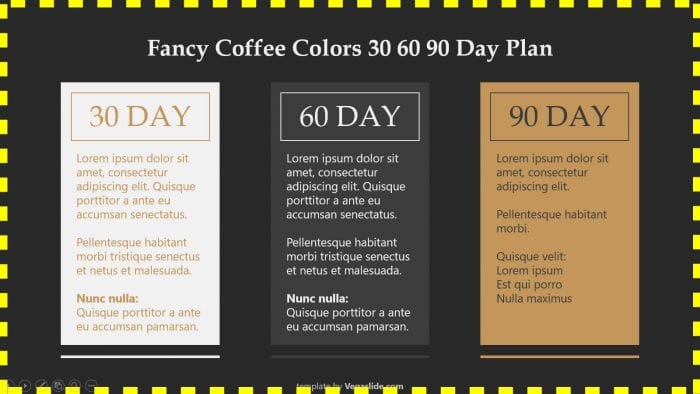
If you’re tired of your PowerPoint presentations looking plain and unappealing, then adding a border or frame to your slides might be just what you need to spice things up
In this guide, I’m going to show you how to add a border or frame on the PowerPoint slide using the Shapes tool. The border will be embedded at the edge of the slide, and you can adjust the color, thickness, transparency, style, and more. Open your PowerPoint file and follow this instruction!
1. Go to the Insert menu.

2. Select Shapes > Rectangles. You can choose other shapes if you wish.
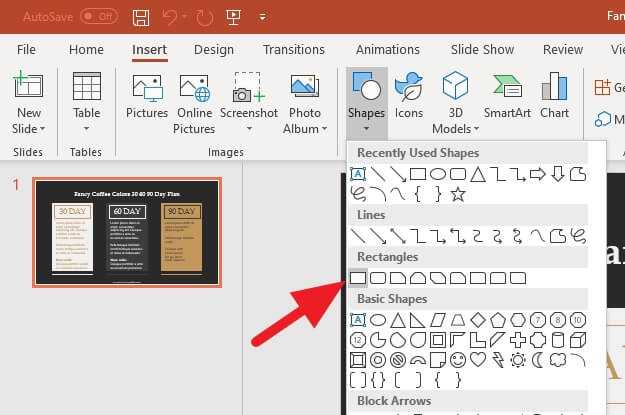
3. Draw a rectangle from the top left of the slide to the bottom right until it covers the entire slide.
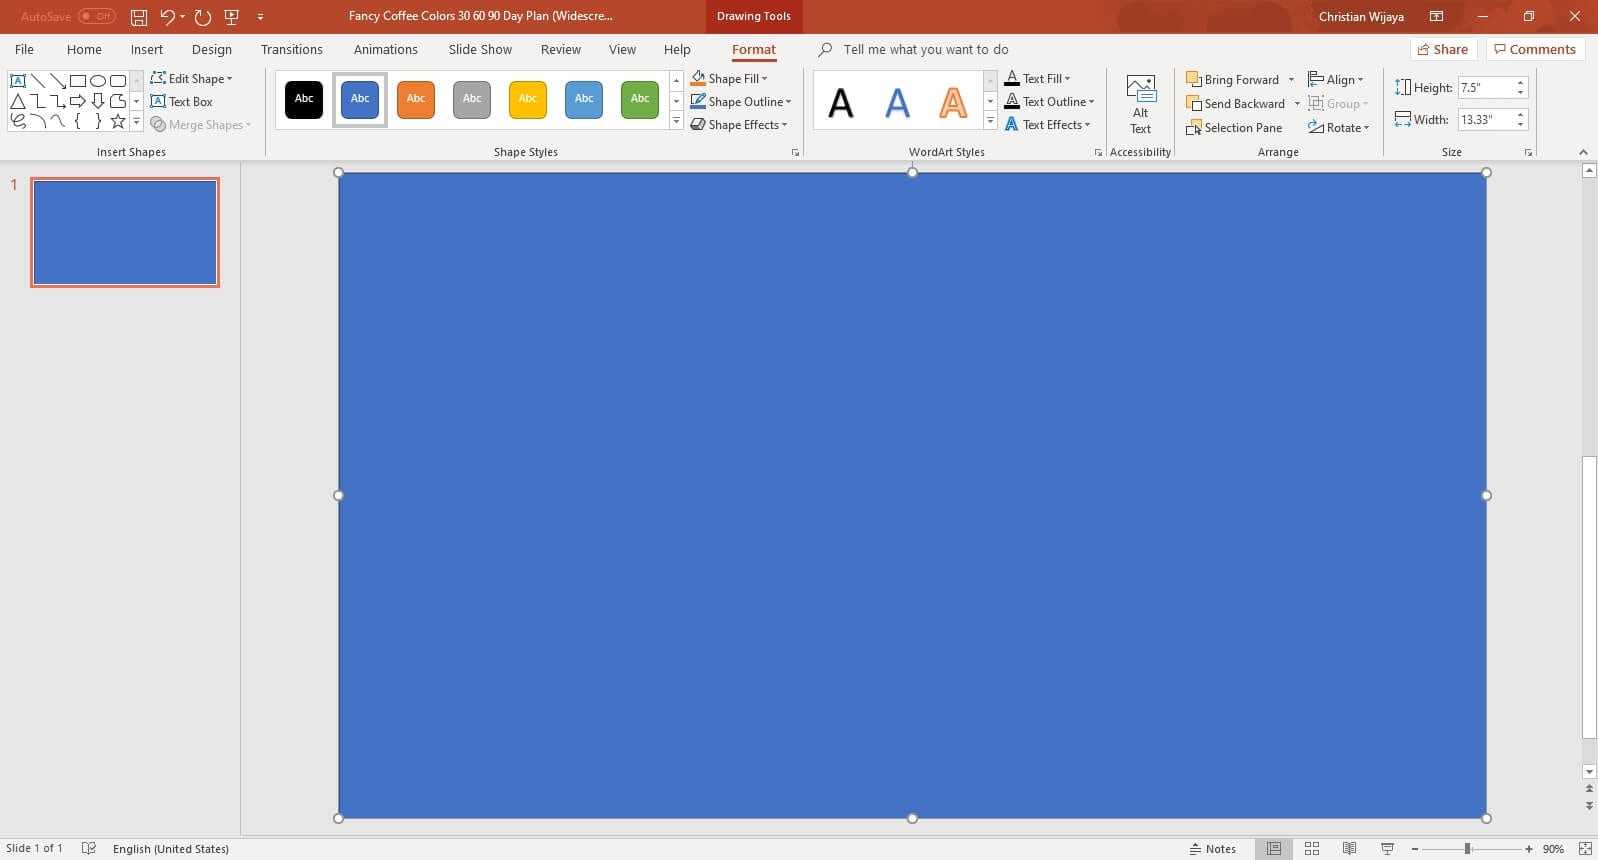
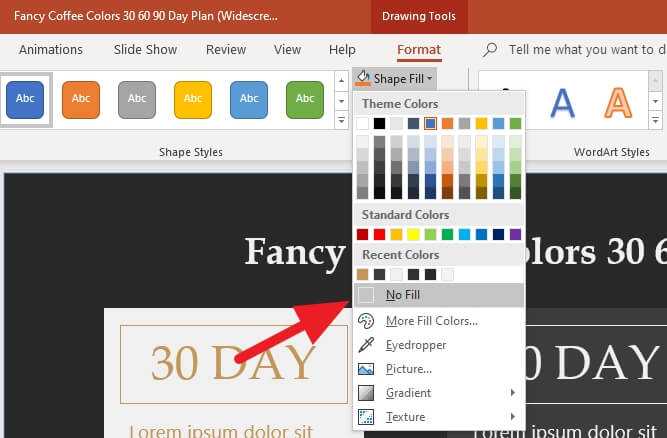
4. Go to Format > Shape Fill > No Fill. This action will remove the rectangle, leaving the thin outline alone.
5. Still in the Format menu, go to Shape Outline > Weight > More Lines…
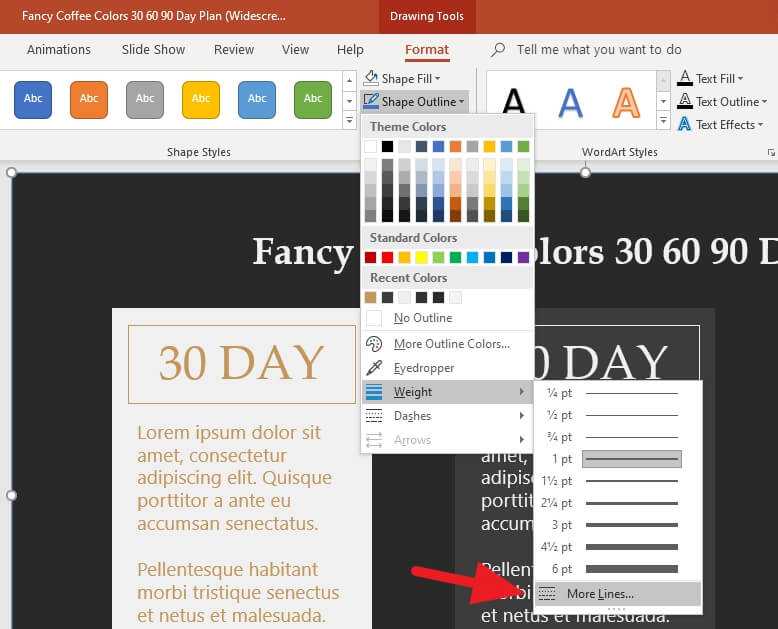
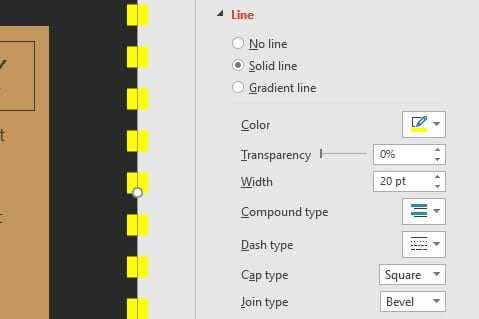
6. A panel on the right will appear. You can change the style of the border.
7. Run the presentation to see how it looks like.
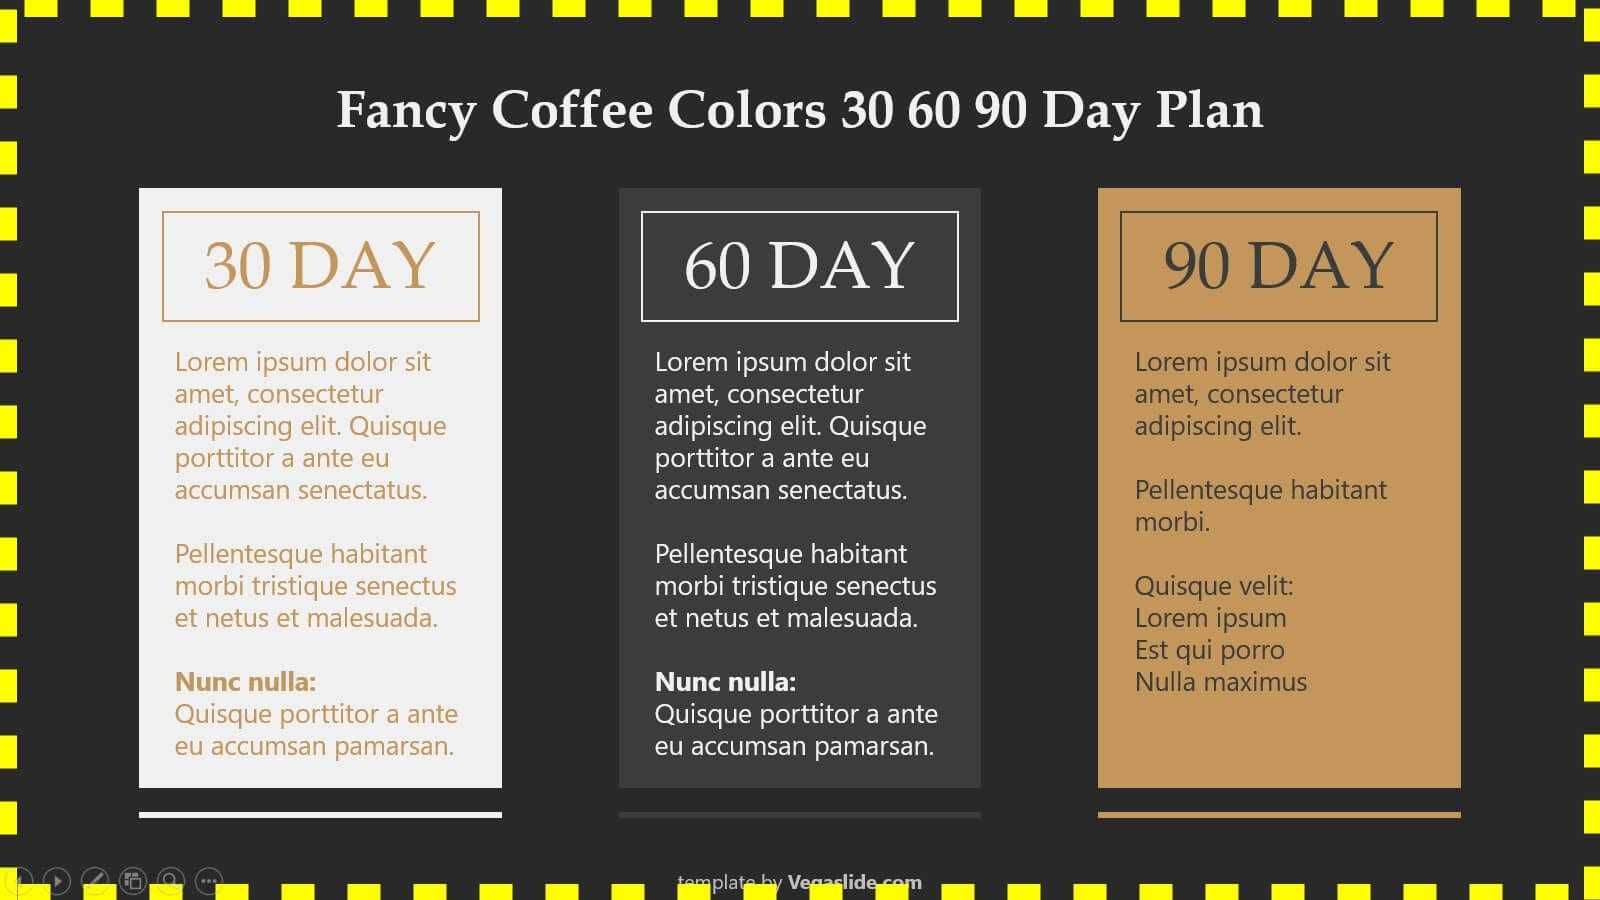
Although there’s no exact feature to add a frame inside PowerPoint, the Shapes tool is considerably useful for certain purposes. You can also make an arrow with text or dashed lines using this tool.
