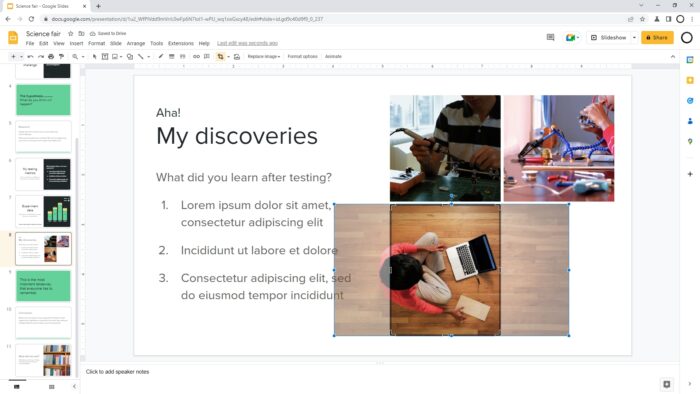
As one of the most used types of content in a presentation, Google Slides receives plenty of features for editing image file formats. From their perspective, this is a no-brainer decision as it will streamline the editing process so the presenter doesn’t have to go back and forth with different programs.
One of those features is cropping. This used to be done on the likes of Paint and Photoshop but Google Slides got you covered.
The process of cropping an image is relatively simple. However, it’s a little different from cropping a photo on a phone editing app. In this guide, I will show you how to properly crop a picture on Google Slides.
1. First, open the slide with the image you want to crop.
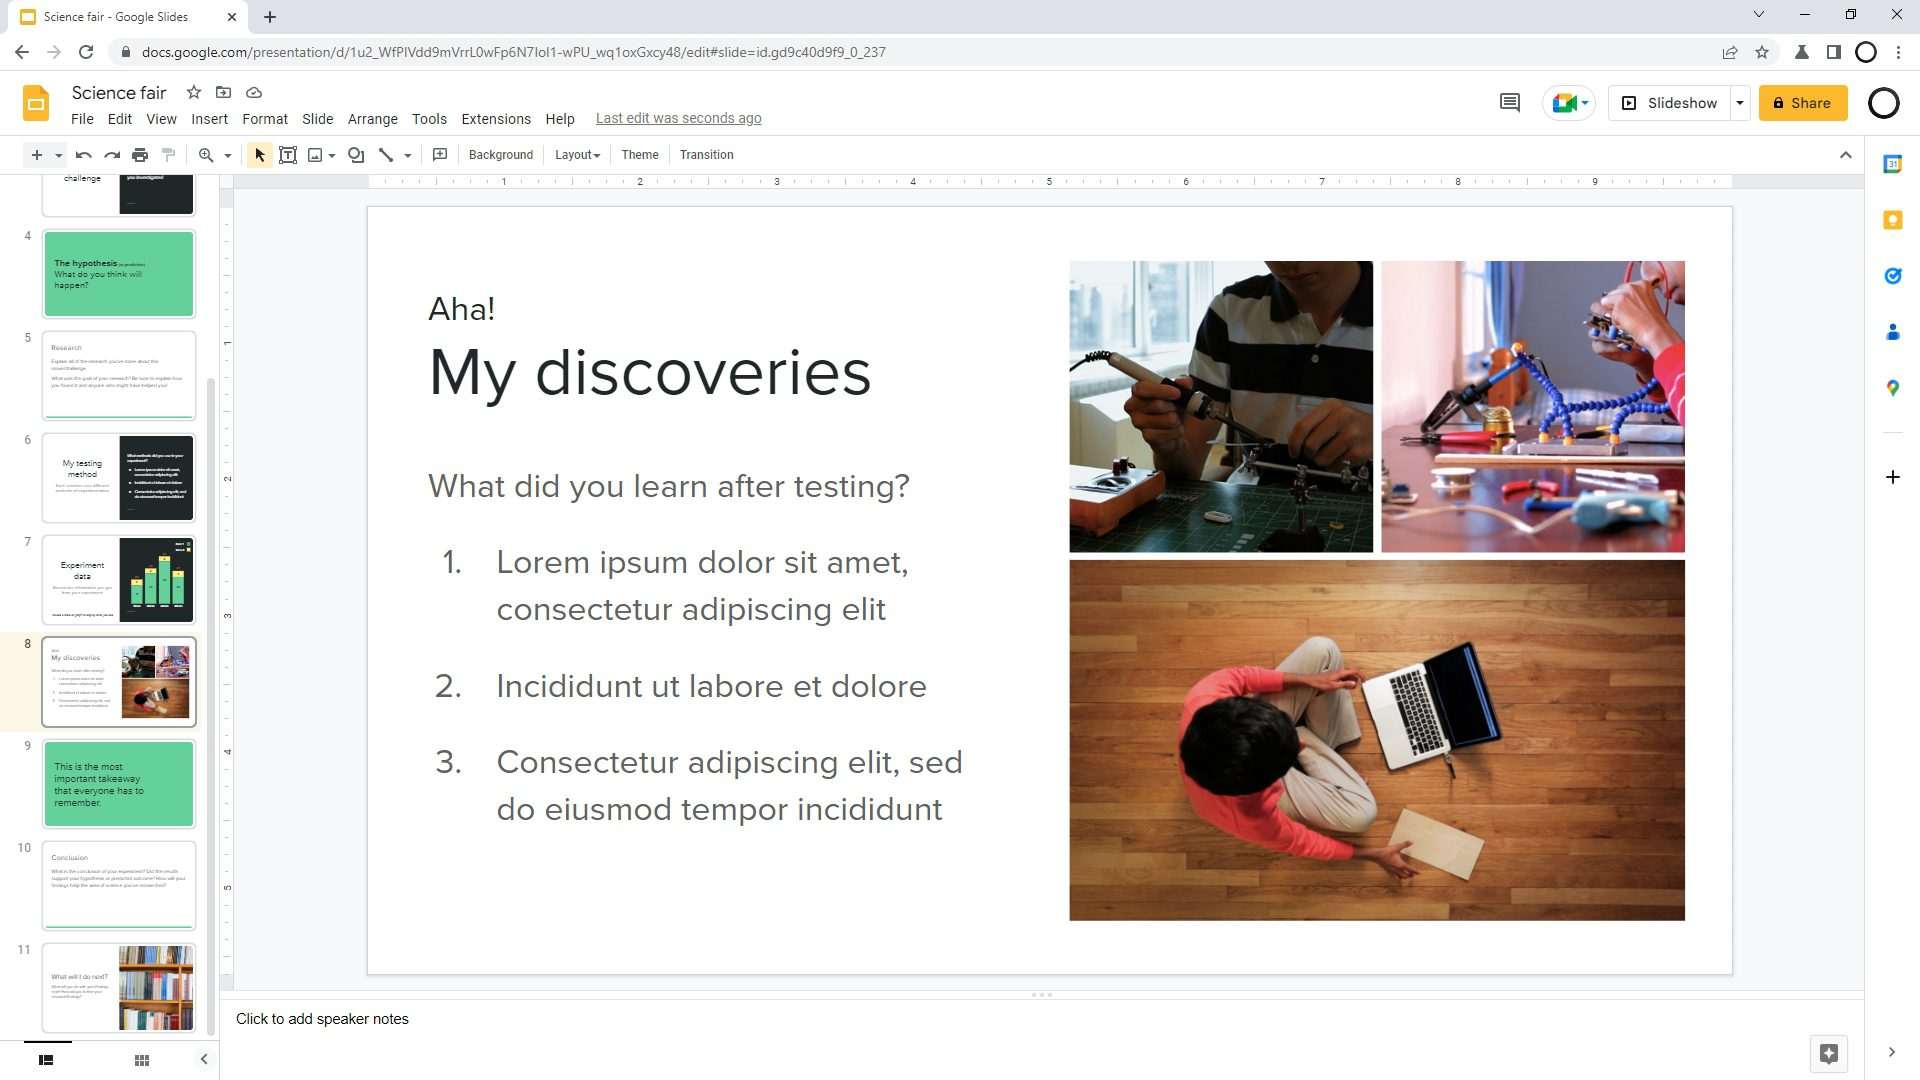
2. Right-click on the image and select Crop image.
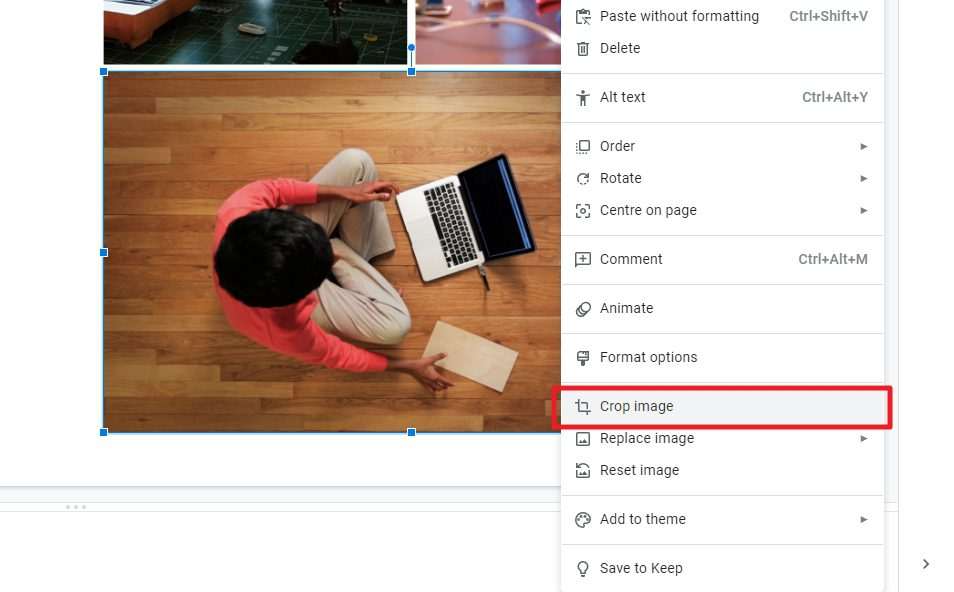
3. Use the black strips around the image to adjust the cropped area. Do not be confused with blue dots as they are for resizing, not cropping.
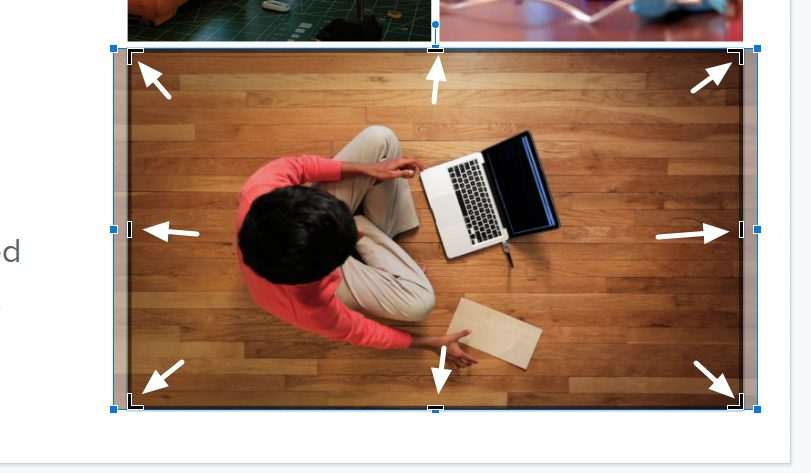
4. In this example, I cropped the image in half. But I want to make the person in red and his laptop to be visible.

5. To do that, drag the outside part of the image and move it to the visible part.
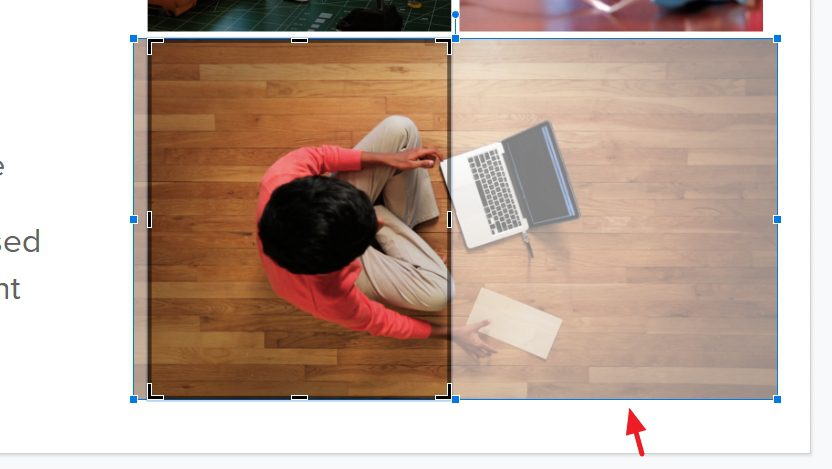
6. Once everything looks exactly what you want, click anywhere on the slide to apply the crop.
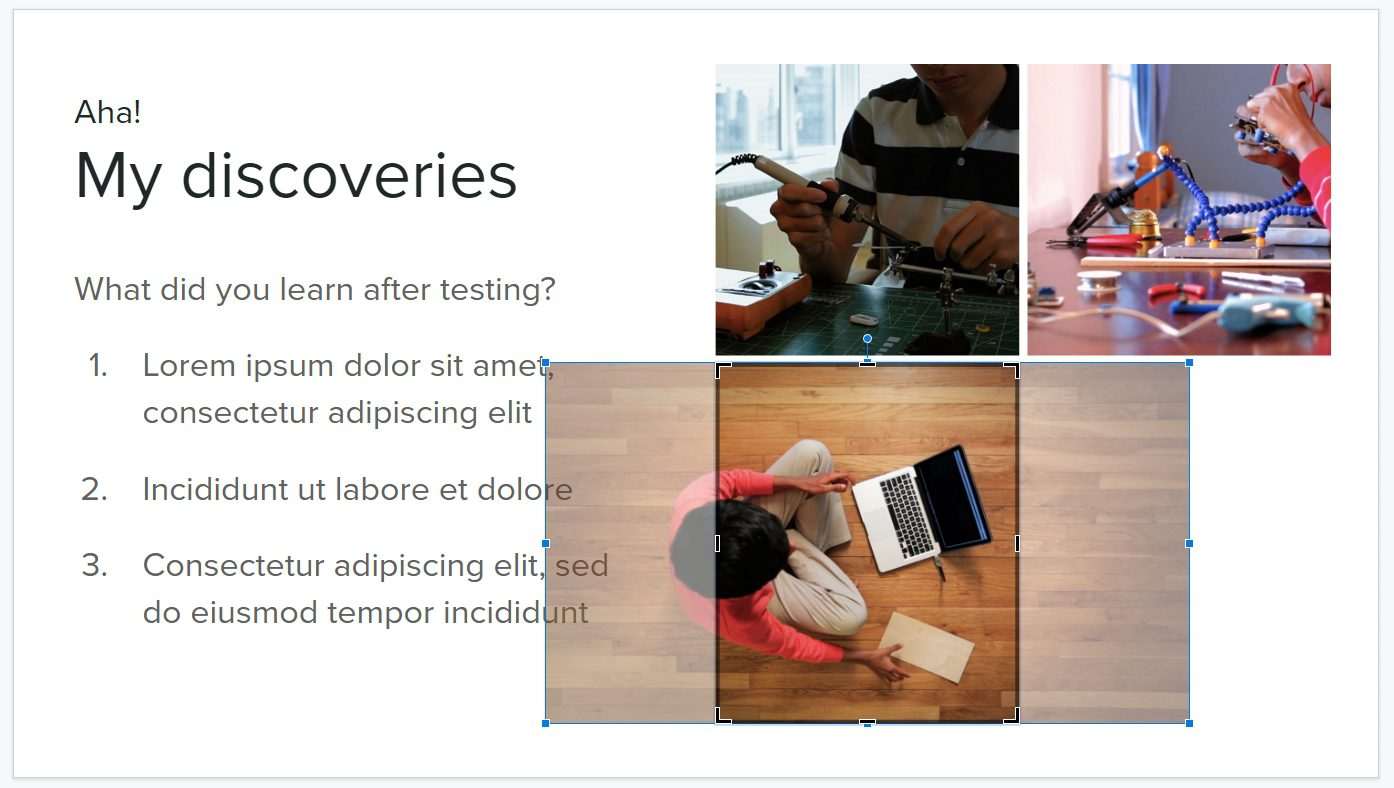
7. Congratulations! The image has been cropped.
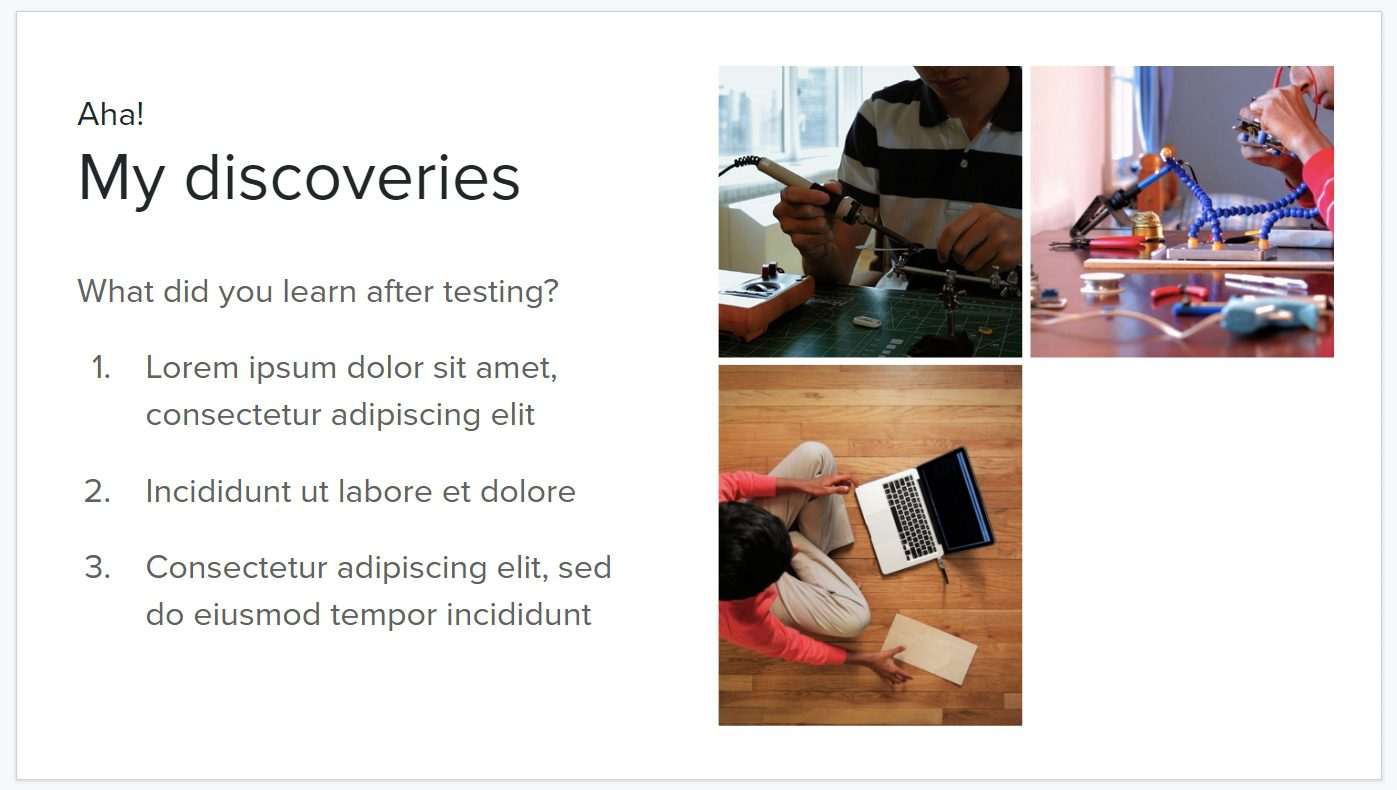
If you messed up on the first attempt, don’t worry. You can right-click, select Crop image, and adjust the cropped area again.
Thankfully, cropping in Google Slides didn’t mean you lost the non-visible part of the image. Quite the opposite, the program still has the full resolution of it but just to be shown. Therefore, you can always customize the image later.
