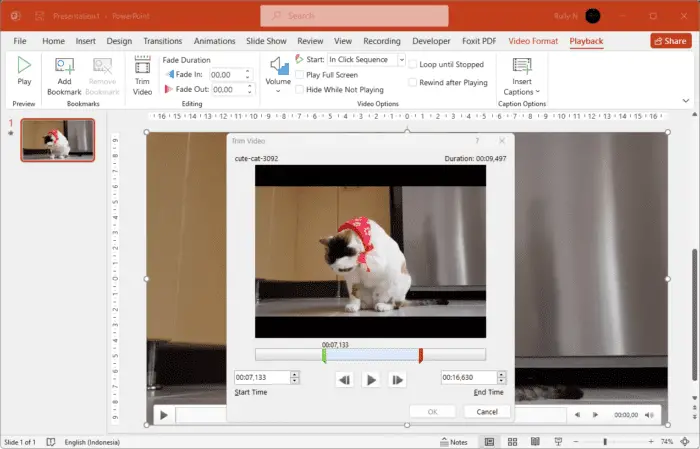
Trimming videos is an essential skill for anyone who works with video content. In this post, we will discuss how to trim a video using PowerPoint.
This software has several features that allow you to edit and manipulate your videos easily. Another advantage of using PowerPoint for video editing is its ability to export videos in various formats such as MP4 and WMV; these file types are compatible with most devices and platforms on which they may be viewed. Let’s go.
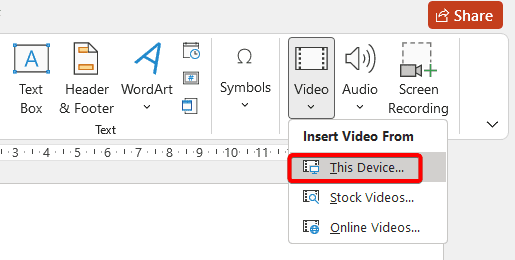
1. In the slide where you want to insert your video, click the Insert tab, Video, and select This device if the video is already saved on your computer.
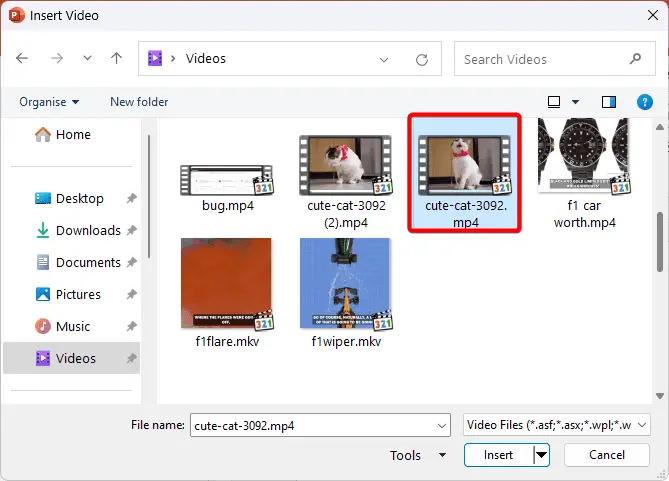
2. Select the video and then click Insert.
3. To trim the video, click the video then click the Playback tab and select Trim Video.

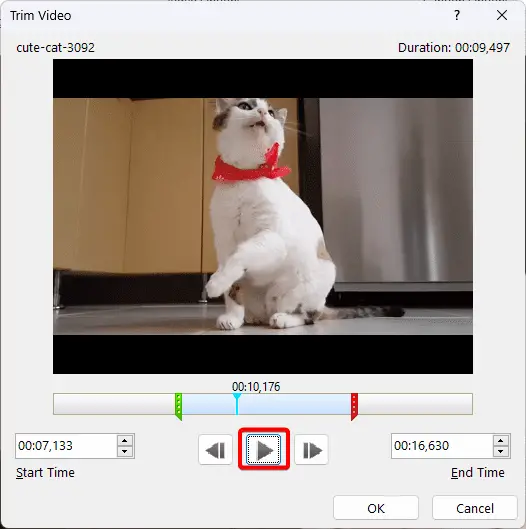
4. You will see a dialog box. Inside, you will see a green marker which is the trimming start point, and the red one is the endpoint. Drag this green and red marker for the part of the video you want to use in your presentation.
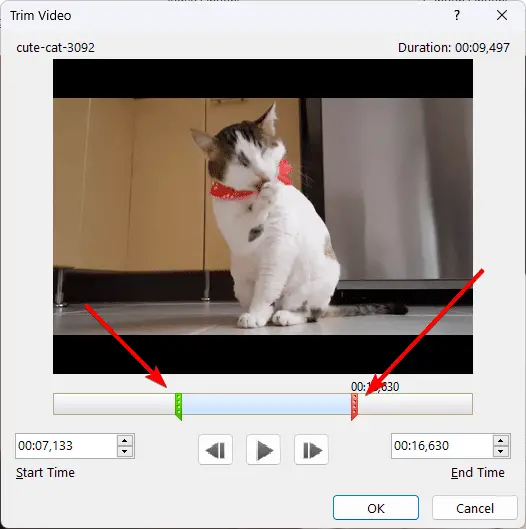
5. Click the Play button to check if the part selected is correct. After that click OK to close.
That was for video, what about audio? Yes, you can trim the audio file or music using PowerPoint. You just need to follow the same procedure as mentioned earlier.
