As anyone who has ever used PowerPoint to create a presentation knows, the order of your slides can make or break your message. You may have spent hours crafting the perfect graphics and carefully writing each sentence, only to find that they don’t transition naturally when you run through your slideshow.
Fortunately, there is an easy solution: changing the slide order in PowerPoint! We’ll tell three methods of how to rearrange your slides quickly and easily so that you can get back to fine-tuning every detail of your deck and delivering an unforgettable presentation.
First method: from slide elevator
1. The area on the left-hand side of your screen is called the slide elevator. If you would like to reorder these slides, what you’re going to do in the slide elevator is click, hold, and drag it.

2. You can make slide elevator bigger or smaller by adjusting the bar between it.

Second method: from slide sorter
1. But what if you have more slides where reordering things in the slide elevator is a little bit difficult? Well, along the bottom you have a button with four little squares called Slide Sorter.

2. You can also go to the View tab and open Slide Sorter as well.

3. Now once you’re in Slide sorter what you get is a little miniature thumbnail of all your slides. To rearrange the slide, just click, hold, and drag it.

4. You can use the zoom slider to zoom out or in to see more or fewer slides.

Third method: using cut and paste
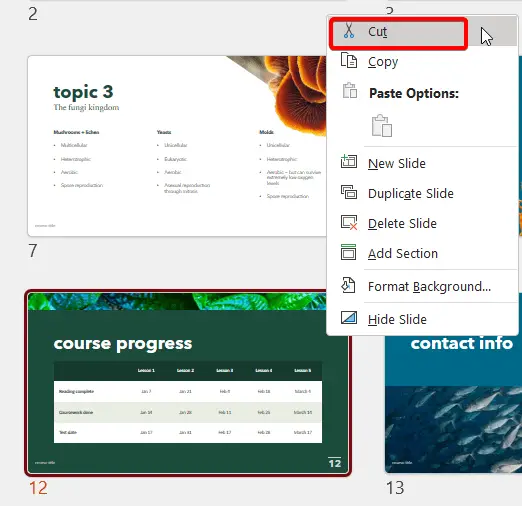
1. For those of you that like to use cut and paste, that’s also going to work well. Right-click the thumbnail icon of the slide that you want to move, and select Cut.

2. Put your cursor in between slides, right-click, and select Keep Source Formatting.

The main takeaway from this tutorial is that re-ordering your slides in PowerPoint can drastically improve the flow of your presentation, making it easier for the audience to understand and remember what you’re saying.


