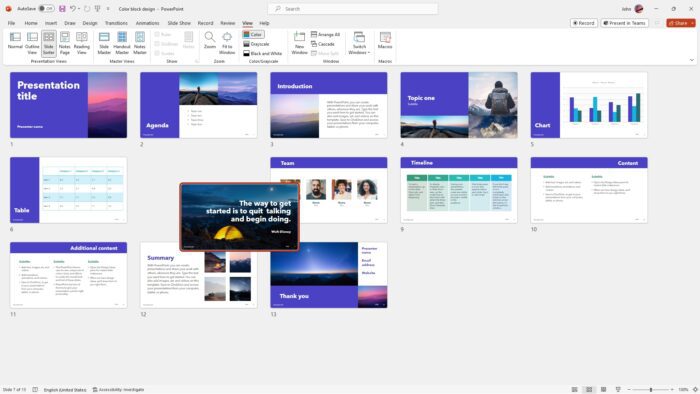
Want to draw attention to a specific part of an image or text in your PowerPoint presentation? Adding a magnifying glass effect is an excellent way to spotlight important details.
In this step-by-step guide, you’ll learn how to make a magnifying glass in PowerPoint that zooms in on targeted areas of your choice.
Why Use a Magnifier Effect in Presentations
Before jumping into the tutorial, let’s look at some of the benefits of using a magnifying glass animation:
- Draws focus – The magnified view immediately captures interest and directs attention to significant elements.
- Emphasizes data – You can use the zoom effect to highlight essential statistics, facts or figures in charts/tables.
- Explains concepts – Complex ideas become easier to digest when you provide an enlarged, detailed perspective.
- Engages audience – The magnifier adds an interactive, almost playful component that keeps viewers attentive.
In other words, this simple animation technique boosts clarity, understanding and engagement.
Step 1 – Insert a Background Image
The first thing you need is a slide with the picture or layout you want to magnify parts of. This will serve as the background.
To insert a background image:
- Go to the Insert tab.
- Click Pictures and select your desired photo from your files.
- Drag the corners to resize, position in the center.
Make sure to choose high quality images for best results.
Step 2 – Create the Magnifying Glass Shape
Now let’s build the actual magnifier tool using PowerPoint’s shape options:
- On the Insert tab, click Shapes.
- Select the oval or circle shape under Basic Shapes to form the glass.
- While holding the Shift key, drag to draw a circle rather than oval.
- Size to about 2” in diameter depending on your image/text size.
To make the circle resemble a magnifying glass:
- With the circle shape selected, go to Format > Shape Styles > Shape Effects.
- Apply a Perspective Bottom style. This gives a 3D, lens-like appearance.
Use circular arrows to angle the glass visually.
Step 3 – Duplicate and Crop Background Image
Here’s where we create the zoomed-in view inside the glass:
- Copy and paste your background photo to duplicate the slide.
- With the duplicate picture active, go to Picture Tools Format > Crop.
- Drag crop handles to highlight the area you want to magnify.
- Adjust circular magnifier to frame the cropped section.
Repeat for additional focus areas as needed.
Step 4 – Add Magnification Effects
To further emphasize the zooming glass effect:
- With cropped picture selected, go to Picture Tools Format > Picture Styles.
- Under Picture Effects, apply Shadow, Glow and Soft Edges.
- Try different effects like Reflection to see what works best.
Play around with settings to find an elegant magnified aesthetic.
Step 5 – Animate the Magnifying Glass (Optional)
To make your magnifier more dynamic:
- Click the circle shape and add an Entrance > Zoom animation.
- On the Animations tab, use Effect Options to set a magnifying zooming motion.
- You can also add a simple Motion Path to slide the glass across points of interest on the background image.
And that’s it! With just PowerPoint’s built-in tools, you can highlight areas of focus in an engaging, visually compelling way.
Tips for Polishing Your Magnifier Animation
- Add a handle to the magnifier shape using a curved line for an enhanced realistic appearance.
- Group the circle and handle shapes (Ctrl + G) to move together more easily.
- Rotate the magnifying glass incrementally between highlighted points for smooth flow.
- Use Follow Path animation to synchronize movement of both magnifier and underlying image.
- Apply Morph transition for the zoom effect to emerge seamlessly.
More Creative Uses for Magnifying Glass Animation
Beyond drawing attention to parts of a photo or chart, you can build unique magnifier animations to make key text/data stand out:
- Spotlight important words/phrases in large passages of body text.
- Highlight individual data points in tables or graphs.
- Emphasize terminology being defined on a slide.
- Zoom in on countries/cities on global maps.
- Feature key milestones on roadmap timelines.
Let your imagination run wild with innovative applications!
Quick Recap: Magnifying Glass Effect PowerPoint Steps
Here is a quick summary of the magnifier creation process:
- Insert background image
- Draw magnifier circle plus handle shape
- Duplicate background, crop to area of focus
- Style magnifier with 3D effects
- Animate magnifier entrance and/or motion path
- Group shapes and rotate glass over points of interest
And you’re all set with an animated magnifying effect in just minutes!
Give High Impact Presentations with Stunning Visuals
A magnifying glass offers an excellent method for drawing attention and reinforcing comprehension. Combined with compelling imagery and seamless animations, you can deliver truly powerful presentations that leave a lasting impact.
For more tips on creating visual slide decks that impress audiences, explore the presentation design tutorials and resources on our blog. Investing a bit of time into polishing your PowerPoint skills can pay off tremendously in more persuasive, engaging communication.
Let us know if you have any other questions! We’re always happy to help fellow presenters take their decks to the next level. Just contact us or leave a comment below.


