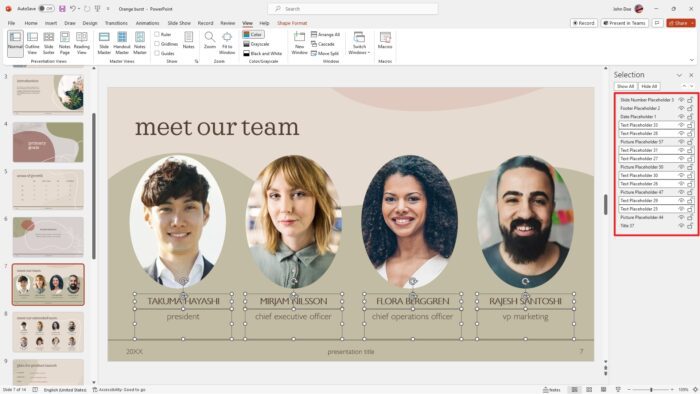
Locking text boxes in PowerPoint is useful when you have text or images that you don’t want to accidentally move around on your slides. For example, you may want to lock your company logo or title text in place. it. This is particularly useful when collaborating with others or when you need to maintain a clean and organized presentation.
Additionally, locking text boxes allows for efficient text editing without accidentally shifting the entire box, enabling precise content adjustments while keeping the original layout intact. Ultimately, this feature empowers you to retain the meticulous positioning of text boxes and other objects, providing greater control over your PowerPoint presentations.
Table of Contents
How to lock a text box in PowerPoint
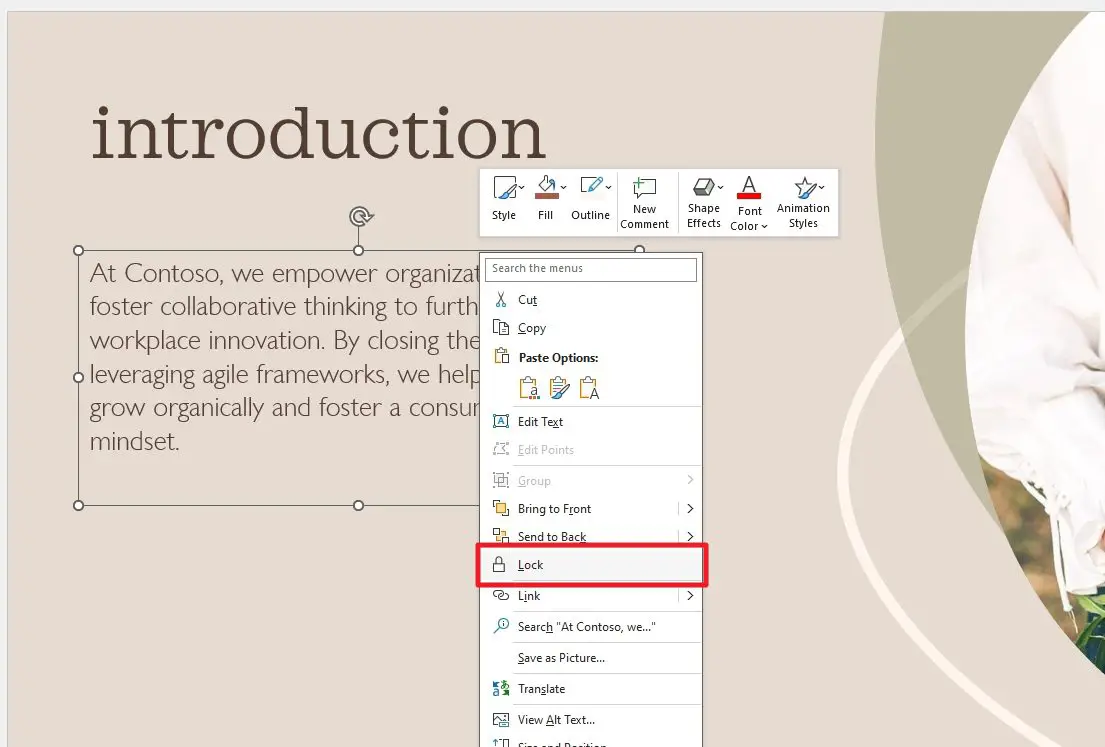
Locking a text box in PowerPoint is an easy thing to do. Here is how:
- Launch Microsoft PowerPoint and open the presentation in which you want to lock text boxes.
- Navigate to the slide where the text boxes are located.
- Click on the text box you want to lock until the sizing handles appear.
- Right-click on the text box. This will open a context menu.
- Click on Lock to lock the text box. This prevents it from being moved or edited.
How to lock multiple text boxes in PowerPoint
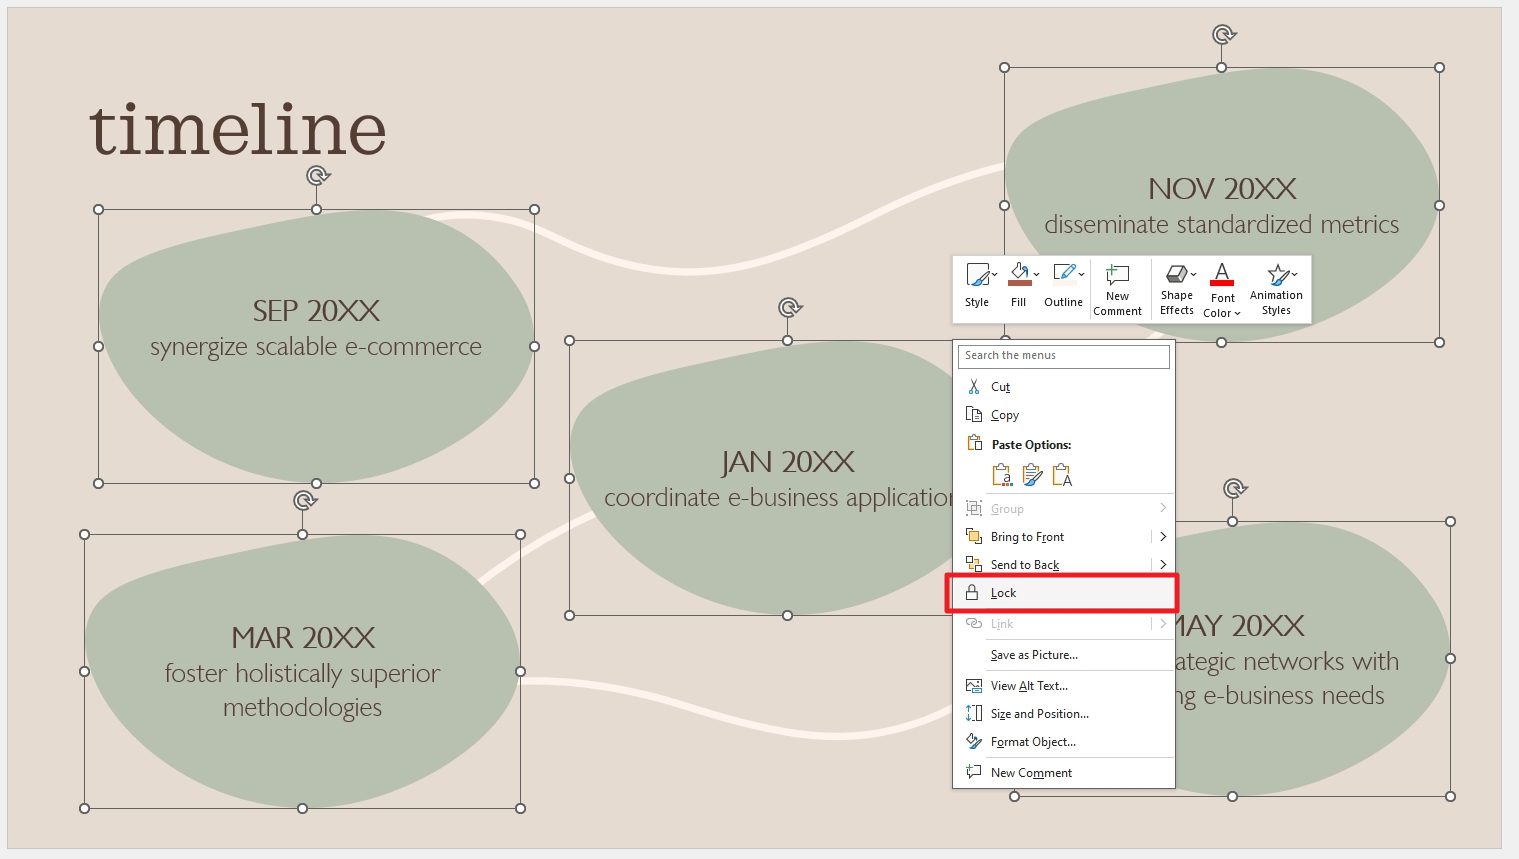
Here are the steps to lock multiple text boxes in PowerPoint:
- Select all the text boxes you want to lock by holding down the Ctrl key and clicking on each text box.
- Right-click on any of the text boxes.
- Select Lock to lock the text boxes.
Remember, locking prevents the text boxes from being moved or resized, but you can still edit the text inside them.
How to lock text boxes using Selection Pane
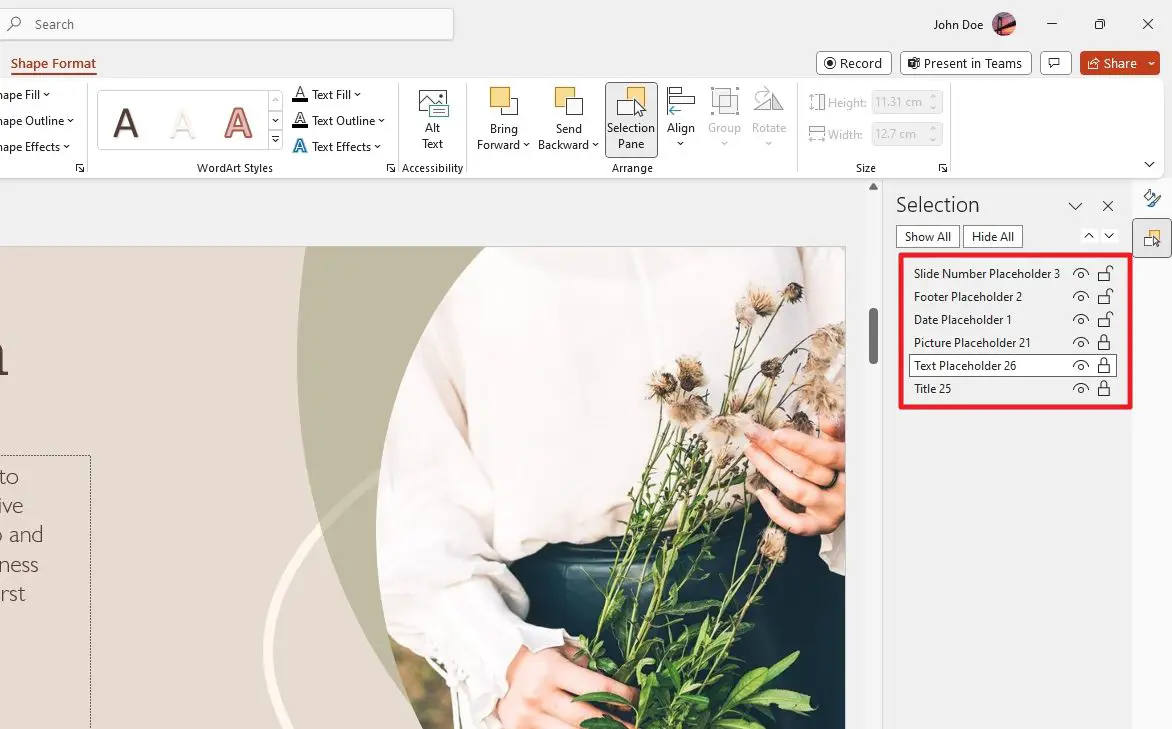
Here are the steps to lock text boxes in PowerPoint using Selection Pane:
- Select all the text boxes you want to lock by holding down the Ctrl key and clicking on each text box.
- Go to the Shape Format tab and click the Selection Pane button. This will open the Selection Pane on the right side.
- In the Selection Pane, you will see all the selected text boxes listed. Click the lock icon next to each text box to lock it.
- The lock icon will turn from an unlocked to a locked state. This will lock the text boxes and prevent them from being moved or resized accidentally.
- To unlock the text boxes later, simply click the lock icon again to toggle it to the unlocked state.
How to lock text boxes using Slide Master
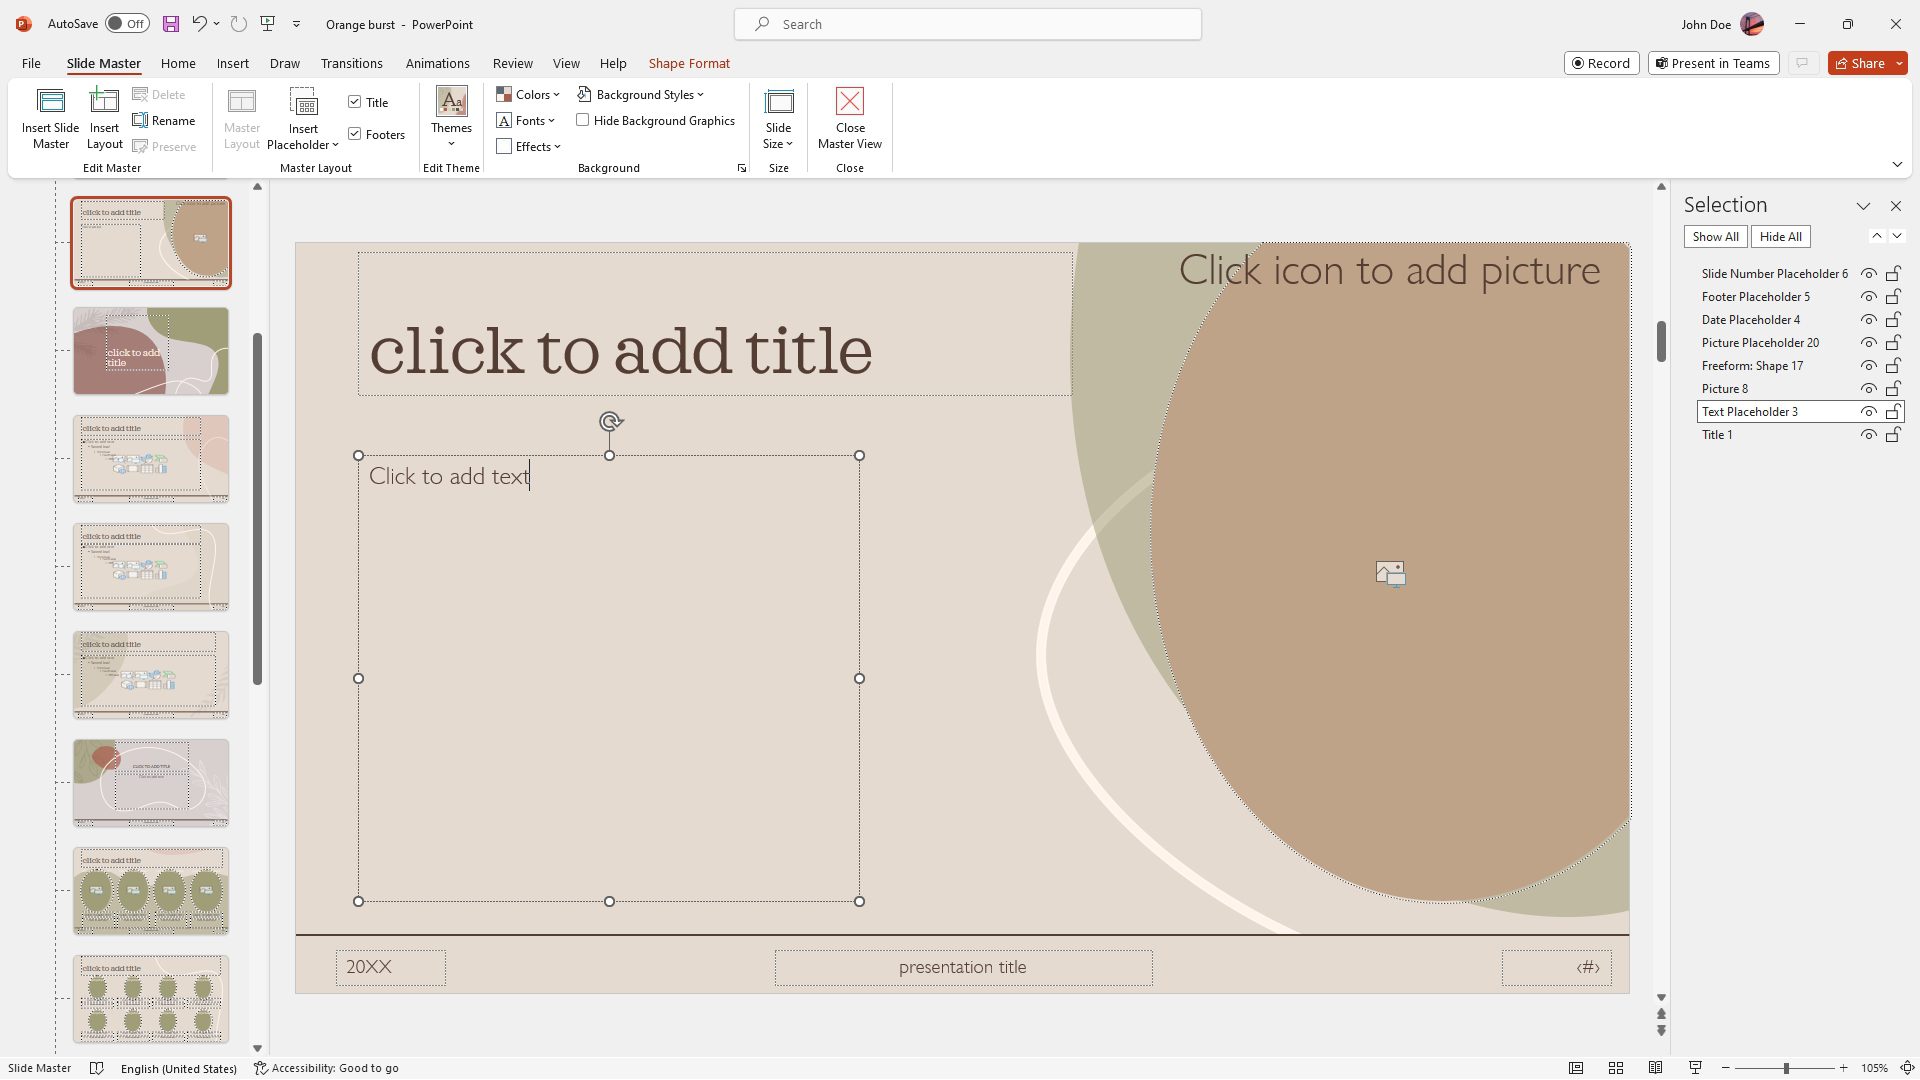
Using the Slide Master to lock text boxes enables consistency, prevents accidental changes, improves editing efficiency, and facilitates collaboration. This makes it a very useful technique for managing text box layouts in PowerPoint.
Here are the steps to lock multiple text boxes in PowerPoint using the Slide Master:
- Open the presentation and navigate to the View tab. Click on Slide Master.
- Locate the slide layout you want to edit. This is usually the slide layout used for the majority of slides in your presentation.
- Insert text boxes on this slide layout where you want them to appear on every slide using this layout (optional).
- Select the text boxes and then go to the Shape Format tab. Click Selection Pane.
- Click the lock icon to lock the text boxes.
- Go back to the Slide Master tab, click Close Master View to return to normal slide view.
This is an easy way to standardize text box placement across all slides in PowerPoint. The locked text boxes on the master slide layout act as a template that propagates to every slide using that layout.
How to unlock text boxes
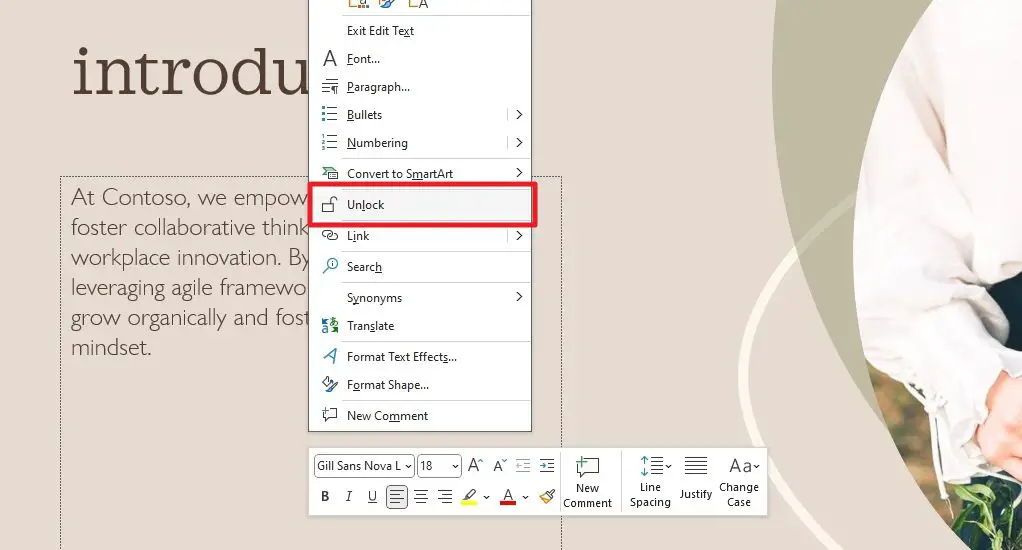
To unlock the locked text boxes, right-click on them and then click Unlock. If you are using the Selection Pane method, click the lock icon to quickly unlock each text box.
Limitations of locking text boxes
Locking text boxes only prevents moving and resizing the box. You can still:
- Edit text formatting – font, size, color etc.
- Add or edit text – the text box size will adjust automatically
- Select and copy text – double-click the text box to edit
But you cannot adjust the size or position of a locked text box unless you unlock it.
FAQs
How do I lock the position of a textbox in PowerPoint?
You can lock the position of a textbox in PowerPoint by selecting it, right-click on it, and then click Lock. Additionally, you can go to the Shape Format tab, click Selection Pane, and lock the text boxes by clicking the pad lock icons.
How do I lock text and shapes in PowerPoint?
Yes, you can lock objects like textboxes, shapes, images, charts, etc in PowerPoint. Select the object, go to Shape Format or Picture Format > Selection Pane > click the lock icons to lock text boxes, images, or shapes.
Is there a way to permanently lock text boxes in PowerPoint?
There is no permanent lock for text boxes in PowerPoint. However, you can lock text boxes on the View > Slide Master > Shape Format > Selection Pane which will lock them for all slides. You can also protect the entire presentation with a password to prevent changes.
