A picture can convey thousands of words, giving it a special effect could change the message entirely. Although PowerPoint is primarily a presentation tool, the software had come with various elements that enable us to modify images with ease.
The offering is basic, but with that under the grip, we can adjust the contrast level, change the color style, add a frame, shadows, and more. In this guide, we will focus on the ability to make a picture appear transparent in a PowerPoint slide. The guide should be compatible with nearly all PowerPoint editions, especially anything after 2010.
Now, let’s dig into it.
1. To import a picture to PowerPoint, go to Insert > Pictures > This Device…

2. Select a picture from your computer and click Insert.

3. Now, right-click on the inserted picture and hit Format Picture…

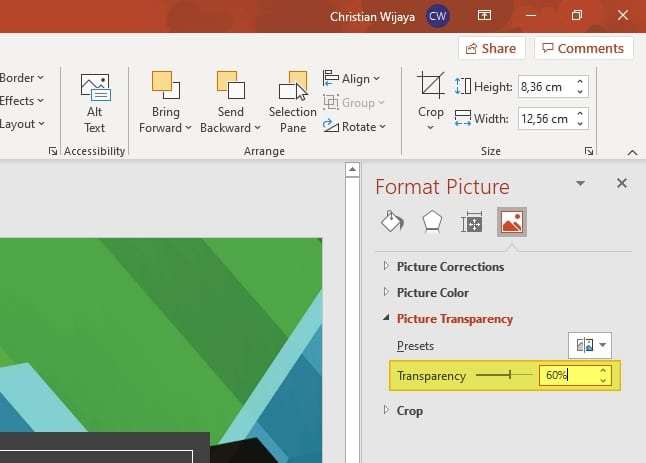
4. A panel will appear on the right side of the screen, click Picture.

5. Under the Transparency, adjust the level you need.

6. The setting is applied to the picture in real-time.

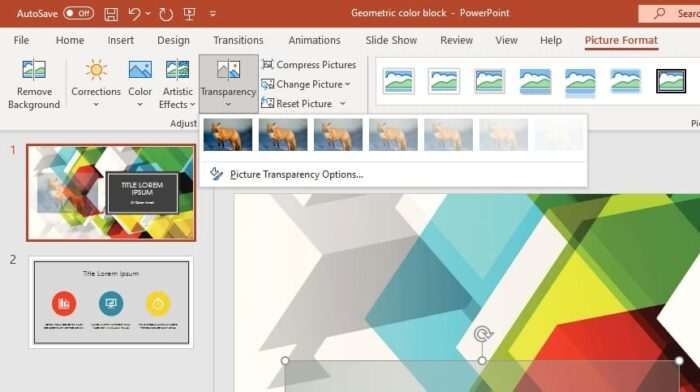
Additionally, several transparencies preset are available by clicking on a picture first, then go to Picture Format, and click Transparency.

Either way, please select the appropriate transparency setting relative to the slide background. Adding a border can also emphasize the contrast between the picture and the background so the audience could distinguish them.


