If you want to make an impressive presentation, then adding a magnifying glass effect in PowerPoint can be a great way to grab your audience’s attention.
This tutorial will provide step-by-step instructions on how to create this effect in PowerPoint for a more realistic effect. With these tips, you can create an eye-catching presentation that will help you stand out from the crowd.
Creating Magnifying Glass Zoom Effect
1. Insert your image from Insert, Picture, This Device.

2. Select the image and Insert.

3. Duplicate the image with Ctrl + D.

4. With the new image selected, go to the Picture Format tab, and press Crop.

5. Crop the image to form a square around the first object you want to highlight. It’s not a problem if the square is not perfect at this stage. Make sure that the size of this area is big enough so that everything you’ll need to highlight later also fits in the size of that square.

6. Press the Escape key once you’re done.

7. You need to make sure the height and width of that square are the same. To do so, click on Crop, select Aspect Ratio, and then 1:1.

8. Press the Escape key to go out of cropping mode.

9. Again, go to Crop, select Crop to Shape, and select Oval.

10. PowerPoint will adjust the crop to make a perfect circle. Move the cropped image to the same position as the original image.

11. To give that magnifying effect, hold the Ctrl key and drag the handles to resize the circle image.

12. Right-click and select Format picture.

13. In Line, select Solid Line and set the Width to 4 pt.

14. In the Effects tab, go to the 3-D Format. In the Top bevel, select Convex.

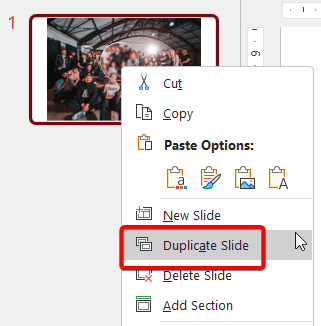
15. Now duplicate the slide.

16. Select the circle on the new slide, go to the Picture Format menu, and press Crop.

17. Drag the image so that the new area you want to highlight fits within the circle.

18. Once you are done, press the Escape key and reposition the cropped image so it overlays the corresponding section of the bottom image.

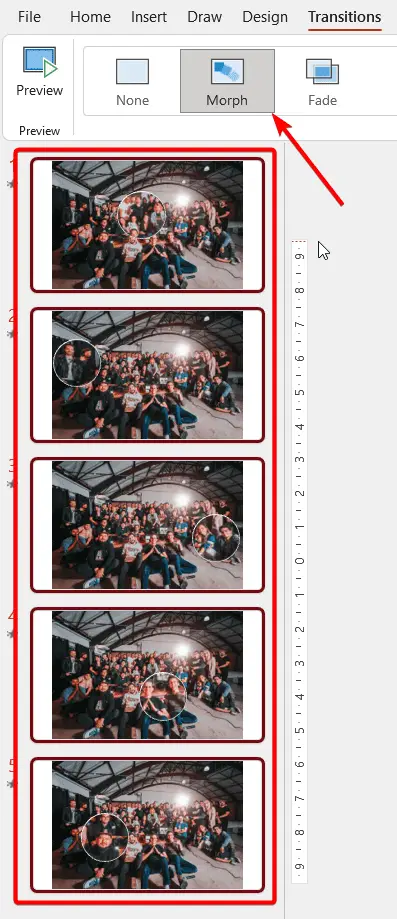
19. Repeat steps #15 – #18 multiple times to highlight multiple sections of the slide.

20. Once this is done, select all slides, go to the Transition tab, and select Morph. Run the slideshow.

With the use of some brilliant graphic design skills and some expert knowledge of PowerPoint layouts, you can create this unique and functional effect in PowerPoint in just minutes!
Tips for Using the Magnifying Glass Effectively
With a bit of practice, you can use the magnifying glass tool effectively to enhance your presentations:
- Zoom strategically – Don’t overuse the tool. Magnify key areas that need the extra focus.
- Pan slowly – Move the magnified view around smoothly so the audience can follow along.
- Use high-res images – Pictures and graphics will look best at 400% zoom if they are high resolution.
- Periodically show the full slide – Zoom out regularly so people see the whole visual in context.
- Practice beforehand – Get comfortable with the magnifying glass motions during rehearsals.
- Emphasize movement – Zoom in on animations and moving elements in videos.
- Follow a narrative – Use the magnifying glass to support the story you tell about the visuals.
Conclusion
The magnifying glass zoom in PowerPoint is an easy way to focus your audience’s attention, illustrate details, and enhance your explanations. With smart use, it can elevate your presentations and public speaking.
Take time to practice with it and think about strategic places to magnify slides. The tool works right within the app so you can zoom smoothly during live presentations to highlight key ideas and engage your viewers.
What is the magnifying glass tool in PowerPoint?
The magnifying glass tool in PowerPoint allows you to zoom in on specific parts of a slide during a presentation, drawing attention to details and enhancing explanations of complex visuals.
Can I resize the magnified area box in PowerPoint?
Yes, you can resize the magnified area box using the handles to show smaller or larger areas magnified.
How do you magnify part of a picture?
To magnify part of a picture in PowerPoint, duplicate the image, then use the Crop tool to focus on the specific area you want to magnify. You can then enlarge this cropped image to create a magnified effect.
What are some tips for using the magnifying glass tool effectively?
Some tips include practicing beforehand, zooming strategically, panning slowly, using high-resolution images, and periodically showing the full slide for context.


