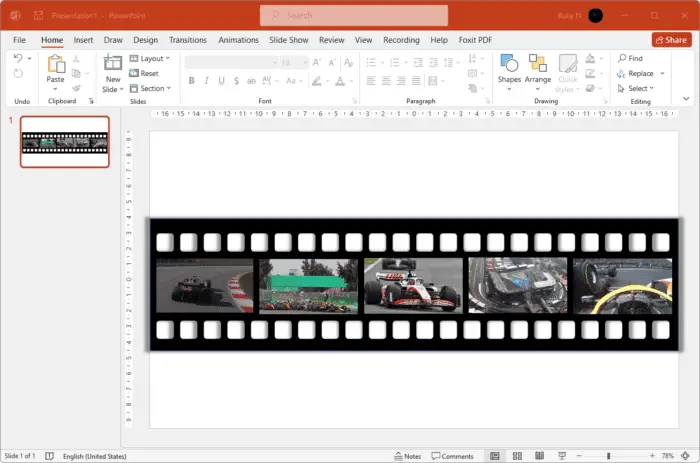
A filmstrip effect is a creative way to tell a story. It can be used in PowerPoint presentations, social media posts, and other types of content.
In this tutorial, you’ll learn how to create a filmstrip effect in PowerPoint. This is an easy way to add some visual interest and make your presentation more dynamic.
1. Start by drawing a rectangle. Go to Insert > Shapes and choose Rectangle.

2. In the Shape Format tab, click Shape Outline > No Outline.

3. Next, click Shape fill and fill it with black.

4. With the same two steps as above, this time draw a rounded rectangle on top of the black rectangle.

5. Then duplicate the shape right across the top by pressing Ctrl + D.

6. Select all the blue rectangles and again press Ctrl + D to duplicate for the opposite end.

7. In the Home tab, Select > Select all.

8. Right-click on the rectangle and choose Save as picture.

9. Save that as a PNG file.

10. To make this film strip looks more real, in a new slide, open the film strip picture that you just saved. Go to Insert > Pictures > This Device.
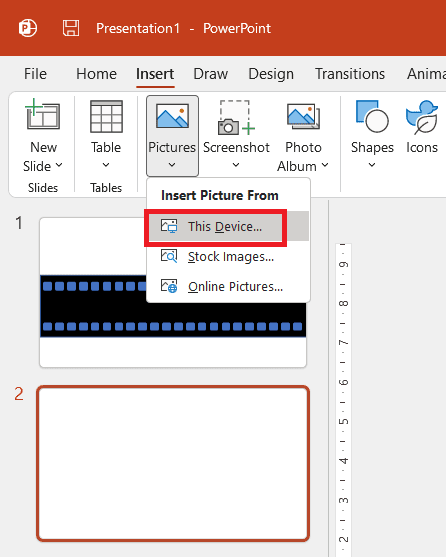
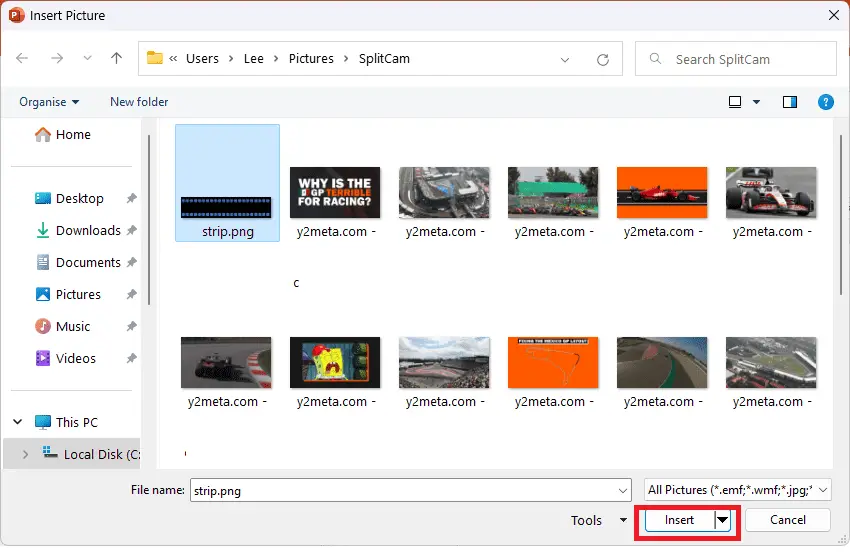
11. Choose the picture file and click Insert.
12. Next, go to the Picture Format tab, Color > Set Transparent Color.
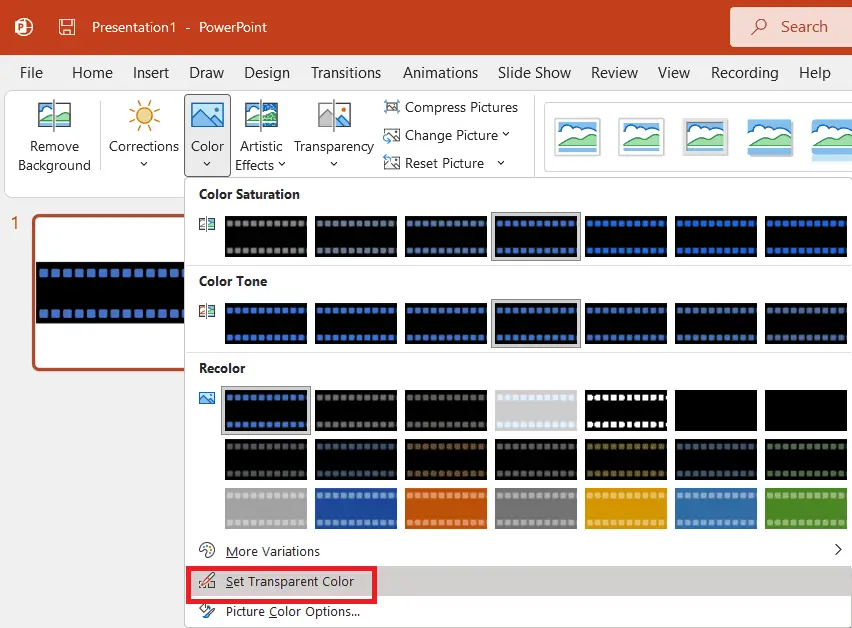
13. Click on the blue part of the image to make it transparent.

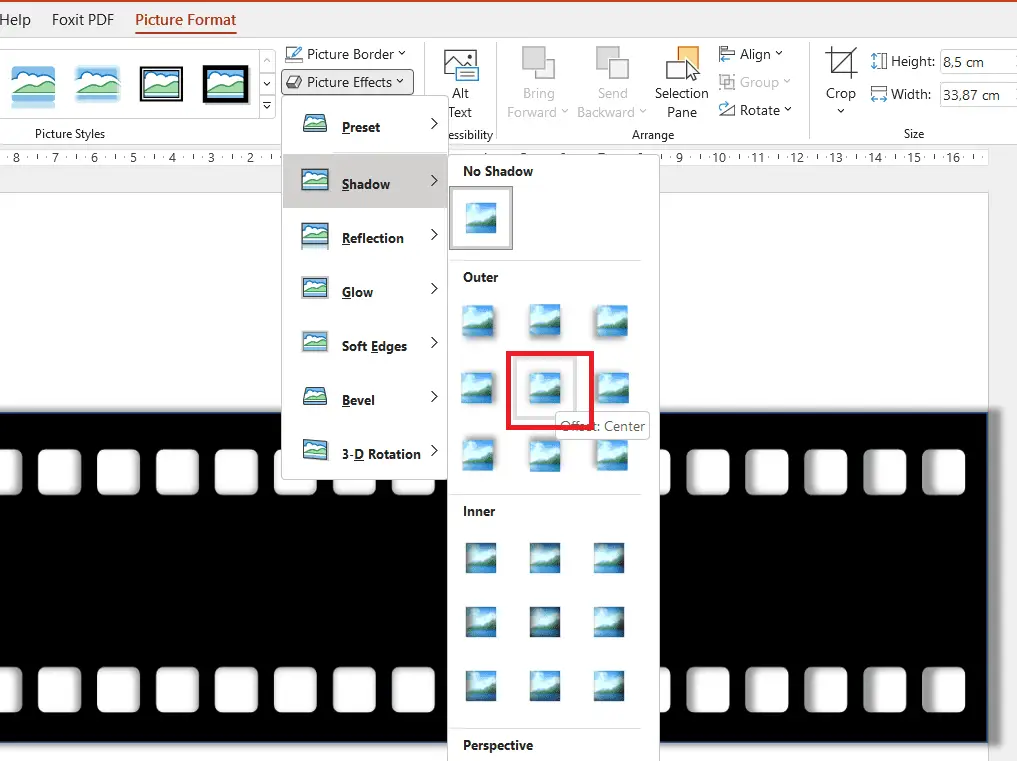
14. Now you can put shadows to make it more real. Still in the Picture Format tab, go to Picture Effects > Shadow > Offset: Center.
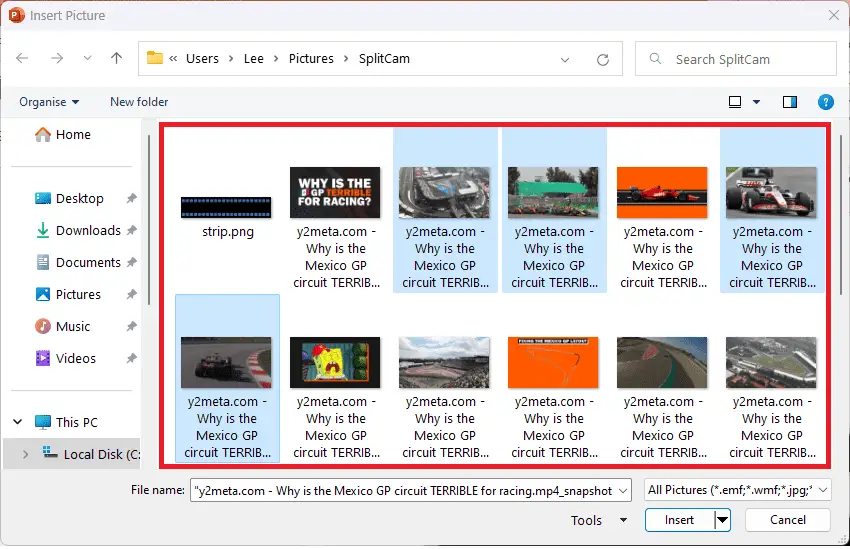
15. The final step would be to add pictures to that film strip. To add pictures, follow steps #10 – #11.
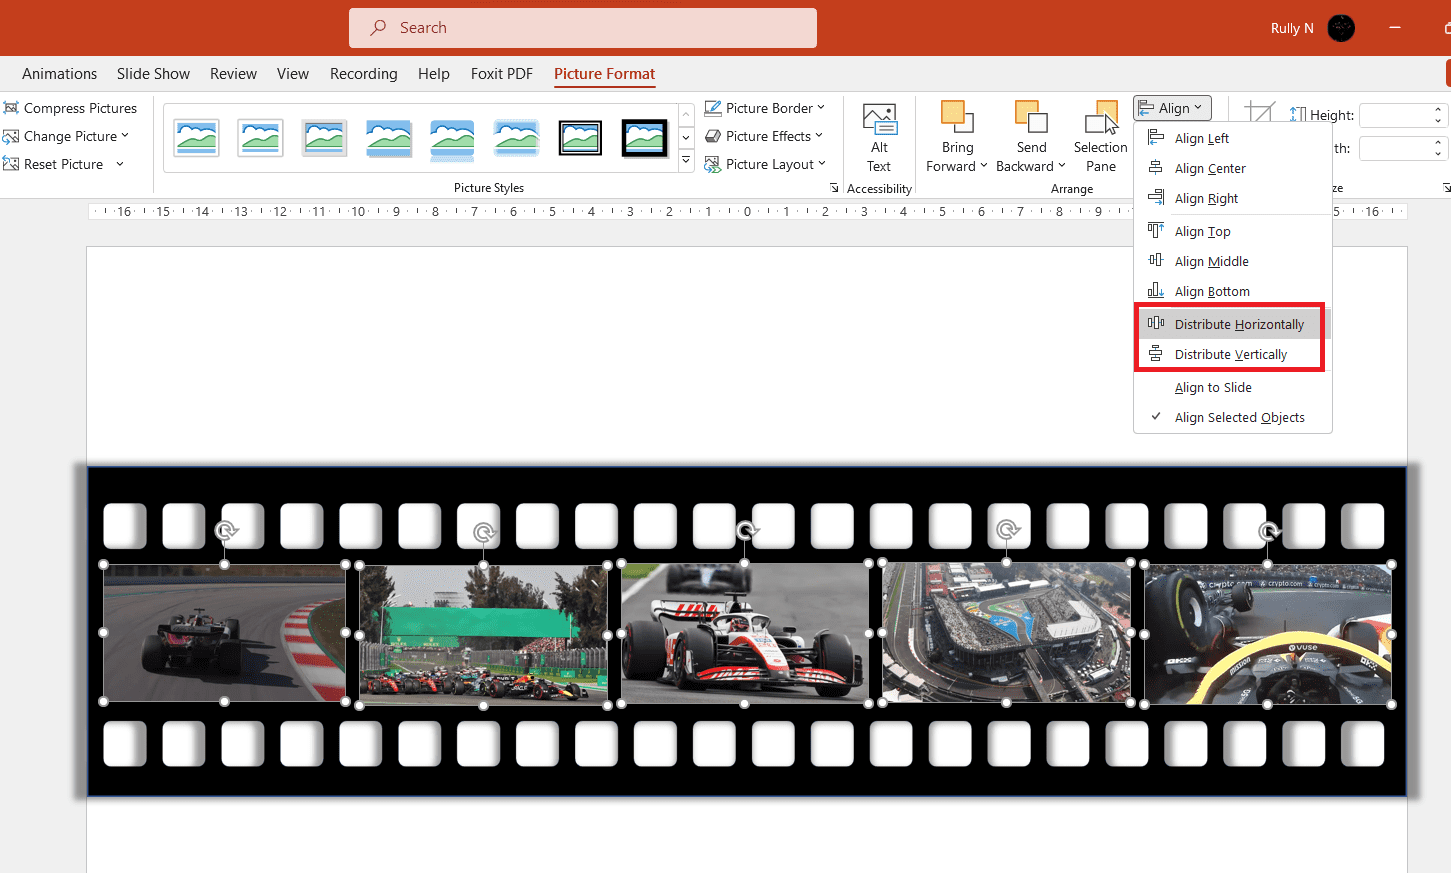
16. You want these pictures to line up perfectly. Select all the pictures, and click Align > Distribute Horizontally and once again Distribute Vertically.
Now you can transform your PowerPoint presentation with stunning cinemagraphs in minutes.
