Creating a table of contents in PowerPoint is a helpful way to organize your presentation and help your audience navigate through your content.
To create a table of contents, you will first need to decide which slides to include. Once you have selected the slides, you can then create links to each slide within the table of contents.
First method: Outline view
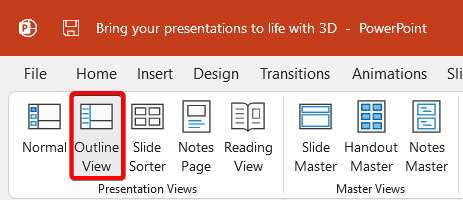
1. Open your presentation and go to the View tab and select Outline view.
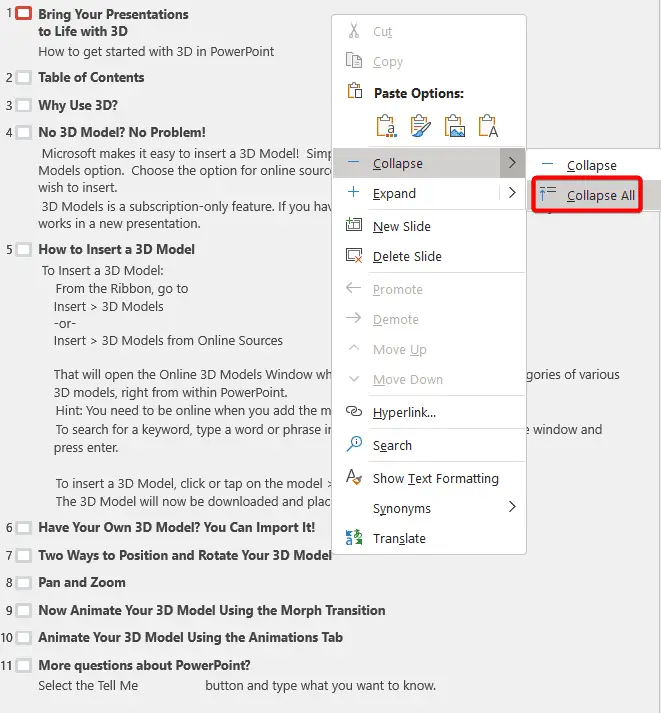
2. It’ll show you all the text in your presentation. You need to collapse the text so you can only see the titles. Right-click, go to Collapse, and Collapse all.
3. Select all the titles and press Ctrl + C to copy.

4. Go back to the Normal view and go up to your table of contents slide.
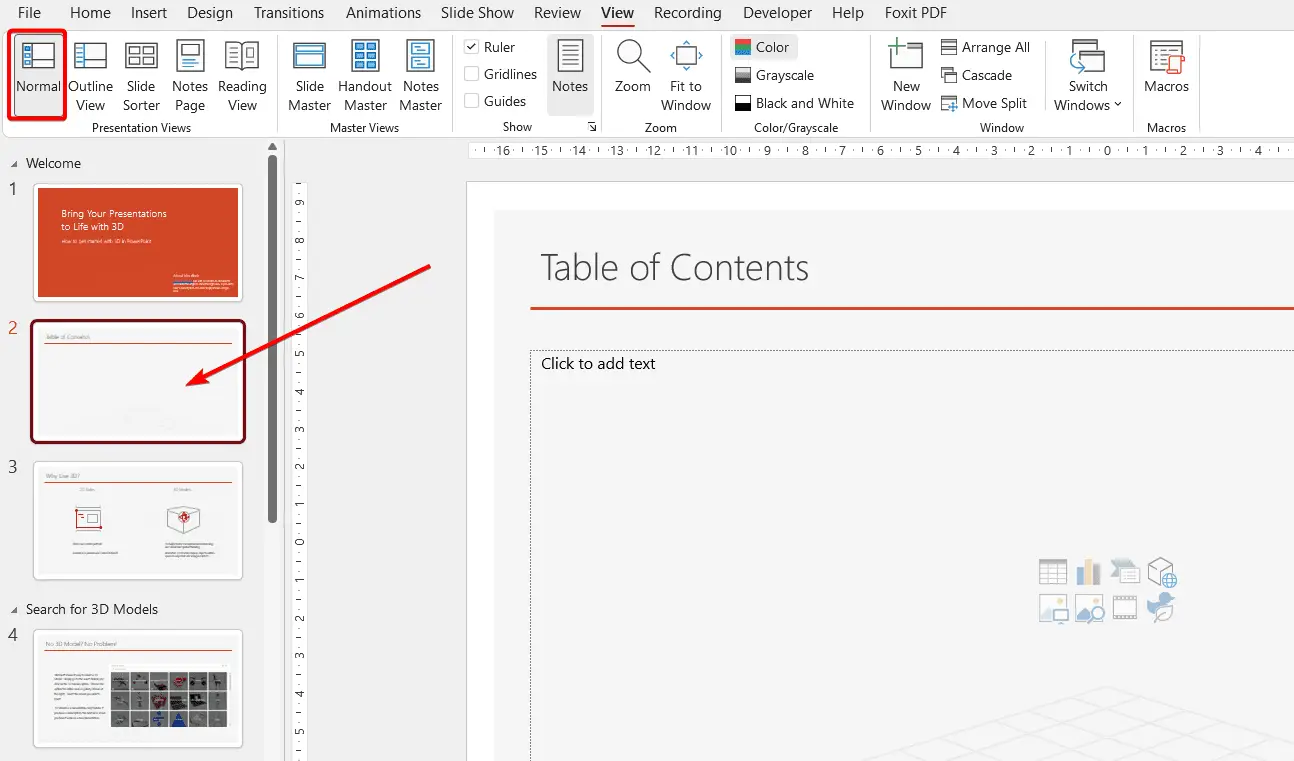
5. Press Ctrl + V to paste the titles. You can customize the appearance of your table of contents by changing the font, size, and color of the text.
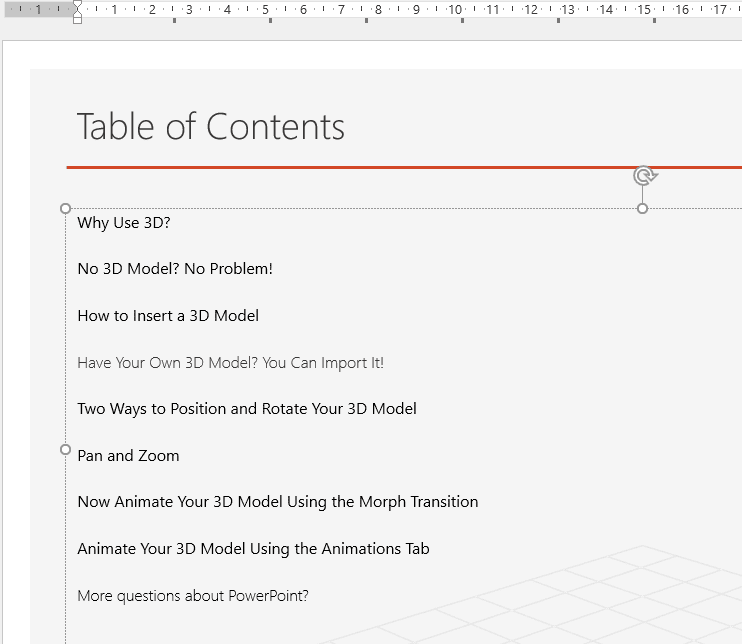
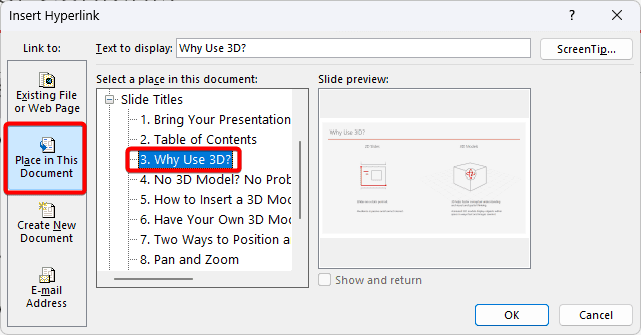
6. If you want these titles hyperlinked to the relevant slide, highlight the text then press Ctrl + K.

7. In Link to, select Place in this document and then choose the slide you want to link to.
Second method: Slide zoom
1. While in your table of contents slide, go to Insert, Zoom, and Slide zoom.

2. Here you can select the slides you want to appear in your table of contents. Click Insert.

3. Arrange them on your slide.
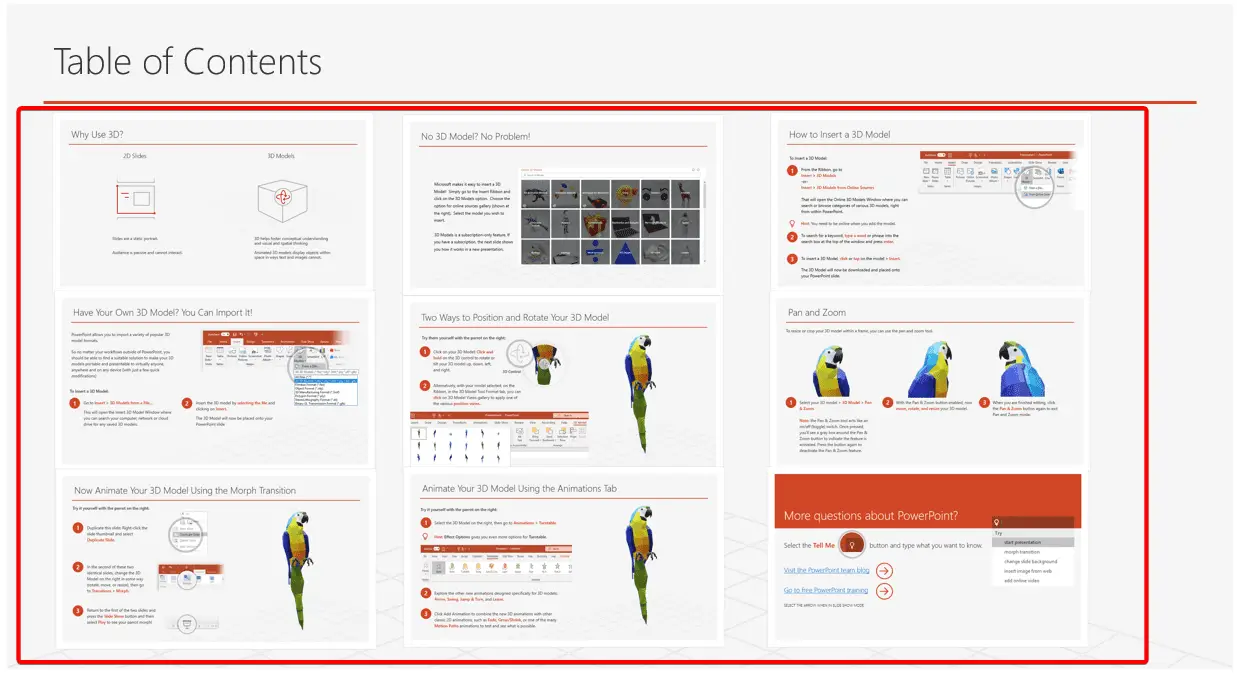
4. Now if you go to the presentation slideshow and click one of the thumbnails in the table of contents slide, it will navigate to the selected slide, then to the next slide.

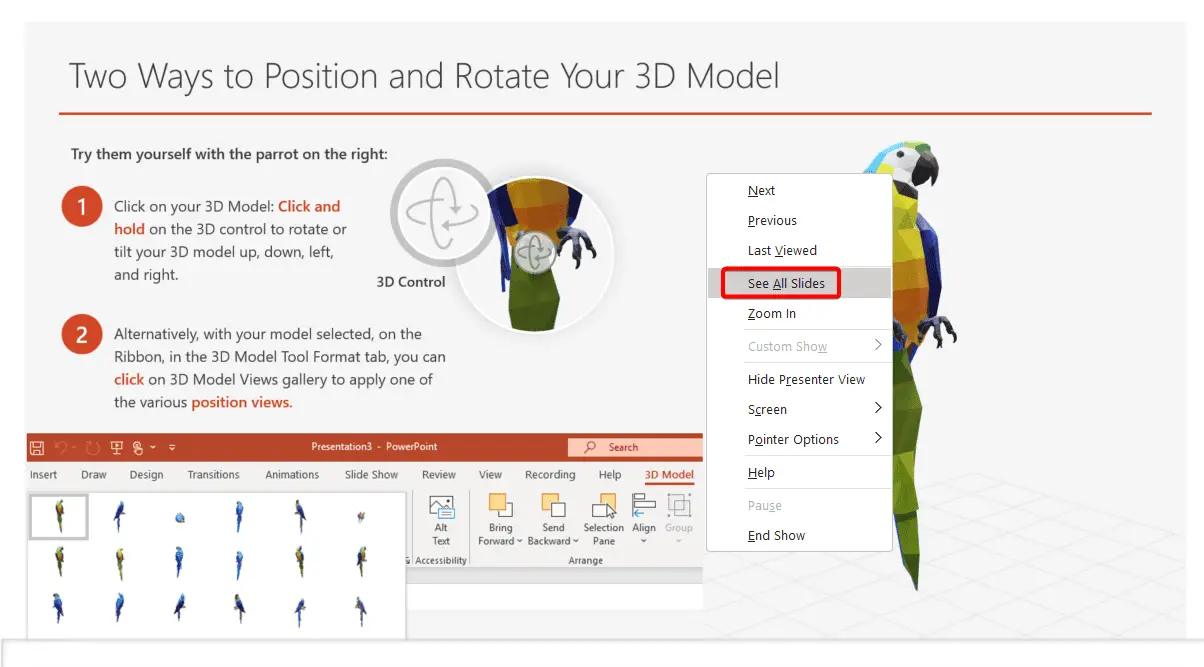
5. To navigate back to your table of contents or to another slide while in presentation mode, right-click and select See all slides.
This is a great way to make sure that your slides are easy to navigate through.
