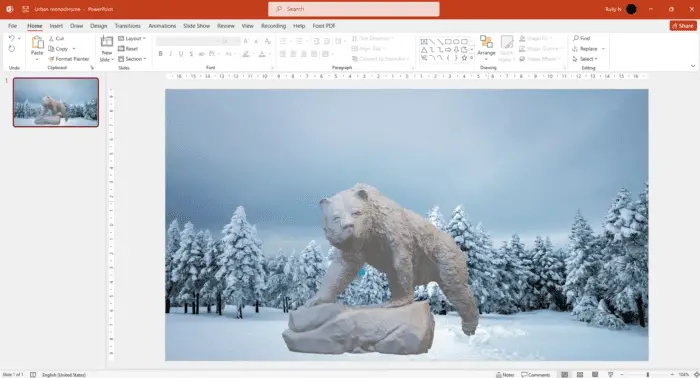
Flipping or rotating pictures and other objects in PowerPoint slides can be useful for fixing orientation issues, emphasizing certain elements, and adding visual interest to your presentations. Here is a comprehensive guide on how to flip pictures and other objects in PowerPoint.
Why Flip Pictures in PowerPoint
There are several reasons you may want to flip a picture on a PowerPoint slide:
- Fix orientation issues – If a picture appears sideways or upside-down after insertion, flipping it can quickly correct the orientation.
- Emphasize certain elements – Flipping an image draws attention to mirrored or unusual compositions.
- Add visual interest – Creative flipping techniques make presentations more visually compelling.
- Show before-and-after transformations – Use side-by-side flipped images to showcase makeovers.
- Create reflections/shadows – Flipping can produce cool 3D effects.
However, flipping pictures too frequently can become distracting, so use this technique judiciously.
How to Flip a Picture Horizontally in PowerPoint
Flipping a picture horizontally to create a mirrored effect is simple in PowerPoint. Follow these steps:
- Select the picture you want to flip
- Go to Picture Tools Format tab > Arrange group > Click Rotate
- Select Flip Horizontal
The picture will now appear flipped left-to-right.
Here is a visual summary:
How to flip a picture horizontally in PowerPoint
Image credit: PresentationLoad
Tips for Flipping Pictures
- Flipping does NOT affect the original picture file, only the copy in your presentation.
- You can flip pictures, shapes, text boxes, and other objects.
- Use Flip Vertical to flip the picture upside down.
- Flipping can sometimes produce mirrored/reversed versions.
Advanced Techniques for Flipping Pictures
Beyond basic horizontal/vertical flipping, PowerPoint offers advanced options for flipping pictures and shapes creatively:
Flip Multiple Pictures at Once
To flip several pictures simultaneously:
- Ctrl+Click to select each picture
- Follow steps above to flip selected pictures together
Manually Flip Pictures
You can manually flip pictures for precise adjustments:
- Click picture border to display selection handles
- Click and drag a side handle to the opposite side
- Manually re-size picture if needed
Rotate/Flip Pictures in 3D
For unique 3D flipping effects:
- Select picture
- Go to Format tab > 3D Rotation group
- Adjust X, Y, Z rotation settings
Experiment with the 3D rotation values to create cool reflections and dimensional effects.
Fix Common Flipping Issues
When flipping pictures in PowerPoint, you may encounter:
- Reversed/mirrored images
- Distorted or off-center pictures
- Overuse diminishing returns
- Alignment/formatting problems
Apply these fixes:
- Crop/rotate picture before inserting
- Limit flipping to avoid visual clutter
- Check picture anchor points after flipping
- Review overall layout/formatting
With practice, you can effectively integrate flipped pictures into presentations.
Conclusion
Flipping images in PowerPoint provides a versatile way to fix orientation problems, emphasize details, showcase transformations, and incorporate visually compelling effects.
By following the step-by-step guidance and advanced techniques covered in this article, you can master the skill of flipping pictures on PowerPoint slides.
Integrate horizontal/vertical flipping and creative 3D rotations to make your next presentation pop!


