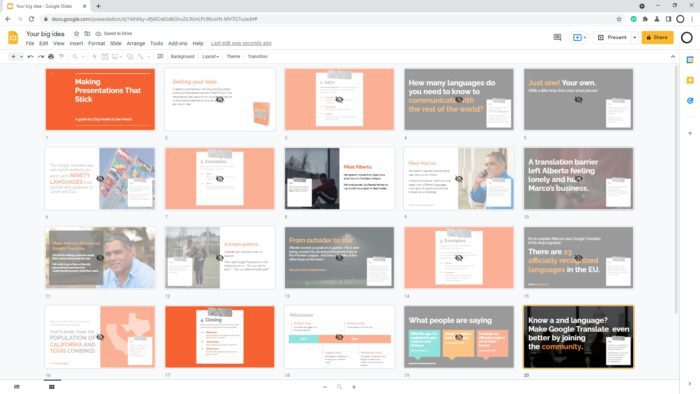
Adding animations to your Google Slides presentations can make them more dynamic, visually appealing, and engaging for your audience. Animations allow you to make text, images, shapes, and other elements enter slides in different ways, move around, change size or color, and more.
Used thoughtfully, animations can emphasize important points, smooth transitions between ideas, and help your presentation flow better. However, overusing animations can become distracting and undermine your message. This article will teach you how to add basic and more advanced animations in Google Slides.
Accessing the Animations Pane in Google Slides
To add any kind of animation in Google Slides, you first need to open the Animations pane. Here’s how:
- Open your Google Slides presentation and select the slide you want to animate elements on.
- Click “Insert” in the top menu bar.
- Select “Animations” from the dropdown menu. This will open the Animations pane on the right side.
Alternatively, you can simply click on the small Animations icon directly next to the Slide Transition icon near the top-right of the window. This looks like a small lightning bolt symbol.
Adding Entrance and Exit Animations
The most common types of animations are entrance and exit animations, which control how elements enter and leave slides during transitions. Here’s how to apply them:
- With the Animations pane open, select the text box, shape, image, or other element you want to animate.
- Under “Entrance” animations near the top of the pane, hover over the animation options to preview their effects.
- Click an animation style to apply it. The element will now be animated when transitioning onto the slide.
- To add an exit animation, scroll down and follow the same steps under the “Exit” animations section.
You can apply multiple entrance and exit animations to the same element. The effects will play sequentially.
Animating Motion Paths
Another way to animate elements is to make them move around the slide in different ways. Here’s how:
- Select the element(s) you want to animate.
- Click “Add animation” under Motion Paths in the Animations pane.
- Choose a predefined motion path style, like “Grow and Turn”, “Snake”, etc. You’ll see the animation previewed.
- Customize the path, speed, and other options to your liking.
- Click the Play button in the Animations pane to preview all animations on the current slide.
Animating Effects for Emphasis
Beyond just entrances, exits, and motion paths, you can also animate visual effects to make elements stand out. For example:
- Grow/Shrink – Make an element start small and rapidly grow or vice versa
- Fade in/Fade out – Smoothly fade an element in or out
- Change color – Animate between two colors for emphasis
- Pulse – Make an element repeatedly grow larger and smaller
Follow the same steps to add these emphasis animations as with other animation types. Mix and match different effects to create multi-part animations on elements.
Controlling Animation Order and Timing
With multiple animations, the order they play in matters. Here’s how to control it:
- In the Animations pane, click the drop down menu at the top left reading “Play In: On Click”.
- Choose “Start: After Previous” to have animations sequence automatically.
- Drag animations up/down in the pane to control their order. Higher animations play first.
You can also customize the duration and delay for animations here. For example, adding a 0.5 second delay between entrance and emphasis animations draws further attention to the emphasis animation.
Best Practices for Animations
When adding animations in Google Slides, keep these best practices in mind:
- Use animations sparingly to highlight your most important content
- Keep animations subtle and consistent with your brand style
- Ensure text remains readable if animating size/color
- Balance animated elements across the slide – don’t cluster too many together
- Time animations carefully so they don’t feel rushed or lagging
- Don’t overuse flashy animations just because you can
The purpose for animations is to aid your presentation and message – not become the focus. If ever unsure, less is often more when it comes to animations.
Advanced Tips for Animating in Google Slides
Once you become more skilled with animations in Google Slides, try some of these advanced tips:
- Animate charts: Bring charts to life by animating bars to grow, pie slices to expand from the center out, etc. Just select chart elements and add animations normally.
- Morph images: Morph one image into another for smooth, captivating transitions. Requires having two layered images.
- Draw attention with color: Temporarily make an element brighter, darker, or contrasting color to draw the audience’s eye during key points.
- Simulate movement: Use subtle repeated Grow/Shrink animations in different directions to make static elements seem in motion, like a pulsing dot following a path.
- Masking entrance: Set an image to fade in from the bottom up or slide in from the side to elegantly introduce it.
Don’t be afraid to experiment! Just be sure to preview your animations and how they aid the storytelling rather than distract.
Conclusion
Adding animations in your Google Slides presentations can make them more memorable, visually compelling, and engaging – so long as you use them thoughtfully. This article covered how to access the Animations pane, add entrance/exit animations, create motion paths, animate for emphasis, control animation order/timing, and apply best practices.
With the power of animations now unlocked, you can make your next presentations truly come alive. Just focus animations around your most important content and messages. If ever unsure, keep it simple. The purpose is enhancing your storytelling and not flashy animations.


