Adding a voiceover to your Canva presentations can be a great way to enhance your slides and better connect with your audience. Recorded audio makes your presentation more dynamic and interesting. It also allows you to provide more context and explanation for your content.
In this guide, I’ll walk you through the full process of how to add voiceovers to Canva presentations, from recording your script to embedding the audio into your slides. Follow these steps to take your Canva presentation to the next level with custom voiceovers.
Method 1: Record Voiceovers Directly in Canva

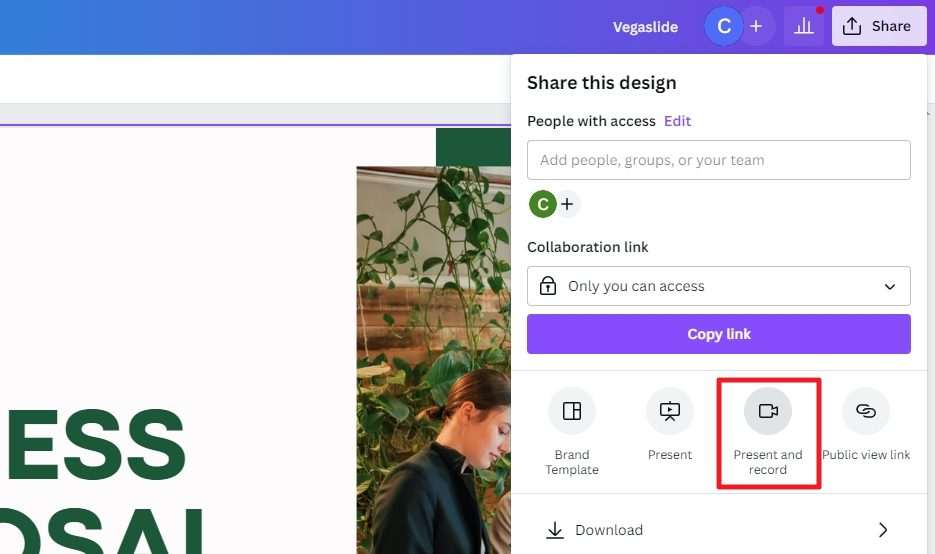
The easiest way to add voiceovers to your presentation is to record directly within Canva using the “Present and record” feature.
Here are the steps:
- Open your Canva presentation and click on “Present” in the top toolbar.
- Select “Present and record”. This will launch Canva’s recording studio. Present and record option
- Give Canva permission to access your computer’s microphone and camera by clicking “Allow” when prompted.
- Click the red “Start recording” button and start narrating your presentation. Your voice will be recorded slide-by-slide as you click through each one.
- When you’re finished, hit “Stop recording” and close the recording studio. The voiceover files will automatically attach to each slide.
That’s all there is to it! Now when you present your slides, your voiceovers will play automatically on each slide.
Method 2: Upload Pre-Recorded Voiceover Files

Alternatively, you can upload pre-recorded voiceover files if you want more control over the recording and editing process:
- Record your voiceover audio in advance using recording software like Audacity or Garageband. Make sure to save files as MP3s.
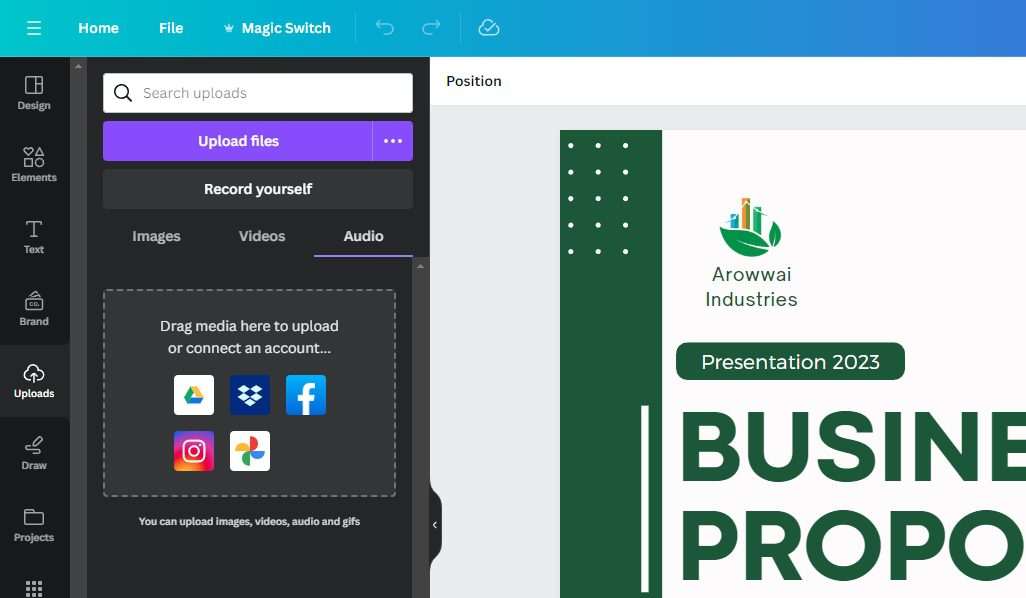
- In Canva, click on the “Uploads” tab. Drag and drop your voiceover MP3 files into the uploads area.
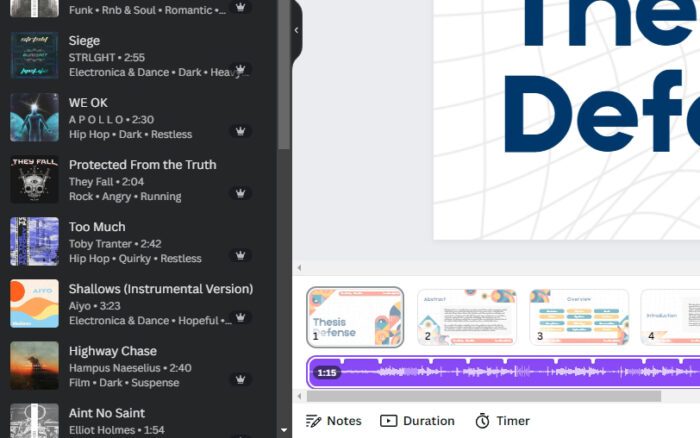
- Go back to your presentation slides. Click and drag your uploaded MP3 file onto the timeline of the slide where you want that voiceover to play. Drag voiceover to timeline
- Repeat for all other slides and voiceovers. Play back your presentation to test.
Pro Tip: If your original presentation video or animations have audio that conflicts with your voiceover, select it on the timeline and toggle mute on. This will mute the original audio and only play your voiceover.
Consider cleaning up flubs and mistakes with editing software before uploading to Canva. Even minor fixes can polish your voiceovers.
FAQs
How long can my voiceover recordings be?
There is no length limit for voiceovers added through the upload method. If recording directly in Canva, voiceovers are limited to the length of each slide.
Is there a file size limit for uploaded audio?
Yes, Canva imposes a 100MB file size limit across all your uploaded assets, including images, videos, and audio files.
Can I edit the voiceover timing and audio?
Basic editing such as trimming the start/end points and adjusting volume levels can be done in Canva’s timeline. For more advanced editing features, use external audio editing software before uploading files to Canva.
What audio formats does Canva support?
Canva supports common formats like MP3, WAV, M4A and AIFF. For best compatibility, export voiceovers as MP3s.
What happens if I go over my Canva storage limit?
If you exceed Canva’s overall storage allowance, you will not be able to add new uploads until deleting old files. Consider compressing audio files to smaller sizes.


