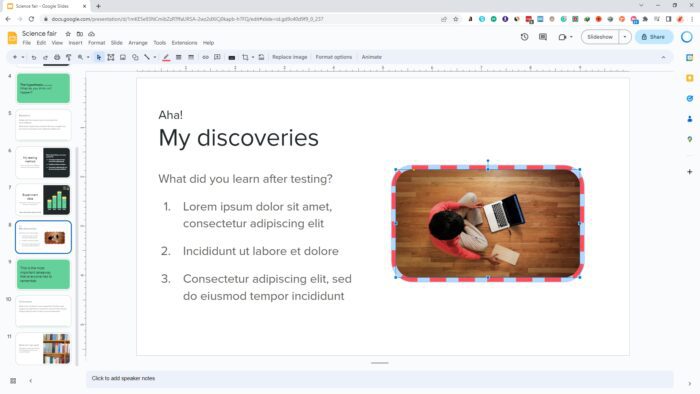
Bringing images forward in Google Slides is an important skill for creating visually appealing and effective presentations. Properly layering visual elements allows you to emphasize key points, make text stand out, and direct your audience’s attention.
In this comprehensive guide, you’ll learn how to easily bring any image forward over text or other objects in Google Slides using simple built-in tools.
Why Positioning Images Matters in Presentations
Visual hierarchy is a key principle in design and presentations. It involves organizing elements on a slide from most to least important using size, color, contrast, and positioning.
By bringing important images forward, you create a logical flow for viewers to follow. Their eyes will naturally be drawn to foreground images first before shifting focus to background elements. This allows you to highlight key information effectively.
Conversely, sending less critical images backward reduces visual clutter and prevents distracting from more relevant points. Thoughtful image placement results in polished, professional slides.
Step-by-Step Instructions
Bringing an image forward in Google Slides only takes a few clicks:
- Open your presentation and navigate to the slide containing the image you want to reposition.
- Click on the image to select it. A blue border will appear around the selected image.
- Access the “Arrange” menu. Go to the top menu, click “Slide” then hover over “Arrange” in the drop-down menu.
- Choose “Bring to Front.” This menu option moves the selected image in front of all other objects.
Alternatively, you can use the “Bring Forward” option to move an image up only one layer instead of all the way to the front.
Customizing Image Layers
Once you’ve brought an image forward, you may need to make adjustments:
- Change layering order – Use the “Send Backward” and “Send to Back” options to reposition images behind text or other objects.
- Group elements – Select multiple objects and group them so they move together as one unit when repositioned.
- Adjust transparency – Increase transparency on foreground images so background items remain visible.
Take time to experiment with different layering configurations for the best results.
Design Tips for Visually Stunning Slides
Follow these best practices when positioning images in Google Slides:
- Lead with powerful visuals by bringing key images to the front.
- Use transparency to prevent covered objects from being hidden.
- Leave negative space around foreground images.
- Send supporting images/graphics to the back layer.
- Use contrasting colors for images and background.
- Group related elements so they move together.
Troubleshooting Common Issues
Problem: Image jumps to the back when adding a new object.
Solution: Group the image with other foreground elements so they hold their layer positions.
Problem: Text or shapes disappear behind an opaque image.
Solution: Reduce the opacity of the front image or send it backward until other objects are visible.
Problem: The image order doesn’t save properly when closing the presentation.
Solution: Make sure to save your changes before closing Google Slides.
Key Takeaways
- Layering images effectively creates visual hierarchy and directs attention.
- Use the “Bring to Front” and “Send to Back” options to easily reposition images.
- Customize transparency and grouping to fine-tune image layers.
- Apply best practices for choosing foreground vs. background images.
Careful positioning of images not only improves aesthetics but also enhances communication of key ideas to your audience during a presentation. With these simple tips, you can now create polished Google Slides presentations sure to impress any crowd!


