A light bulb is among the most popular shapes used in media. It often represents an idea, mind, and imagination in general. One example is this cool fusion Venn diagram with light bulbs instead of circles.
While you can grab a picture from the internet and smash it into a PowerPoint slide, the design, and feel of the bulb wouldn’t feel original. Some presenters may just create their own lamp figure that matches the overall style of the presentation. This approach is rarely taken but when it does, it will elevate your presentation.
In this guide, I’m going to show you how to draw a somewhat simple light bulb in PowerPoint, no third-party tool is required. Even if you are a beginner, the light bulb could be done in 5 minutes or less.
Now, let’s get into it.
#1 How to draw a simple light bulb in PowerPoint
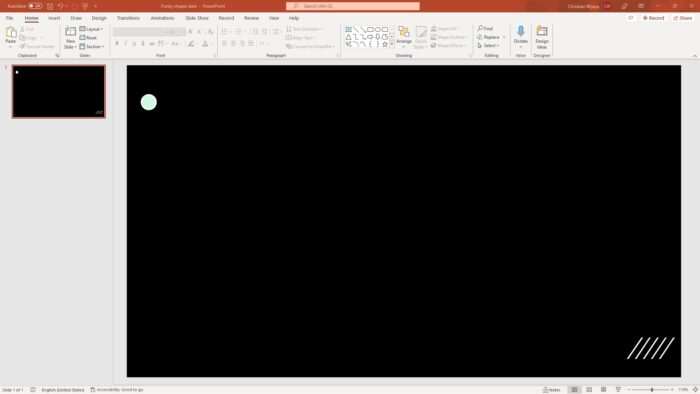
1. Launch PowerPoint and prepare a slide where you want to draw a light bulb. For example, I’m going to use this black slide.
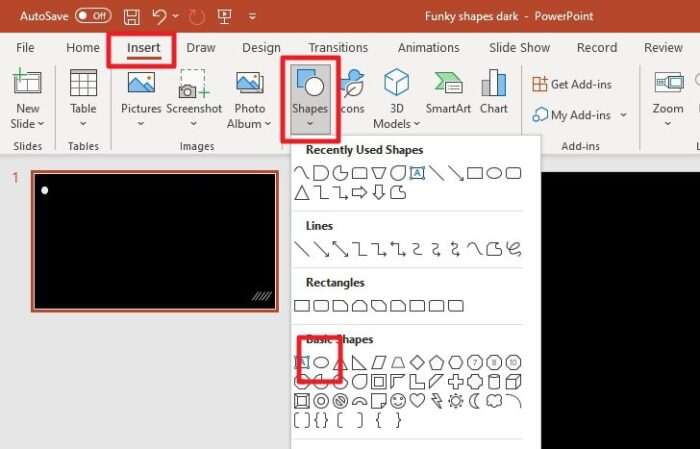
2. Now, navigate to Insert > Shapes > Oval.
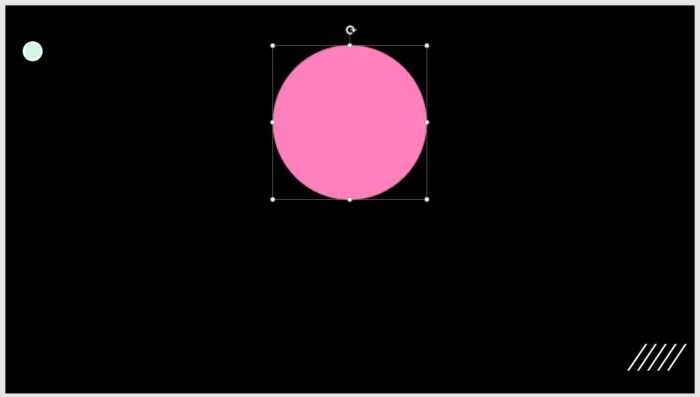
3. Hold Shift and use the pointer to draw a perfect circle.
4. Next, go to Insert > Shapes again and select Manual Operation. You may use Trapezoid as an alternative.
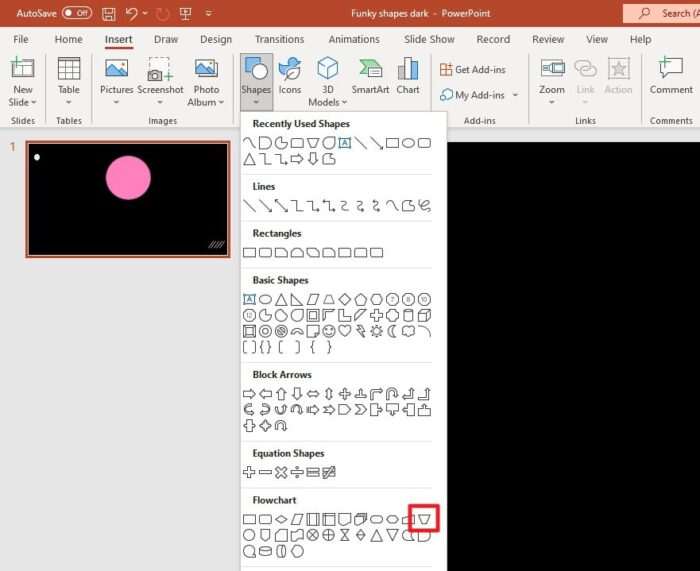
5. Draw and place it overlapping the bottom part of the circle.
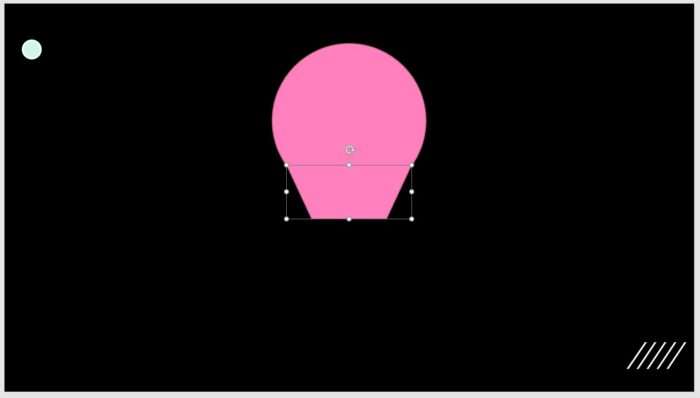
6. Then, navigate to Insert > Shapes > Rectangle: Top Corners Rounded.
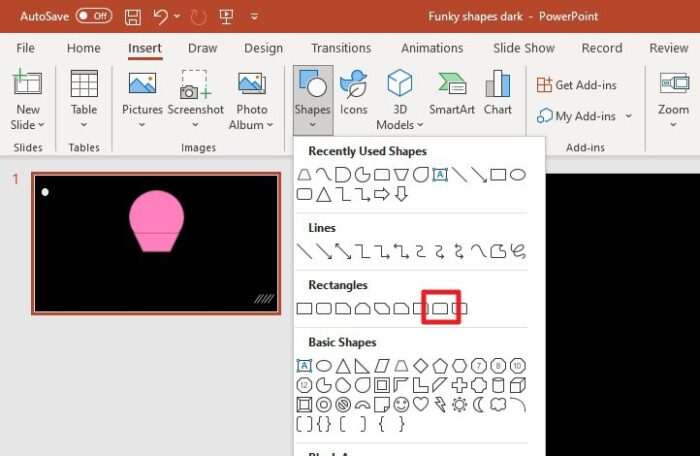
7. Draw and place it under the Manual Operation with the rounded corners facing downward.
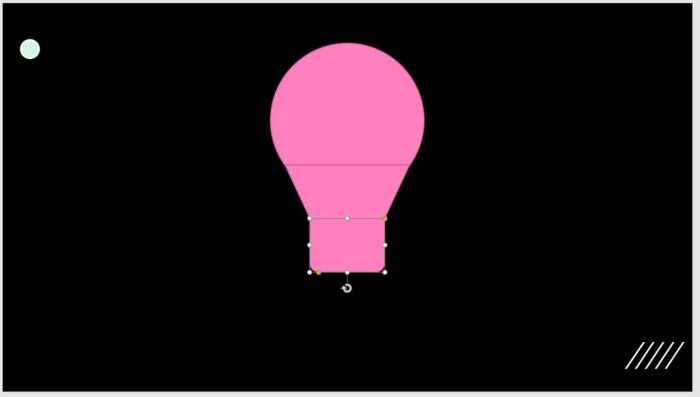
8. Lastly, click Insert > Shapes > Delay.
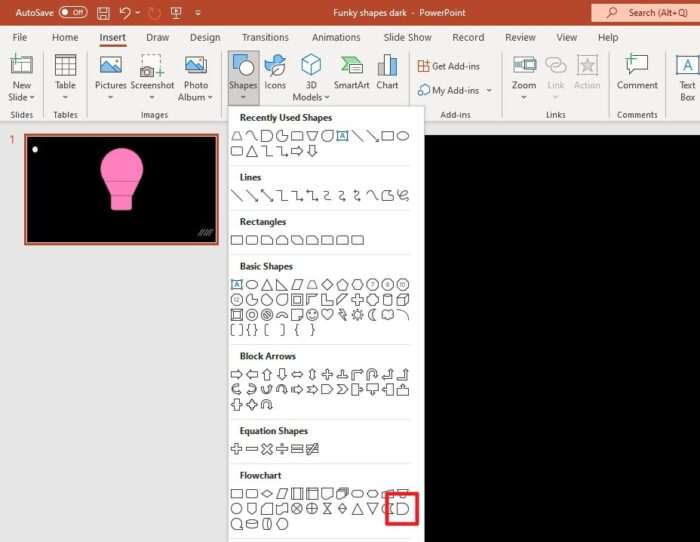
9. Draw and place it under the rounded rectangle.
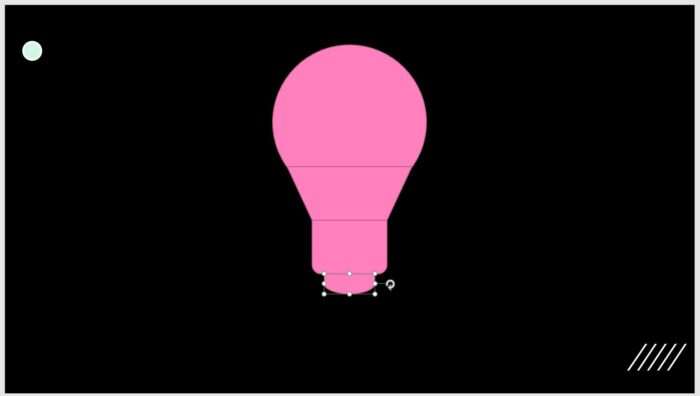
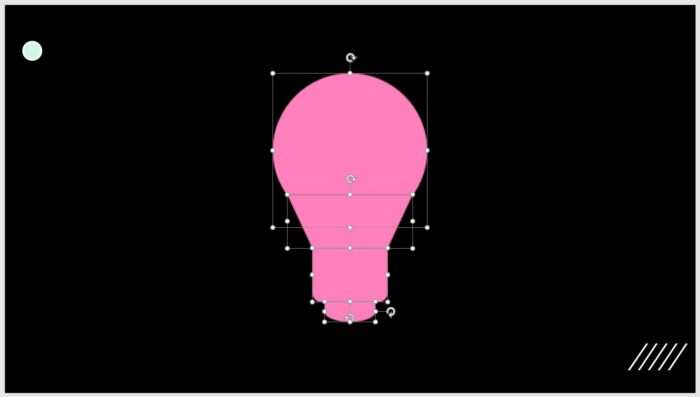
10. We are about to recolor these shapes but we must get rid of the outline first. Select all the shapes you have just created. Use click & drag or Ctrl+A to perform this action.
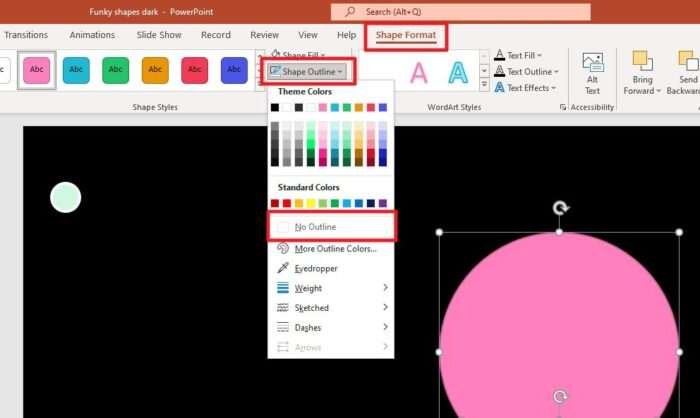
11. Head to Shape Format > Shape Outline > No Outline.
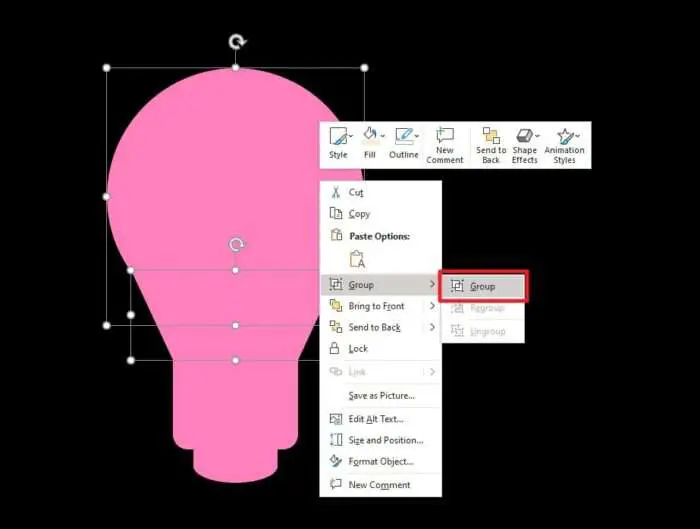
12. It’s a good idea to merge the Circle and Manual Operation shapes together to make them quicker to recolor. First, select the shapes. You can use Ctrl+Left Click to do that.
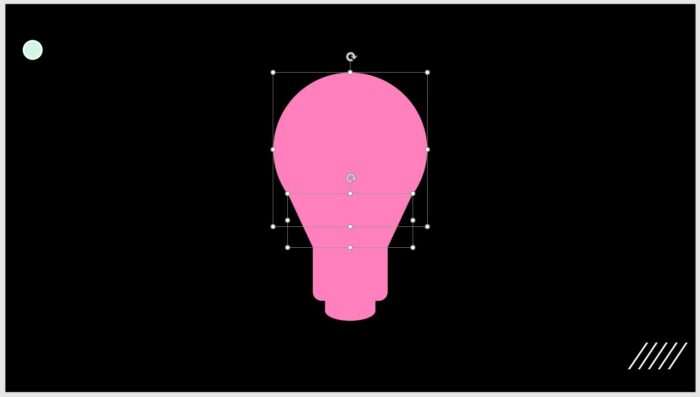
13. Right-click the area and Group them.
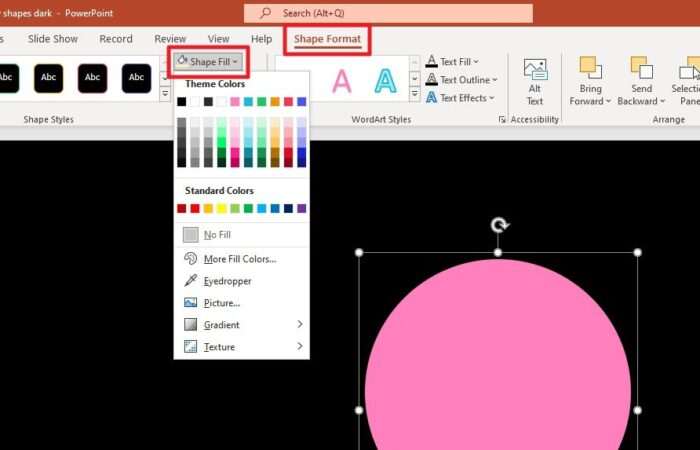
14. To recolor, select a shape and navigate to Shape Format > Shape Fill, and then choose the appropriate color for it.
15. Repeat the process until all shapes are nicely colored.
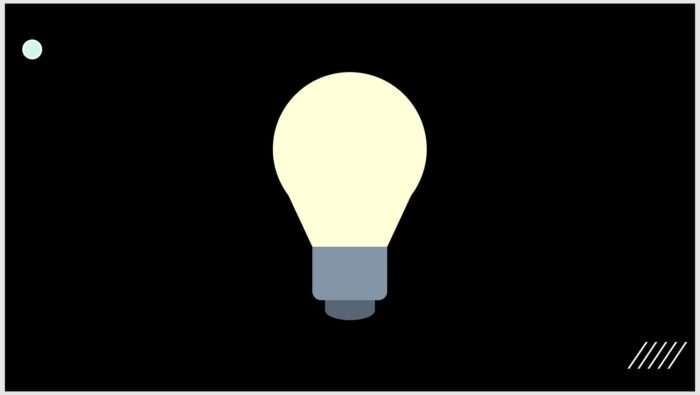
Up to this point. You have successfully created a simple light bulb in PowerPoint. That’s such an achievement! If you want to go a bit further, I have covered additional details you can add to your first light bulb.
#2 Adding more details to the light bulb
In the next tutorial, we will learn how to add more elements like threads, reflection, and filament. These things although simple would make the bulb looks more realistic.
1. Go to Insert > Shapes > Rectangle Rounded Corners.
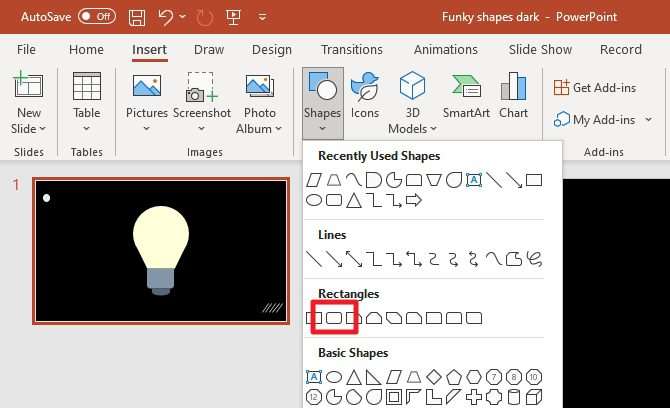
2. Make it small and elongated, and rotate a little. Slide the orange dot to adjust the roundness level. Recolor it with a slightly darker color but softer.

3. Next, we are going to add reflection. Navigate to Insert > Shapes > Oval.
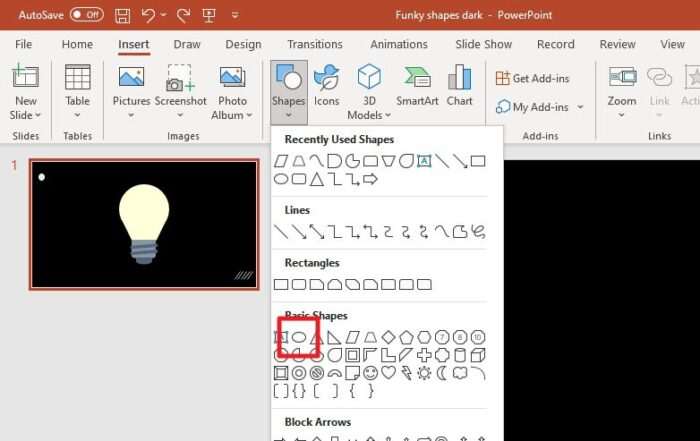
4. Draw an oval and place it near the edge of the bulb. You can add more if needed. Just like most reflections, lighter color is recommended.
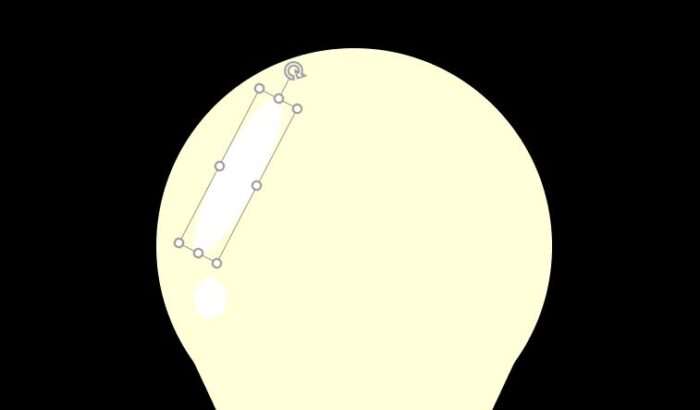
5. To draw a filament, click Insert > Shapes > Curve.
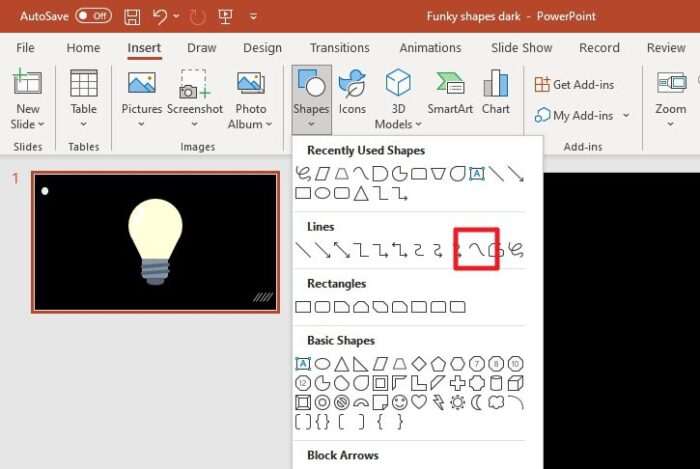
6. Using the cursor, draw a line that looks like a filament. An arbitrary line is probably enough.
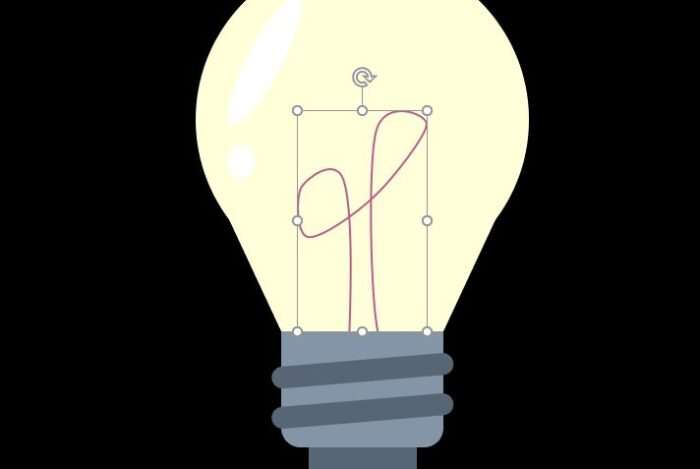
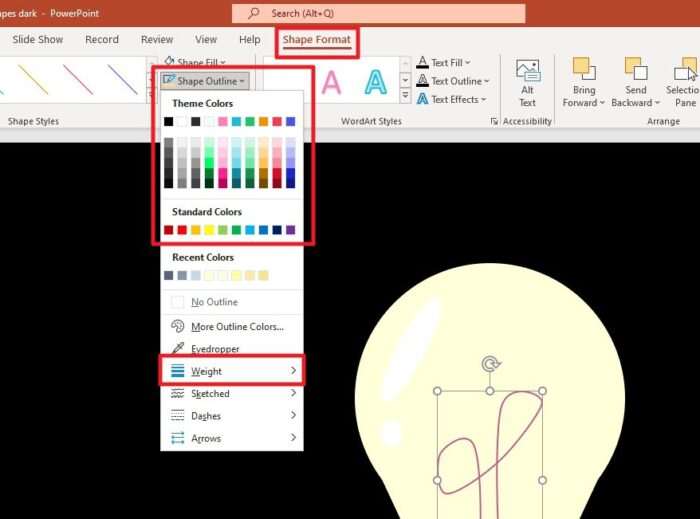
7. Then, click the filament shape, head to Shape Format > Shape Outline, and select a new color, preferably darker than the bulb. You can also increase its Weight to make it more visible.
8. Finally, the light bulb got its appearance improved.

#3 Making the light bulb glow
To add a cherry on top, we can make the bulb turn on and shine a bright light on its surrounding. Luckily, adding a glow effect is an easy endeavor in PowerPoint.
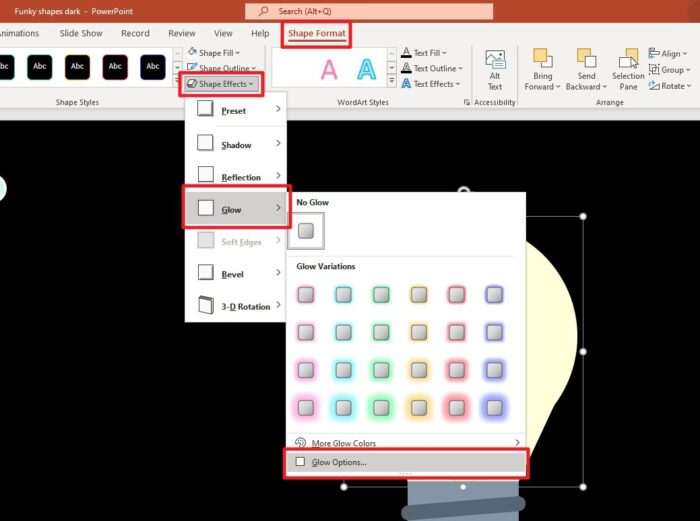
1. Click the bulb body, go to Shape Format > Shape Effects > Glow > Glow Options…
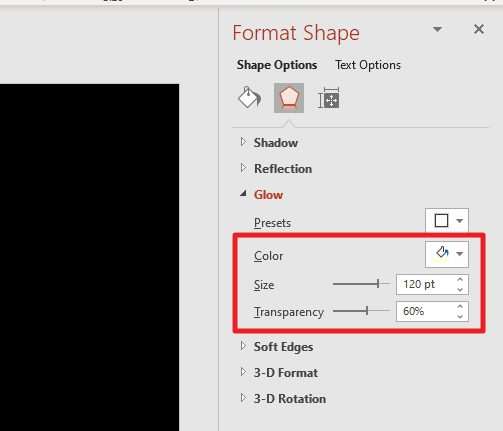
2. Play with the Color, Size, and Transparency until you found the perfect settings.
3. Now you have the bulb illuminating the slide.
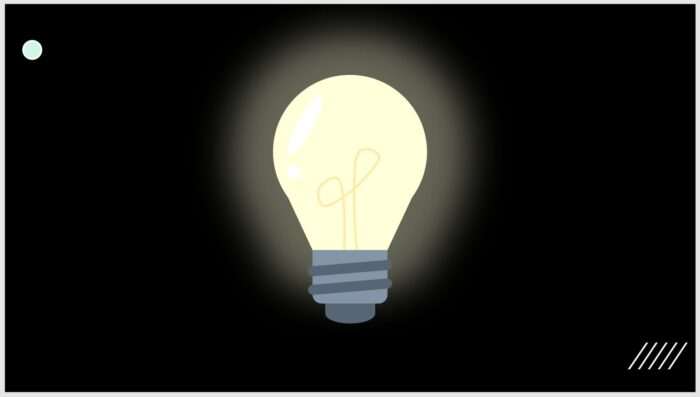
Isn’t that look fantastic?
Although I made this tutorial to be as beginner-friendly as possible, there are a few basic knowledge that I deliberately skipped to keep the guide short. If your first light bulb doesn’t satisfy your expectation, don’t worry. With more practice, you will master PowerPoint Shapes and deliver a piece of art that otherwise only exist in your imagination.
So, don’t stop at where you are now, instead, keep practicing. Thank you for sticking to the very end.


