Grouping objects in Google Slides allows you to move multiple objects together as one unit. This makes organizing and formatting your slides much easier. Here’s a step-by-step guide to grouping and ungrouping objects in Google Slides.
Why Group Objects in Google Slides
Here are some key reasons why you may want to group objects in Google Slides:
- Move multiple objects simultaneously instead of individually
- Resize a group of objects while maintaining position and scale
- Apply formatting like colors or effects to multiple objects at once
- Keep related objects together as you organize and layout your slides
Grouping creates a single object container that allows you to quickly work with multiple objects efficiently.
How to Group Objects in Google Slides
- Select the objects to group
- Click on one object, then hold Shift while clicking additional objects to multi-select
- Alternatively, click and drag a selection box around objects
- Group the selected objects together
- Right click on a selected object and choose “Group”
- Or go to the “Arrange” menu and select “Group”
- Keyboard shortcut: Ctrl+Alt+G (Windows) or Cmd+Alt+G (Mac)
Once grouped, you can move, resize, arrange, format or manipulate the group as if it were a single object.
Ungrouping Objects in Google Slides
If you need to edit individual objects again, you can ungroup them:
- Select the grouped object container
- Right click and choose “Ungroup”
- Or go to the “Arrange” menu and select “Ungroup”
- Keyboard shortcut: Ctrl+Shift+Alt+G (Windows) or Cmd+Shift+Alt+G (Mac)
Ungrouping separates the objects again into individual, editable objects.
Tips for Grouping Effectively
- Only images and shapes can be grouped – text boxes cannot be included in a group
- Objects must be on the same slide to group them
- Make sure to group objects with alignment and spacing you want to preserve
- Name your groups with the “Arrange > Name Group” menu for easy identification
- Use groups to apply effects like color overlays to multiple objects at once
Common Uses of Object Grouping
Here are some common ways people use object grouping in Google Slides:
Organizing Layouts
Group objects like icons, shapes and images to keep associated elements together when arranging slide layouts.
Applying Bulk Formatting
Format multiple objects at once by changing the group’s fill color, outline, effects, etc.
Creating Logos and Icons
Group shapes to create more complex icons, logos or graphical elements.
Animating Elements
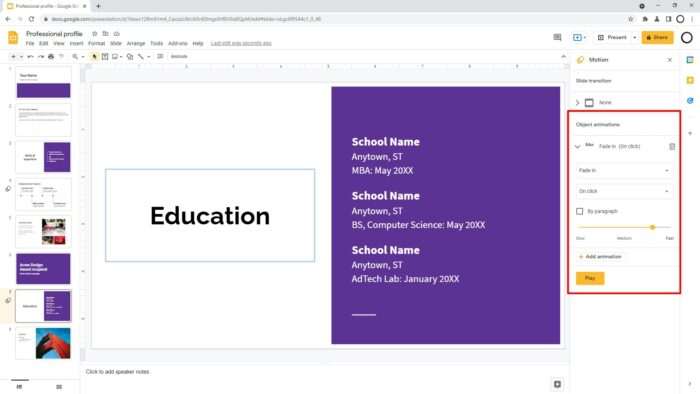
Animate multiple objects at once by applying entrance/exit animations to the group.
Exporting Sections
Group sections of content to export or copy slides from one Google Slide presentation to another.
Insert Shapes for Grouping
Google Slides provides various shape types you can insert and then group together to create more complex objects and layouts:
- Basic Shapes: rectangle, circle, triangle, arc, line, etc.
- Block Arrows
- Equation Shapes
- Flowchart Shapes
- Stars and Ribbons
Use basic shapes as building blocks you can layer, align and group.
Grouping vs. Merging Shapes
Grouping combines objects while keeping them as separate elements. Merging shapes creates a single new shape:
- Group: Objects remain separate entities that can be ungrouped again. Retain individual manipulation.
- Merge: Objects are fused into one new shape. Can no longer edit individual source objects.
Group when you want to combine objects without permanently merging them. Merge when you need to create complex shapes.
Aligning Objects in a Group
When grouping objects:
- Align objects first – Arrange shapes or images so they line up exactly how you want before grouping.
- Use alignment guides – Display guides like gridlines to easily align and distribute grouped objects.
Precise alignment of objects before grouping will ensure your grouped layout maintains positioning.
Organizing Groups by Name
To help organize multiple groups and identify them easily:
- Right click group
- Choose “Name group”
- Assign descriptive name
Naming groups makes it easier to manage them in larger presentations with many object groupings.
Keyboard Shortcuts for Grouping
Use these handy keyboard shortcuts to quickly group and ungroup objects in Google Slides:
- Group Selected Objects:
- Windows: Ctrl+Alt+G
- Mac: Cmd+Alt+G
- Ungroup Selected Group:
- Windows: Ctrl+Shift+Alt+G
- Mac: Cmd+Shift+Alt+G
Memorize group/ungroup shortcuts to rapidly combine and break apart objects.
Advanced Grouping Techniques
Once you get the hang of basic grouping, try these more advanced techniques:
- Group overlapping shapes to create cutouts and textures
- Animate groups of objects to move together in sequence
- Make multiple copies of a grouped object to quickly populate a layout
- Nest groups within other groups for complex arrangements
- Apply transparency effects to groups to create overlays
Experiment by layering, duplicating, animating and nesting groups of objects.
Troubleshooting Group Issues
Here are solutions to common grouping problems in Google Slides:
Can’t group objects
- Make sure objects are on the same slide
- Only shapes and images can be grouped, not text boxes
- Objects may already belong to another group
Can’t ungroup objects
- Select the group’s bounding box instead of an individual object
- Group may be nested inside another group
Group formatting changes unexpectedly
- Accidentally changed the formatting for the entire group
- Objects may be overlapping each other
Group positioning or alignment shifts
- Objects weren’t aligned properly before grouping
- Text reflow in a shape may have affected positioning
Carefully check your selection, layering, and alignment to fix unexpected grouping behavior.
Frequently Asked Questions
Here are answers to some common questions about grouping objects in Google Slides:
Can I group slides together in Google Slides?
No, you cannot group or combine multiple slides. Slide grouping only applies to objects within an individual slide.
What’s the maximum number of objects I can group together?
There is no stated limit for how many objects you group. However, grouping an excessive number of objects can impact performance.
What happens when I copy a grouped object?
Copying a grouped object pastes another instance of that group. If you edit the copy, it will not affect the original group.
Is there a way to group all objects at once?
Unfortunately there is no “Select All” that would allow grouping everything on the slide at once. You must multi-select the objects first.
What’s the best way to work with multiple groups on one slide?
Name your groups clearly so you can identify them. Use Send to Back/Bring to Front arrange options to layer groups effectively.
For more answers, check out Google Slides official help documentation or tutorials on YouTube.
Conclusion
Grouping objects allows for efficient slide design and layouts in Google Slides. Use it to streamline working with multiple objects. Align, organize and format groups rather than individual shapes and images.
To recap, here are some key takeaways:
- Group related objects to work with them as one unit
- Ungroup when you need to edit individual objects again
- Use grouping to quickly apply formatting to multiple objects
- Align and position objects precisely before grouping them
- Name groups and use arrange options to manage complex groupings
- Group, animate and duplicate objects to create engaging slide visuals
Now you know how to harness object grouping to boost your Google Slides productivity!


