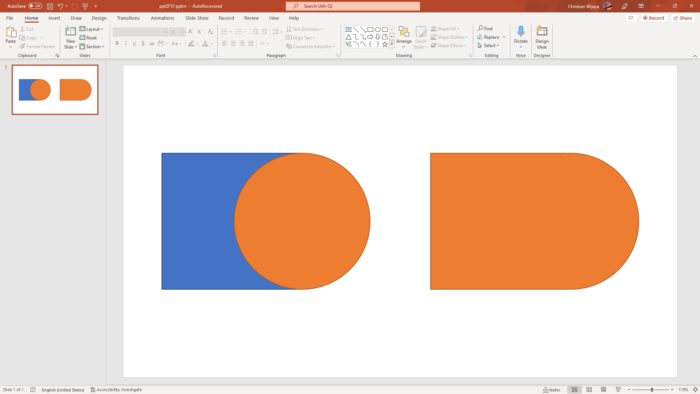
Layering refers to the ability to arrange objects on a slide so some appear on top of others. Just like layers in Photoshop or other design programs, each object in PowerPoint resides on its own layer.
The layer order determines which items are visible in front and which ones are obscured behind. PowerPoint remembers the order in which you add objects to a slide and stacks the newest additions on top.
Why Layer Objects in PowerPoint
There are several key reasons you may want to layer objects in your PowerPoint presentations:
- Create visual interest – By overlapping objects and making some transparent, you can create more sophisticated slide designs that capture attention.
- Build complex animations – Layering allows you to animate some objects separately from others on the same slide. This helps focus the audience.
- Hide and reveal content – Stack objects in front of content you want to keep hidden until just the right moment. Layering creates opportunities for dramatic reveals.
- Fix alignment issues – Rather than nudging misaligned objects pixel by pixel, rearrange their layering order to line them up perfectly.
How to Layer Objects
PowerPoint makes layering easy with just a few clicks. Here are the basic steps:
1. Add Objects to Your Slide
Start by inserting all the items you want to layer – pictures, shapes, text boxes, charts, SmartArt, etc. If you already have objects on your slide, skip to the next step.
2. Select the Object to Layer
Click the object you want to move to a different layer. Avoid clicking and dragging at this stage.
3. Choose a Layering Option
Go to the Format tab and locate the Arrange group. Click the drop-down and select one of the following options:
- Bring to Front – Moves the selected object in front of all other objects
- Bring Forward – Moves the selected object up one layer
- Send Backward – Moves the selected object down one layer
- Send to Back – Moves the selected object behind all others
Alternatively, you can right-click the object and choose a layering option from the context menu.
4. Repeat as Needed
Reselect objects and use the layering commands to stack them in the desired order.
5. Fine-Tune Layer Alignment
Use PowerPoint’s alignment tools on the Format tab to line up layered objects perfectly.
Advanced Layering Techniques
Mastering a few additional layering techniques will help you become a PowerPoint pro:
- Rename Layers – Use the Selection Pane to give custom names to objects for easy identification.
- Lock Layers – Lock down finished layers in the Selection Pane to prevent accidental changes.
- Copy Layers Between Slides – Duplicate layers to efficiently reuse complex designs.
- Modify Layer Transparency – Make layered objects semi-transparent for a cool layered effect.
- Animate Layers Separately – Use PowerPoint’s animation tools to individually animate objects on separate layers.
Layering Best Practices
Follow these tips when layering objects for the best PowerPoint slide design:
- Limit layers to 5 or fewer for simplicity.
- Put layered objects close together to appear as one integrated unit.
- Use alignment guides and gridlines to accurately overlap items.
- Make sure layered text remains readable.
- Watch out for unintended transparency effects.
- Test on various screen sizes to ensure nothing gets cut off.
The layering tools in PowerPoint provide immense creative freedom. Implementing these best practices will ensure your layered slides enhance rather than distract from your presentation’s core message.
Conclusion
Layering objects opens up exciting new presentation design possibilities. You can capture attention, incorporate sophisticated visuals, and craft compelling stories through strategic layering.
Mastering object layering does take some practice, but the effort pays off through more polished and professional slides. With these PowerPoint skills under your belt, you will be able to produce truly stunning and impactful presentations.
Citations:
[1] https://support.microsoft.com/en-au/office/layer-objects-on-slides-81cccf31-9219-4c89-b7ba-9f25ad429c4a
[2] https://www.presentation-process.com/layering-in-powerpoint.html
[3] https://support.microsoft.com/en-us/office/group-or-ungroup-objects-56d8b2d3-2f31-4f50-abae-6154c1f969a9
[4] https://support.microsoft.com/en-au/office/align-and-arrange-objects-on-a-slide-5f961535-a2ae-4914-a24a-94c669903ae3
[5] https://www.youtube.com/watch?v=TSNuB_fdVMs
[6] https://www.powerpointninja.com/design-tips/layering-technique-for-powerpoint-objects/
[7] https://support.microsoft.com/en-us/topic/group-or-ungroup-shapes-pictures-or-other-objects-a7374c35-20fe-4e0a-9637-7de7d844724b
[8] https://edu.gcfglobal.org/en/powerpoint2016/aligning-ordering-and-grouping-objects/1/
[9] https://buffalo7.co.uk/blog/powerpoint-layers/
[10] https://www.youtube.com/watch?v=XXVvDGz04Hk
[11] https://support.microsoft.com/en-us/office/video-ungroup-and-regroup-shapes-or-pictures-ee79ec23-97f2-42a7-b2aa-86a8641e9db3
[12] https://support.microsoft.com/en-us/office/align-or-arrange-objects-bfd91078-2078-4b35-8672-f6270690b3b8
[13] https://smallbusiness.chron.com/layers-powerpoint-39961.html
[14] https://www.youtube.com/watch?v=Zx_i9xox-FU
[15] https://www.youtube.com/watch?v=1WA-8OjEI3Y
[16] https://support.microsoft.com/en-au/office/change-the-order-in-which-stacked-objects-placeholders-or-shapes-appear-on-a-slide-9a3b64b2-f1ac-42bc-ad97-ab30fad93de4
[17] https://creativepro.com/secrets-of-powerpoints-selection-pane/
[18] https://zebrabi.com/guide/how-to-ungroup-in-powerpoint/
[19] https://www.youtube.com/watch?v=sX2R93TIpUI
[20] https://zebrabi.com/guide/how-to-group-objects-in-powerpoint/
[21] https://data-flair.training/blogs/how-to-group-or-ungroup-objects-in-powerpoint/
[22] https://helpdeskgeek.com/office-tips/layering-objects-in-a-powerpoint-presentation/
[23] https://edu.gcfglobal.org/en/powerpoint2003/grouping-and-ungrouping-objects-on-a-slide/1/
[24] https://www.youtube.com/watch?v=42AWLMxh2rk
[25] https://www.youtube.com/watch?v=005gGDxKDus


