Giving presentations is a key skill in school, business, and life. With PowerPoint, you can create professional, visually-engaging slides to captivate your audience. But there’s a difference between a good PowerPoint and a great one.
Follow these PowerPoint tips and tricks to take your slides to the next level:
Use a Template
Starting with a professionally designed PowerPoint template saves time and gives a unified look.
Benefits include:
- Consistent fonts, colors, and layouts
- Slide masters with formatted placeholders
- Variety of themes for different purposes
Browse free templates on sites like SlidesCarnival or SlideModel for inspiration.
Customize the Slide Master
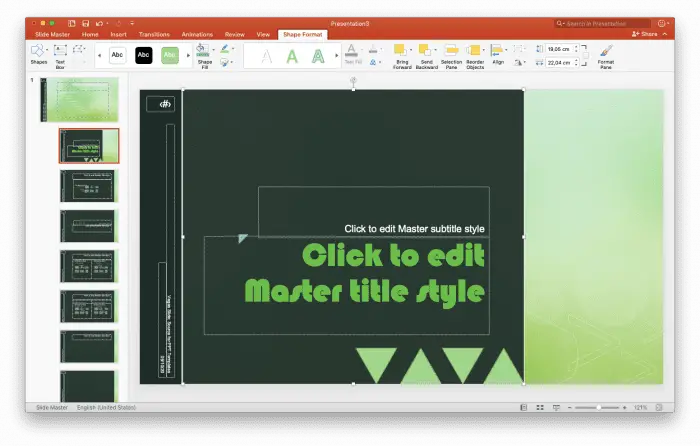
The slide master controls the default text styles and background in your presentation. Customizing it is one of the best PowerPoint tricks to quickly change multiple slides at once.
To edit your slide master:
- Select “View > Slide Master”
- Make changes like adding a logo or adjusting font sizes
- Click “Close Master View” to save changes
Modifying the slide master is especially handy for applying company branding.
Use High-Quality Photos
A picture is worth a thousand words. Stock photos make slides more visually interesting and easier to understand quickly.
When selecting images:
- Choose high-resolution photos that are clear and relevant
- Edit images to remove busy backgrounds using PowerPoint tools
- Always cite image sources to avoid copyright issues
Free stock sites like Pexels or Unsplash offer great photos.
Minimize Text and Bullet Points
Too much dense text overloads cognitive capacity. Use the “less is more” approach with concise bullet points instead of lengthy paragraphs.
Best practices include:
- 3-5 bullet points per slide
- Keywords and short phrases rather than full sentences
- Size 12-point text or larger
- Contrasting colors for text/background
Remove unnecessary words so key messages stand out.
Use Charts and Graphs
Visualizing data through charts and graphs makes trends more noticeable and memorable.
Types to consider:
- Bar charts to compare quantities
- Line graphs to show progression over time
- Pie charts to demonstrate proportions
- Scatter plots to reveal correlations
Use PowerPoint’s built-in options under the “Insert” tab.
Add Multimedia for Engagement
Videos, gifs, and audio clips break up information while keeping viewers attentive.
Multimedia to incorporate:
- Short video clips less than a minute long
- Animated gifs showing processes or transitions
- Narration or music for more emotional appeal
Upload files directly or embed content from sites like YouTube or Vimeo.
Use Transitions and Animations Judiciously
Subtle transitions and animations can guide the viewer through key points without being distracting.
Best practices include:
- 1-2 second duration for transitions/animations
- Consistent style throughout the presentation
- Simple motions like fades or wipes
- Emphasize important elements only
Avoid overusing flashy animations that detract from content.
Check Accessibility Settings
Make sure your presentation works for all audiences by enabling accessibility options.
To review and adjust settings:
- Select “File > Info” and choose “Check for Issues > Check Accessibility”
- Resolve flagged issues like missing alt text or insufficient color contrast
- Manually check by tabbing through slide order and reading aloud
Simple changes ensure those with disabilities can understand your slides.
Use Presenter View
Presenter view shows your notes and next slides while the audience only sees the current slide.
Benefits include:
- Displaying speaker notes and slide previews
- Annotating slides with a digital laser pointer
- Recording slide timings to pace your presentation
Try the view under “Slide Show > Set Up Slide Show”.
Rehearse with Slide Timings
Practice your presentation with timings to polish your delivery and pacing.
To add and view timings:
- Select “Slide Show > Rehearse Timings”
- Go through your presentation to record durations
- Observe timings in the speaker notes or slide sorter view
Rehearsing with timings also calculates your total run time.
Compress Media for Smaller File Sizes
Large file sizes slow down loading and impact performance. Compress images and videos for quicker downloads.
To optimize media:
- Use PowerPoint’s built-in compression under the “Picture Tools” or “Video Tools” tabs
- Save images as reduced-quality JPGs instead of PNGs
- Lower video resolution if quality loss isn’t noticeable
- Delete cropped portions of images
Try different compression levels to minimize size while preserving quality.
Save and Convert to Other Formats
To present, share, or edit files across devices, save your presentation in additional formats.
Common options include:
- MP4 to play as a video
- PDF for wider accessibility without PowerPoint
- PNG images to reuse individual slides
- PPTX for backward compatibility
Use the export options under the “File” menu to distribute your slides anywhere.
Back Up Your Work
Don’t lose hours of hard work to file corruption or crashes. Routinely save backups as you build your deck.
Ways to back up:
- Save an extra copy to a USB drive
- Email the file to yourself
- Upload to cloud storage like Google Drive
- Use an auto-save program for periodic backups
Save critical presentations in multiple places for redundancy.
Final Polish and Proofread
Before presenting to an audience, scrutinize every element in your slides. Confirm content accuracy, branding consistency, and visual appeal.
When reviewing:
- Check spelling, grammar, company name, logos
- Play embedded videos with sound on
- Test hyperlinks and animations
- Ensure colors and fonts align with brand style guide
Refine and enhance to make unforgettable presentations!
Conclusion
Using these next-level PowerPoint techniques will give your decks a competitive edge in any industry. From maximizing multimedia to optimizing animations, every tip amplifies engagement and impact.


