A 3D object is just like a 2D object if it wasn’t moving. That’s why you need to emphasize the audiences that the object they are seeing is three dimensional. You can do that by making the object animate.
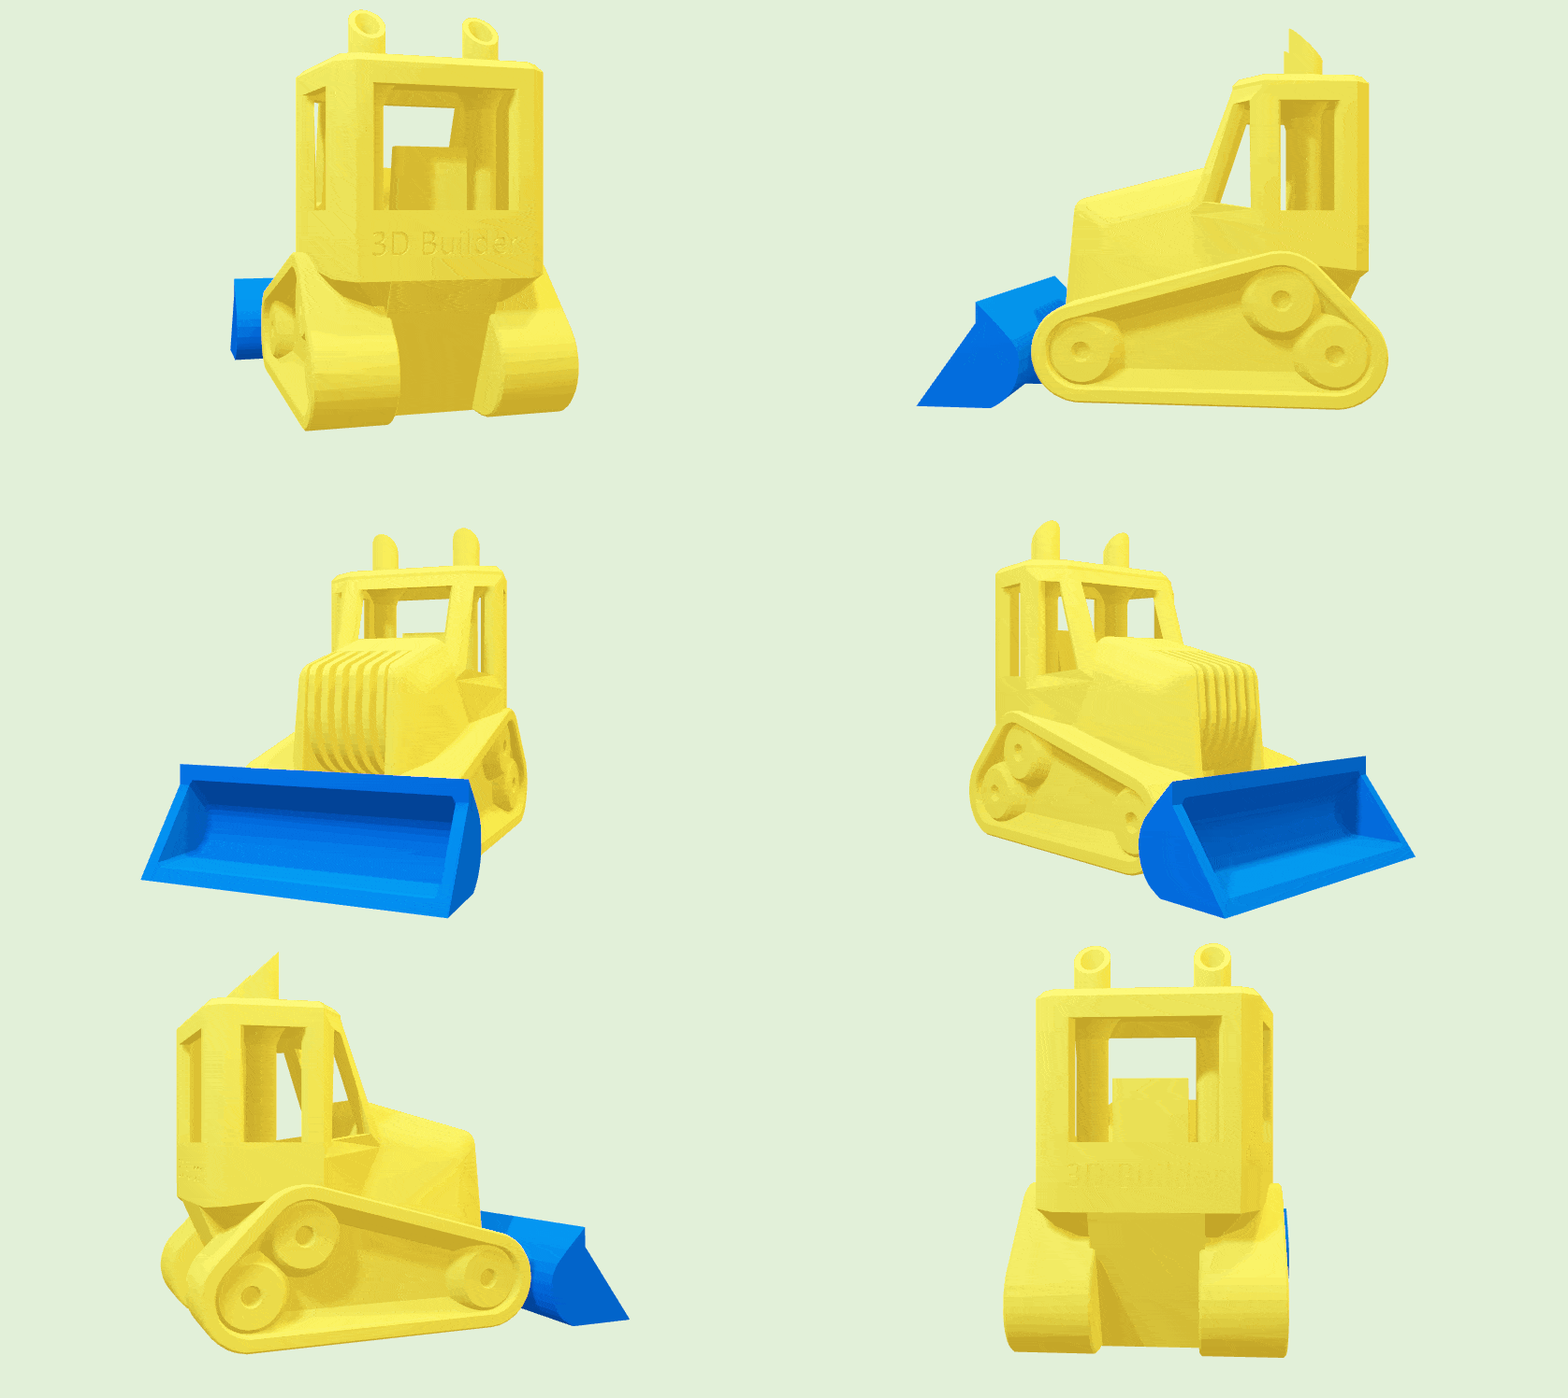
The most common animation used in 3D models is spinning/rotation mode where audiences could see the object from a different angle.
In Microsoft PowerPoint, you can make the 3D object spins indefinitely during its show. Here is how to do that.
How to make 3D in PowerPoint spins forever
In this tutorial, you will learn how to spin the 3D object in PowerPoint. It will spin forever unless you end the slide or animate different objects manually. It is highly advised to use the recent versions of PowerPoint.
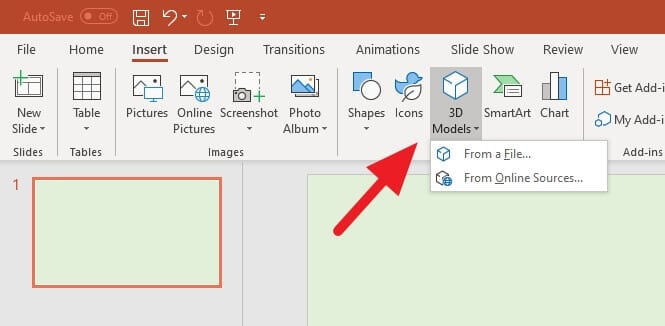
1. Go to the Insert menu, select 3D Models, and choose either From a File… or From Online Resources…
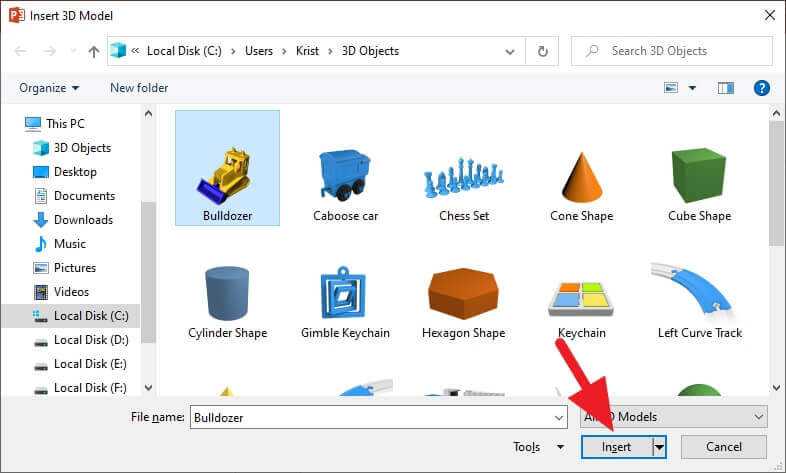
2. Select the 3D Model you want to show.
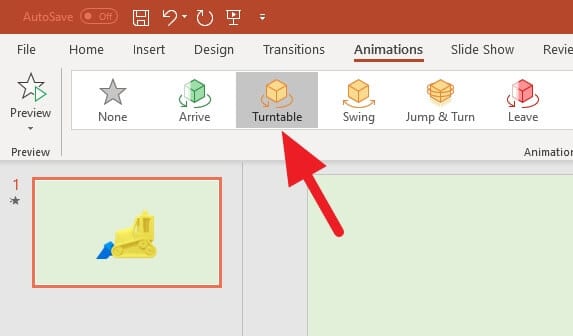
3. Head to the Animations menu and select Turntable. It will create a spinning effect on the 3D object.
4. Still in the Animations menu, click on Animation Pane. You may also set up the trigger, duration, and delay here if you wish.

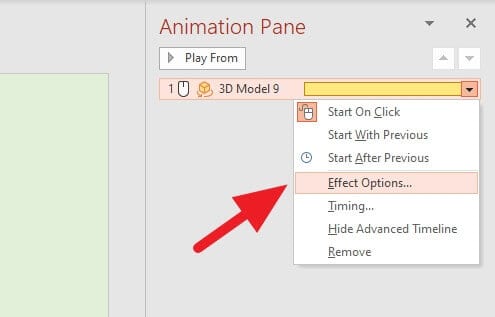
5. Click the dropdown menu of the animated object, then select Effect Options…
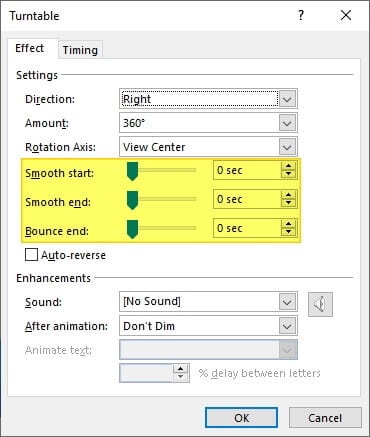
6. Set the Smooth start, Smooth end, and Bounce end to zero.
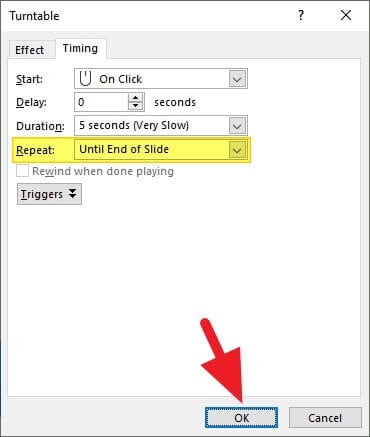
7. Go to the Timing tab, and on the Repeat section, select Until End of Slide. Finally, click OK.
8. Try to run the slide.
Make sure you choose the trigger and delay correctly because those are the most common factors that prevent the animation from running. Meanwhile, the duration represents how long it would take to finish one full rotation.
Limitations to Be Aware Of
PowerPoint’s 3D effects are best utilized in the desktop versions of PowerPoint, like Office 365, 2019, or 2016. The 3D animation features may not fully work when presenting in PowerPoint online or PowerPoint mobile apps.
Also, you cannot freely rotate 3D models during the slideshow by dragging with your mouse. Any spinning animations need to be preset before starting the slideshow.
FAQs
How do you make a 3D model spin in PowerPoint?
To make a 3D model spin in PowerPoint, insert and position your 3D model. Then, on the Animations tab, select one of the 3D animation effects. Choose the animation effect you want and select Effect Options to open the menu.
Here, you can choose properties related to the Direction, Intensity, and Rotation Axis of movement. Preview the effect to see it in action.
How do you make a spinning effect in PowerPoint?
To create a spinning effect in PowerPoint, use the Spin animation. This animation rotates an object around its center point. If you want the object to spin around a different point, you can change the center point by grouping the object with a larger, invisible shape centered on the desired rotation point. Apply the Spin animation to the group, and the entire group will rotate around the group center point.
How do you make a 3D spiral in PowerPoint?
Creating a 3D spiral in PowerPoint involves drawing and merging semi-circular arcs. Start by drawing a semi-circular arc using the Arc tool in the Auto Shapes menu. Make several copies of the arc, each with a different diameter. Align all the arcs in the center to create a spiral diagram. You can then group alternative arcs and flip them vertically to create a 3D effect.
How do you morph a 3D rotation in PowerPoint?
To morph a 3D rotation in PowerPoint, create a 3D object using the 3D bevel and rotation functions. Duplicate the slide with the 3D object and rotate the object more on the second slide using the 3D rotation options. Set the slide transition to Morph. When you switch between the slides, your 3D object will rotate between the two states
Alright. I hope that helps!
If there’s anything you want to ask, please feel free to write it down on the comment below. Thank you.
