While it’s possible to change the PowerPoint slide dimension globally, it seems to be almost impossible to change the dimension of an individual slide. Fortunately, I found a simple trick that could create an illusion where each slide appears to have a different size.
Frankly, this is not a perfect solution but some of you may found it to fit to your presentation.
The trick that I’m talking about is by adding black bars to the top & bottom or the left & right sides of a slide — a trick that used by movie producers to make their movies fit into a wider screen. Your audiences won’t be able to tell whether it was black bars or literally different aspects ratio.

So, with all been said, let’s go into the tutorial.
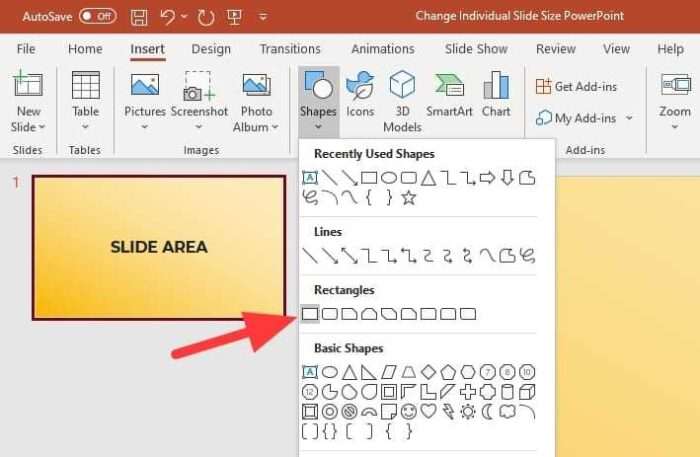
1. Launch PowerPoint, click Insert > Shapes > Rectangle.

2. Create a simple rectangle using the mouse.

3. Then go to Shape Format, set Shape Fill and Shape Outline to be black.

4. Now, resize and relocate the black rectangle to fit to one side. In this instance, I want to place it to the top side.

5. Copy the rectangle (Ctrl+C).

6. Paste and relocate the rectangle to the opposite side.

If you want to change the ‘dimension’, simply by adjusting the black bars thickness and location.
Also, make sure your presentation content is not overlapping with the black bars. Some changes may be necessary to ensure the content looks perfect under the new dimension.


thanks a lot for the great tip