Pictures can be a massive burden on PowerPoint’s slide performance. Not only that, it often responsible for the ballooning size of PPT documents. This, of course, an unfortunate problem for devices with limited storage capacity.
Luckily, we know that by compressing pictures we can get a smaller file size while roughly still maintaining its visual quality. In newer PowerPoint releases, we have that feature built-in the program.
Let’s check out on how you can take advantage of the PowerPoint’s compression system to reduce image sizes in an instant!
1. Run the PowerPoint document which pictures you want to compress.
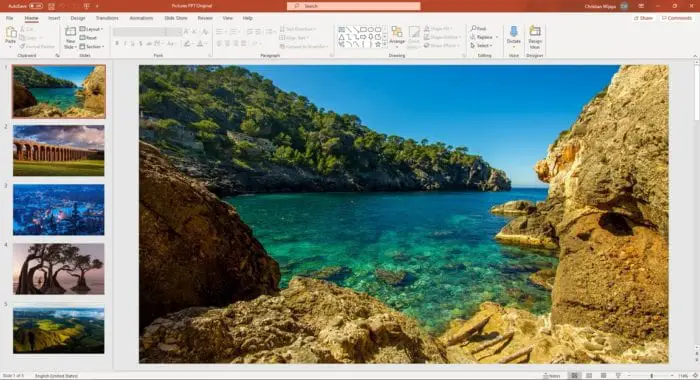
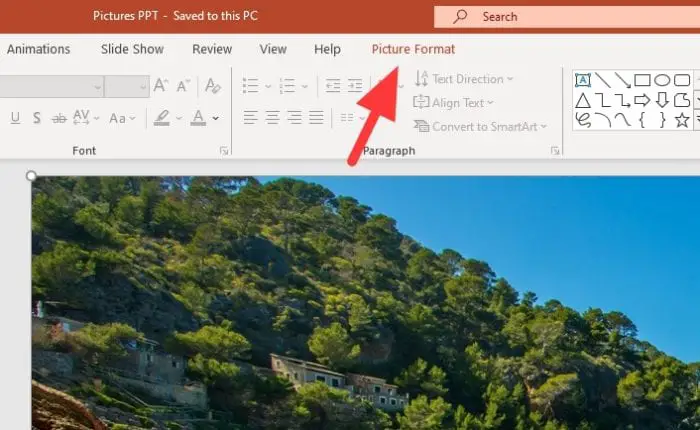
2. Click on any picture, then go to Picture Format.
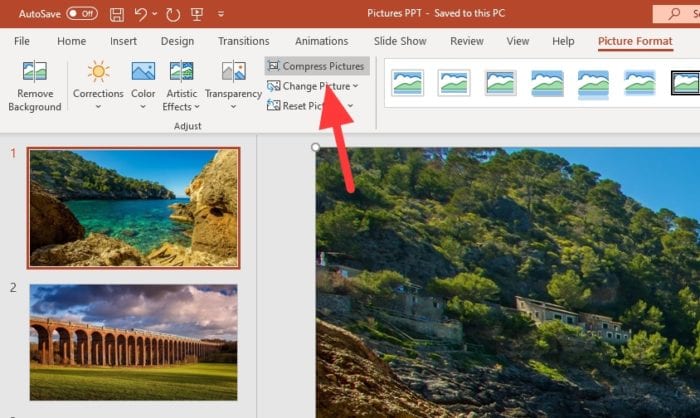
3. Now click Compress Pictures.
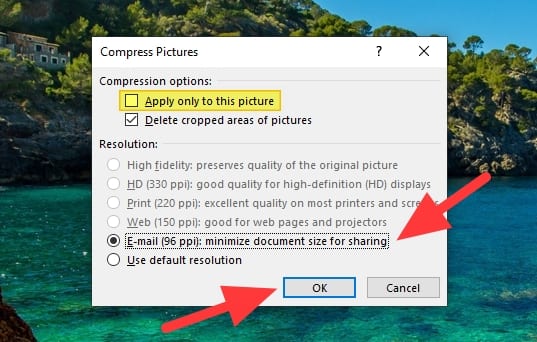
4. Select the E-mail (96 ppi) for the maximum compression, and click OK. If you want to apply it on all pictures, untick the Apply only to this picture box.
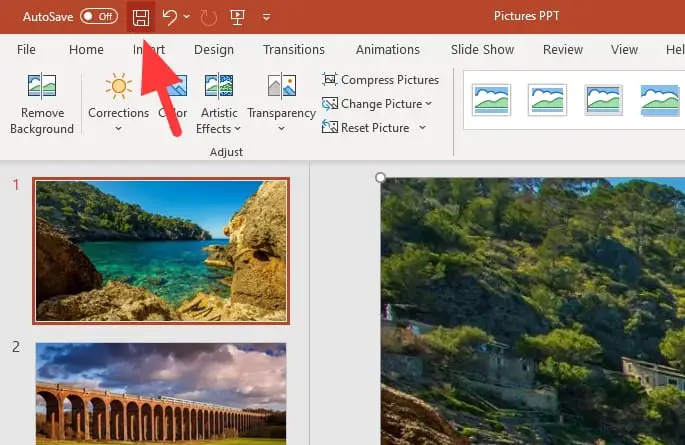
5. The pictures have been compressed and you can Save the document. I suggest you Save As with a new name to retain the original document, just in case you need it later.
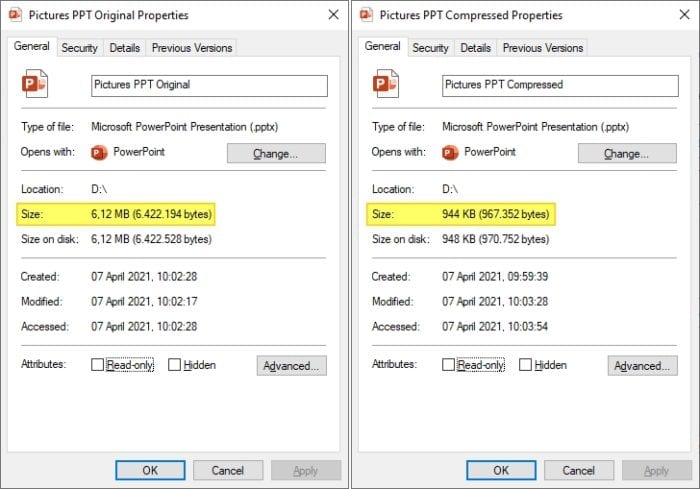
From the sample document above, I managed to shrink the document full of pictures from 6,12 MB to just less than 1 MB. All of that with extremely minimum to no visual downgrade after the compression.
Another trick to compress pictures is by resizing them to appropriate dimensions before inserting them into a document. Also, an online compression tool like TinyPNG could reduce image sizes significantly without affecting quality.

