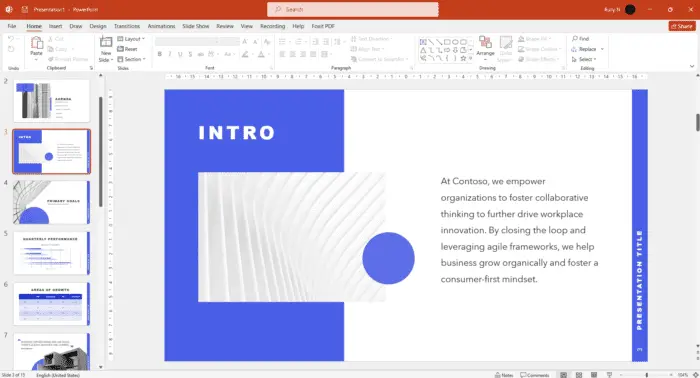
A slide master is an essential tool in PowerPoint that allows you to customize the design and layout of all slides in your presentation. Using a slide master helps ensure visual consistency, saves time, and gives your presentation a polished, professional look.
In this step-by-step guide, you’ll learn how to create a custom slide master from scratch in PowerPoint.
Step 1: Open the Slide Master View
The first step is to access the Slide Master view. Here’s how:
- Open your PowerPoint presentation
- Click on the “View” tab
- Click on “Slide Master” – this will open the Slide Master view
You’ll see a slide master thumbnail at the top, with layout thumbnails below it. The slide master controls the design for all slides, while the layouts control the placement of content.
Step 2: Edit the Slide Master
With the Slide Master view open, click on the slide master thumbnail at the top. This is the main slide that controls the overall design.
Customize the master slide however you like – change the background, colors, fonts, add logos or graphics, etc. These changes will apply to all slides using this slide master.
Some elements you may want to edit:
- Background color/design
- Font styles and colors
- Company logo placement
- Header and footer elements
Keep in mind less is more – don’t overcrowd the slide master.
Step 3: Customize Layouts
Below the slide master are layout thumbnails. Layouts control the positioning of content placeholders, which later get filled with real content.
Some presentations only need one layout, while others may need several – title slides, section headers, bulleted lists, etc.
To edit a layout:
- Click on the layout thumbnail
- Customize elements like placeholder sizes, positions, colors
- Repeat for additional layouts as needed
Tip: Give your custom layouts clear names so they are easy to identify later.
Step 4: Add Custom Placeholders
You can also add completely custom placeholders to your slide master layouts, beyond what PowerPoint includes by default.
To add a custom placeholder:
- Select the layout to add it to
- On the Slide Master tab, click “Insert Placeholder”
- Choose what type of placeholder you need – text, picture, etc.
- Resize and position it as desired
Custom placeholders are great for elements you want on every slide, like your logo.
Step 5: Save the Slide Master Theme
When you have your slide master and layouts looking just right, you’ll want to save it as a custom theme for reuse.
Here’s how to save your slide master as a theme:
- On the Slide Master tab, click “Close Master View”
- On the Design tab, click “Themes”, then “Save Current Theme”
- Give your theme a name and click Save
Now whenever you create new presentations, your saved slide master theme will be available to quickly apply.
Recap and Tips
Using slide masters may take some initial setup, but saves vast amounts of time down the road. The key steps are:
- Open Slide Master view
- Customize slide master and layouts
- Add custom placeholders if needed
- Save slide master as custom theme
A few extra tips:
- Make minor tweaks to your slide master periodically to keep it looking updated
- Create multiple slide masters for different purposes or sections
- Always have a simple, easy-to-edit slide master available
With a professionally designed slide master, your PowerPoint presentations will stand out and leave a lasting impression!
Citations:
[1] https://support.microsoft.com/en-us/topic/create-a-slide-master-in-powerpoint-19cf3e28-707a-5059-134e-29513e6f6161
[2] https://www.presentationload.com/blog/powerpoint-slide-masters/
[3] https://www.brandwares.com/bestpractices/2021/01/multiple-slide-masters-beware-best-practices/
[4] https://www.youtube.com/watch?v=qxvIUhFOdrs
[5] https://strategy-compass.com/en/powerpoint-usage/
[6] https://support.microsoft.com/en-au/office/video-create-a-new-slide-master-and-layouts-a42fc660-bb28-44a2-b988-29181e6c7fe2
[7] https://support.microsoft.com/en-us/office/what-is-a-slide-master-b9abb2a0-7aef-4257-a14e-4329c904da54
[8] https://bootcamp.uxdesign.cc/expert-secrets-to-building-pro-level-powerpoint-templates-c50140f5027b?gi=654936a46f51
[9] https://www.youtube.com/watch?v=w6UCNXZ-KiI
[10] https://answers.microsoft.com/en-us/msoffice/forum/all/how-does-powerpoint-know-which-layout-is-bound-to/17ab4a52-1d49-4a6a-a922-a056e8eb896a
[11] https://support.microsoft.com/en-us/office/customize-a-slide-master-036d317b-3251-4237-8ddc-22f4668e2b56
[12] https://www.indeed.com/career-advice/career-development/what-is-slide-master-in-powerpoint
[13] https://alum.mit.edu/sites/default/files/2018-06/POWERPOINT%20BEST%20PRACTICES_1.pdf
[14] https://zebrabi.com/guide/how-to-use-slide-master-in-powerpoint/
[15] https://superuser.com/questions/1375727/using-an-existing-slide-to-create-master-slide-views
[16] https://ethos3.com/pros-and-cons-of-powerpoint-master-slides/
[17] https://www.youtube.com/watch?v=hgjQRKJ_kOA
[18] https://thesoftwarepro.com/powerpoint-slide-master/
[19] https://answers.microsoft.com/en-us/msoffice/forum/all/existing-ppt-slide-deck-to-convert-to-a-master/f28c89e3-49e3-43f4-85de-2a7815bca1d9
[20] https://edu.gcfglobal.org/en/powerpoint/slide-master-view/1/
[21] https://www.youtube.com/watch?v=kHRc-3rMCg4
[22] https://24slides.com/presentbetter/master-slides-101-how-to-create-and-use-master-slides-in-powerpoint
[23] https://zebrabi.com/guide/how-to-use-master-slides-in-powerpoint/
[24] https://support.microsoft.com/en-au/office/video-use-slide-masters-to-customize-a-presentation-055c0629-bf35-426a-bd19-5f0780fbc9af
[25] https://www.youtube.com/watch?v=QiVSIvB1xis


