Unlike Microsoft Word which has a watermark feature built in natively, creating a watermark on PowerPoint is a little tricky, at least if you don’t know how to do it correctly.
Sure, you may add a text box containing the word you needed such as DRAFT, CONFIDENTIAL, INTERNAL, URGENT, etc but it would be gruesome work to copy and paste on each slide, especially in a PowerPoint file with a massive number of slides. Luckily, there is a better and faster way to do it.
In this guide, you will learn how to create a watermark text in all PowerPoint slides (almost instantly).
1. Launch your PowerPoint document.

2. Go to View > Slide Master.

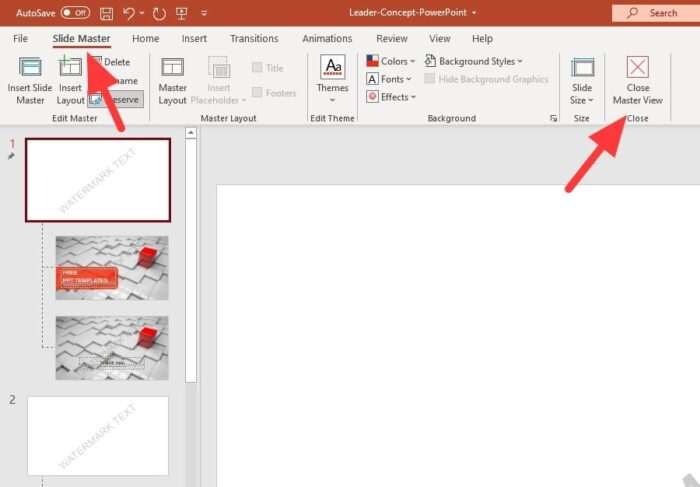
3. The slide list will turn into something similar to this. But don’t worry, it’s just temporary.

4. Now click on a master slide (the one with blank content) and go to Insert > Text Box.

5. Write the watermark text in the Text Box. You may also change its orientation, position, font type, size, and color.

6. To ensure content visibility, right-click on the text box, select Format Shape…

7. Then go to Text Options, and set the Transparency setting.

8. After all the master slides watermarked, head to Slide Master and hit Close Master View.

9. You would see all slides have a watermark in the background.

The beauty of this method is the watermark is positioned in the background and isolated from further editing. That way it prevents any accidental touch which will keep the watermark intact, unless if you enable the master slide view again.
I also want to emphasize again that the watermark is in the background, so it’s still possible to cover it with another layer of content, such as shape, image, or even a text box. But in general cases, it should be relatively visible and readable.


