There are many ways you can use to make an image in a presentation slide look more aesthetic and attractive. Other than color corrections, shadow, and 3D option, you can create a reflection effect on the image.
This effect is known as a specular reflection which mostly appears on an object where there’s clear water beneath it. You can create such effect easily with Microsoft PowerPoint.
The recent versions of PowerPoint may have better reflection configurations, but the basic configurations should be available on every PowerPoint versions being used today.
Create a reflection on an image in PowerPoint
In the guide below, you will learn how to add a specular reflection effect on PowerPoint with ease. The effect will appear at the bottom of the image no matter what orientation you choose. Here is how to do that.
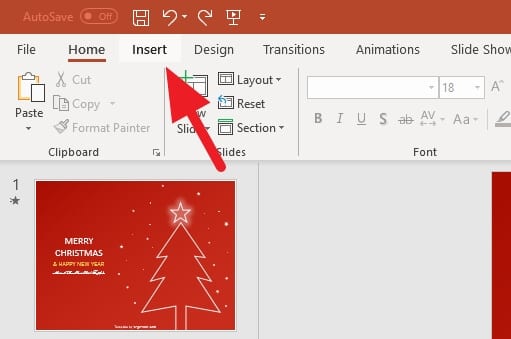
1. Go to the Insert menu.
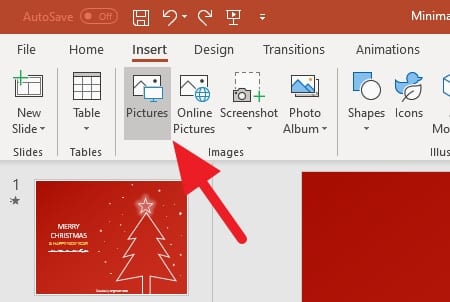
2. Click on Pictures.
3. Select the image you want to give a reflection effect, then click Insert. You can also select multiple images if you wish.

4. Right-click on the image, and select Format Picture…

5. Click on Reflection on the right panel.
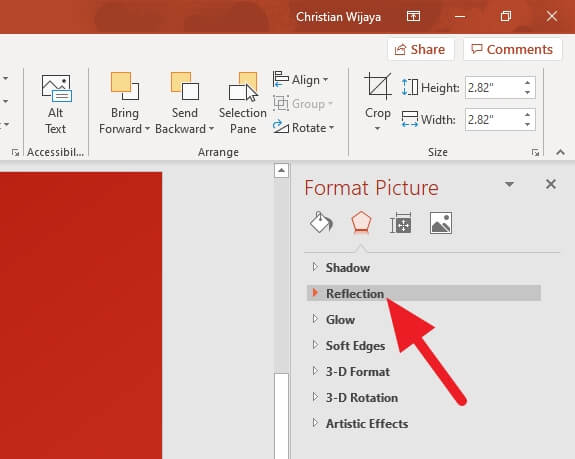
6. Select the reflection Presets you want. You can modify its value thereafter.

7. Now, the reflection effect has created!

8. You can add the 3-D Rotation effect for further improvement.
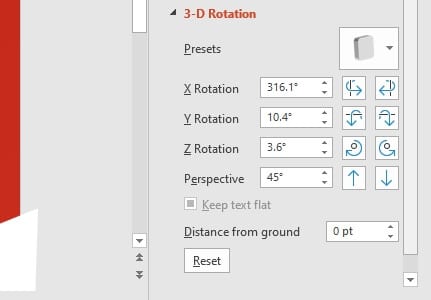
9. The result may be more beautiful!

The PowerPoint template used on the screenshots above is Animated Minimal Line Christmas Tree. You can use this template for free.
Very easy, right?
Feel free to change reflection values, such as Transparency, Size, Blur, and Distance according to your needs. The more relevant your settings, the more beautiful it looks. Happy editing!
FAQs
How do I add a reflection to an image in PowerPoint?
To add a reflection to an image in PowerPoint, first insert the image using the Insert menu. Then, right-click on the image and select Format Picture. In the right panel, click on Reflection and select the reflection Presets you want. You can modify its value thereafter.
How to apply the first reflection picture effect in PowerPoint?
To apply the first reflection picture effect, select the image and navigate to Picture Tools > Format > Picture Effects. From the dropdown, select Reflection and choose the first option from the list of presets
How do you reflect an object in PowerPoint?
To reflect an object in PowerPoint, select the object you want to mirror. Then, go to the Format tab, select Rotate, and choose either Flip Horizontal or Flip Vertical based on your requirement.
How to do mirror effect in PowerPoint?
To create a mirror effect in PowerPoint, select the image you want to mirror. Click on the Format tab, select Rotate, and choose either Flip Horizontal or Flip Vertical. This will create a mirrored image, which is simply a reflection of the original image.


