Google Slides is a popular free presentation software that makes it easy to create, share, and collaborate on presentations online. With its user-friendly interface and powerful features, Google Slides has become the go-to choice for many presenters.
In this article, we will cover the 10 best Google Slides tools and features to create professional presentations, along with step-by-step instructions on how to use them.
1. Themes and Layouts
Themes and layouts allow you to quickly style your presentation. Google Slides offers several pre-designed themes to choose from, making it easy to find one that matches your brand.
How to use:
- Open your presentation in Google Slides
- Click on the Themes icon in the toolbar
- Browse through the different themes and click on one to preview it
- Select the theme you want to use
You can also customize the theme colors, fonts, and background by clicking Customize theme after selecting your theme.
2. Animations
Animations bring your presentations to life by adding movement and visual interest to text and objects.
How to add animations:
- Select the text or object you want to animate
- Click the Insert tab and select Animation
- Choose an animation effect like fade in, fly in, float in etc.
- Customize options like duration, start trigger etc.
- Preview the animation
3. Transitions
Transitions control how your slides move from one to the next during your presentation. Using interesting transitions keeps your audience engaged.
How to add transitions:
- Click on the slide after which you want to add a transition
- Select the Transitions tab
- Browse through transition effects like fade, push, wipe, split etc.
- Customize options like duration and direction
- Preview how the transition looks
4. Presenter View
The presenter view displays speaker notes and a timer for the presenter while the audience sees only the slide content on the full screen.
How to use presenter view:
- Open your Google Slides presentation
- Click Slideshow at the top
- Select Presenter View from the drop down
- Use the notes section and timer while presenting through your laptop screen, even as the slides are displayed in full screen for the audience.
5. Audience Q&A
The built-in Q&A feature allows your audience to ask questions during your presentation which you can answer in real time.
How to enable audience Q&A:
- Open the presentation and start the slideshow
- Click the Options icon ⋮ at the bottom left
- Check the box for Audience questions
- Share the unique presentation link with your attendees
- Attendees can ask questions which you can answer during the presentation
6. Present to a Google Meet Call
You can directly present your slides to a Google Meet video call from within Google Slides, instead of screen sharing your entire desktop.
How to present through Google Meet call:
- Start or join a Google Meet call
- Open your Google Slides presentation
- Click on Present to a Google Meet call option at the top right
- Select the Google Meet call you want to present to from the list
- Your slides will open in full screen for call participants
7. Link to Google Sheets
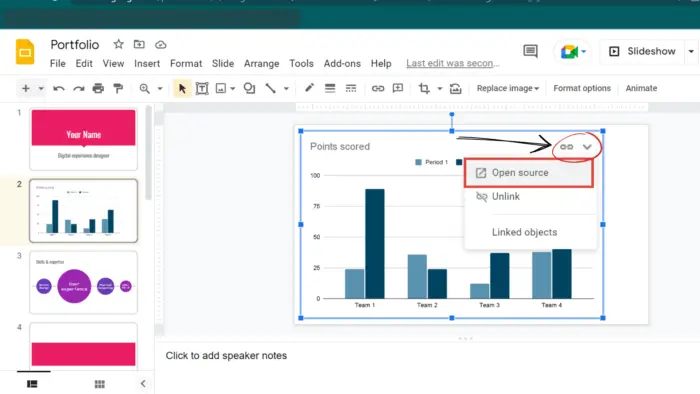
You can insert live charts and graphs from Google Sheets by linking your presentation to Sheets spreadsheets. The charts auto-update when the source data changes.
How to link Google Slides to Sheets:
- Create your charts in Google Sheets
- In Google Slides, click Insert > Sheets chart
- Select the spreadsheet with the chart you want
- Customize and insert the linked chart
8. Export and Print
You can download your Google Slides presentation in different file formats or print handouts with multiple slide thumbnails per page.
How to export and print:
Export:
- Go to File > Download
- Select export format: PDF, PPTX, PNG images
- Choose print layout and quality
- Click Download
Print:
- Navigate to File > Print
- Select the print layout: notes, handouts etc.
- Choose paper size, orientation, page scaling
- Click Print
9. Offline Access
You can view, present, and edit your Google Slides presentations offline by installing the Google Slides offline Chrome extension. Your changes sync when you’re back online.
How to enable offline access:
- Install the Google Docs Offline extension in Chrome
- Turn on offline access for Google Drive in Chrome
- Open your Google Slides presentation
- Make your changes in offline mode
- Changes sync automatically when online
10. Third-Party Add-ons
Add-ons extend Google Slides capabilities with new features. Useful add-ons let you insert icons, graphics, charts and more.
How to use add-ons:
- Click the Add-ons menu
- Search the add-on store for a specific tool
- Install the add-on you need
- Access the add-on functionality from the Add-ons menu
Some popular add-ons are Lucidchart Diagrams, Unsplash Images, Slides Toolbox, and more.
So those were the top 10 best Google Slides tools and features to create stunning and impactful presentations! Each of these built-in options and third-party extensions help you save time, add visual interest, and keep your audience engaged from start to finish.
Try out these Google Slides presentation tools today to take your slides to the next level!


