I know how frustrating it can be to spend hours creating a presentation, only to have it fall flat when it comes to design. Thankfully, Google Slides has a tool that can help with that. The Color Picker feature allows you to easily select and apply colors to your slides, giving your presentation a cohesive and polished look.
In this article, I will guide you through how to use the Color Picker on Google Slides and offer some tips on color selection to make your presentation more visually appealing. By the end of this article, you will have the knowledge and tools to elevate your presentations and impress your audience.
1. Go to Google Slides and open your presentation document.

2. Navigate to the slide you want to edit.

3. Click on the element on which the color can be changed. In this example, I’m going to click a regular text box.

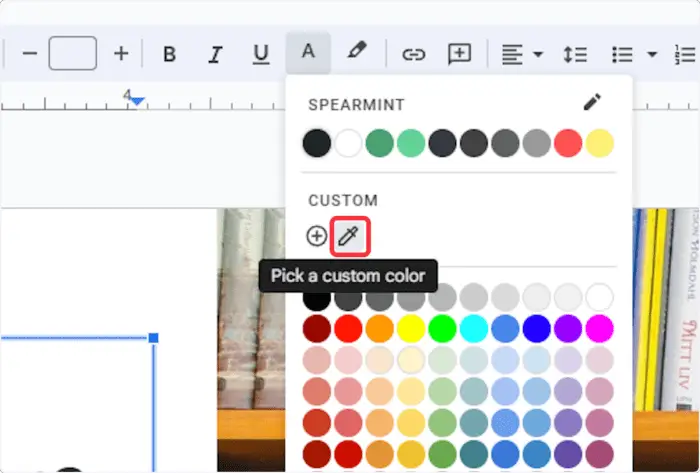
4. Now, click on the Text color.

5. Click on Pick a custom color. This is basically an eye-dropper tool.

6. Use the cursor and pick a color you want from the screen.

7. Now, go back to the Text color menu again.

8. Your new color has been added.

9. You can use the color for your presentation.

10. Additionally, the color picker tool is also available for shapes, graphics, lines, and many more. This is an amazing tool to make your slides pretty and consistent.


