Sometimes, presentations can last for minutes or even hours. This frequently occurs because you have to adapt the presentation to various requirements. For someone searching for certain pieces of information, navigating a presentation like this can be intimidating. Choice boards can help with that.
You can include interactive elements in your presentations using Google Slides choice boards. A presentation using choice boards gives the audience several ways to traverse the same presentation.
Let’s hop over to Google Slides to look at on how to make one.
1. Go to Insert and select Table. Then choose the number of columns and rows that you want in your table.

2. Adjust the table size by dragging it down.

3. Put a title above that table using Text Box. Go to Insert, and select the Text box.

4. Choose an interesting font, and adjust the font size so it’s a little bit bigger.

5. Then start entering the names that you want to include in each box. After you’ve entered every source name, highlight all of the text, and click Center align.

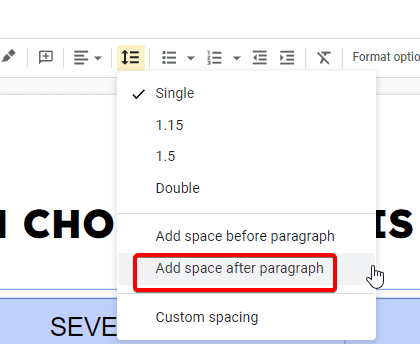
6. With the text still highlighted, go to Line spacing and choose Add space after paragraph to make sure that there’s some space between the text and the images that you’re about to add.
7. Now you’re going to bring some images in. Go to Insert, choose Image, and Upload from my computer.

8. Select the image and Open.

9. Next you’ll need to make the text into hyperlinks. To make the text into a hyperlink, highlight it, right-click, and choose Link.
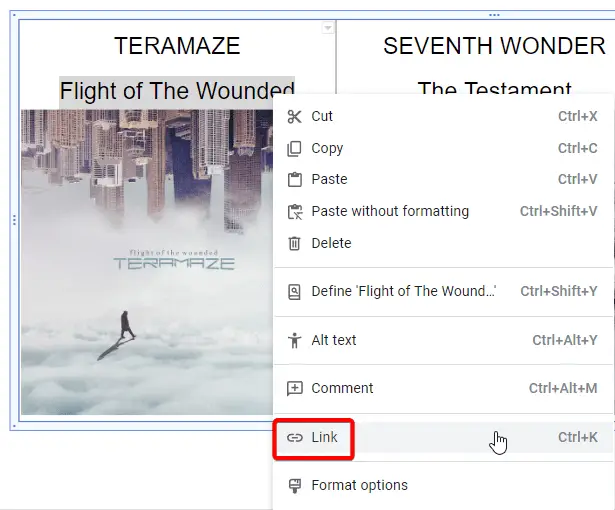
10. Paste the URL for the website that you want to direct the reader to right in and click Apply

11. To make an image into a hyperlink, select it, go to Insert, and select Link.
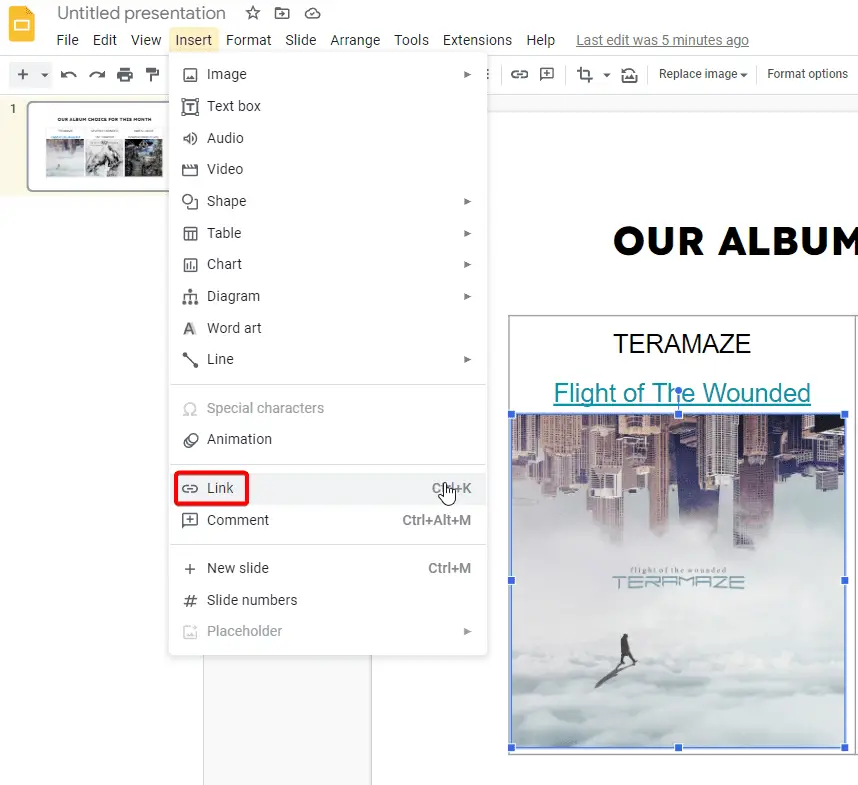
12. Then paste the URL, and click Apply.

You can see that it’s pretty easy to make a choice board with hyperlinks to websites using Google Slides.
