Dotted or dashed lines can be useful on some presentation explanations which will distinguish the plain line type. And like any other Office apps, you can create dotted or dashed lines in PowerPoint by yourself.
The process is quite easy and essentially similar to other Office apps like Microsoft Word.
The following guide is based on Microsoft PowerPoint 365 version 1902. Other versions might have a slightly different look and feel. However, the step-by-step process should be the same.
How to create a dashed line in PowerPoint
In this guide, I will explain to you how to make a dashed/dotted line in PowerPoint. You also have various choices regarding the type of line you’d like to use, not to mention its thickness and color.
1. Go to the Insert tab menu.

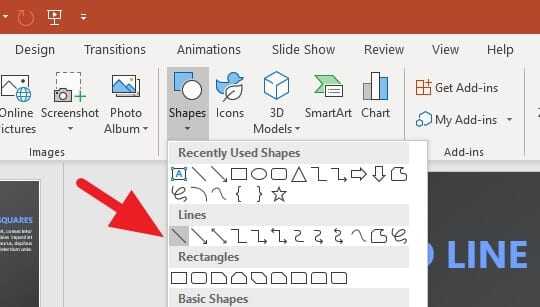
2. Click on Shapes and select Line. You can use other line types inside the Lines category.

3. Now, draw a line using a pointer. Press SHIFT while drawing to make a straight line.

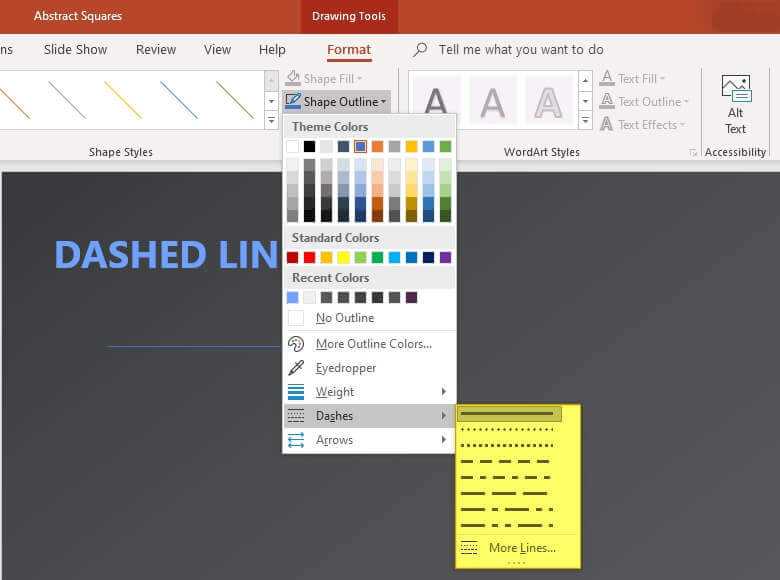
4. Under the Format menu, click on Shape Outline > Dashes and select which type of lines you want to use.

5. Finally, the dashed line has been created!

The screenshot references in this tutorial are based on Abstract Squares PowerPoint Template which you can download and use for free.
Essentially, all the customization options for a line are located inside the Shape Outline menu as I mentioned in the fourth step. You can change the color, weight, and even the arrow shape of the line.
This method also works with other shapes such as rectangle, circle, triangle, diamond, and more — basically all shapes you can find in PowerPoint.
Thank you for reading! I hope your presentation goes well!


I am looking for a dashed arrow not line