Changing the border color of tables in PowerPoint can be a simple yet effective way to enhance the visual appeal of your presentations. A colored border of a table may gain more attention from your audience. It’s also an opportunity to highlight data that you want the audience to remember.
In this blog post, we will guide you through the step-by-step process of changing table border colors in PowerPoint. Whether you’re a seasoned presenter or new to PowerPoint, this tutorial is designed to help you easily customize your tables and create impressive slides.
Table of Contents
How to add and change a table border color
Though this may not be obvious, tables in PowerPoint are essentially borderless. In order to change the “border” color, we need to add a border first. Only after that can we change the color. Here’s the full guide for that.
1. Open a PowerPoint document. Go to the slide/table you want to edit.

2. Select the table you want to edit. Make sure all cells are selected.
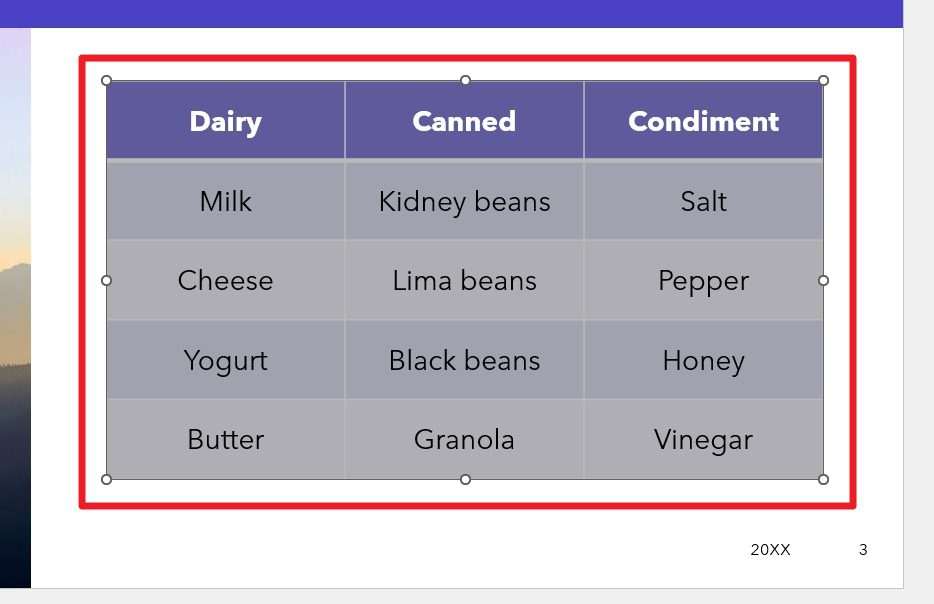
3. Go to the Table Design menu at the top bar.

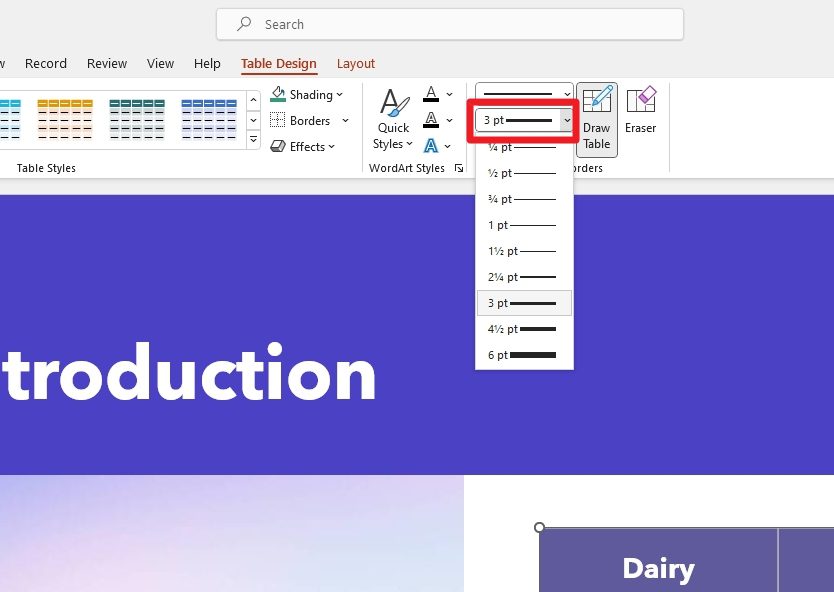
4. On the Pen Weight, select the border width you desire.
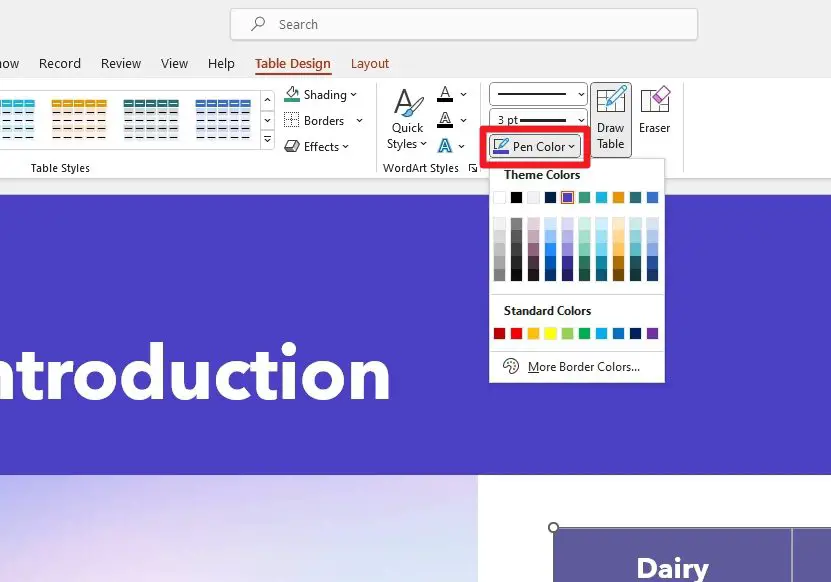
5. Then on Pen Color, select the color for the table border.
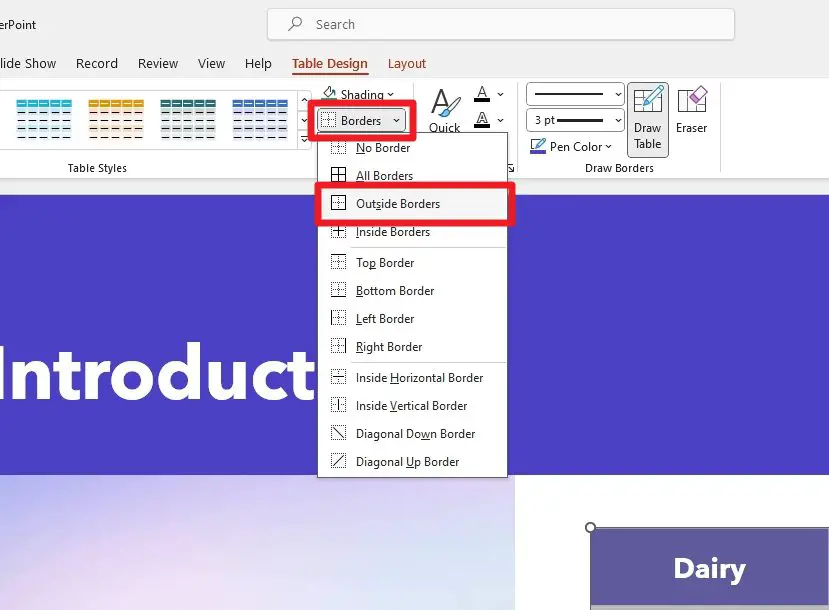
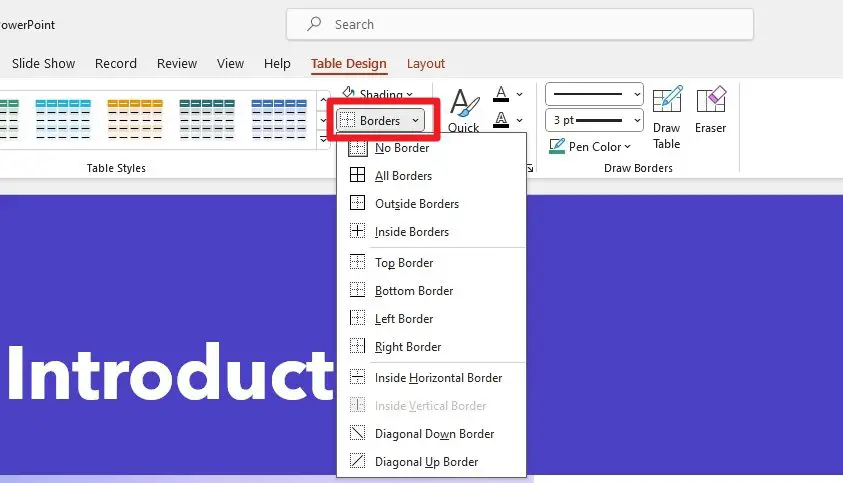
6. Next, click Borders and select Outside Borders.
7. The table now has a border and a “new” color. Notice that the table has a vibrant, thick border on its surroundings.

But you might ask: Then how do we change the table border color later?
Admittedly, the process of adding a border to a table in PowerPoint is a bit counterintuitive. We choose the color before adding the border. But to change the border color later, select the table, go to Table Design, change Pen Color, click Borders, and then finally select Outside Borders.
Basically, repeat the process from steps #2 to #6 above.
How to change the cell border color
If you want to change an individual (or multiple) cell border color to make it stand out from the rest, follow these steps.
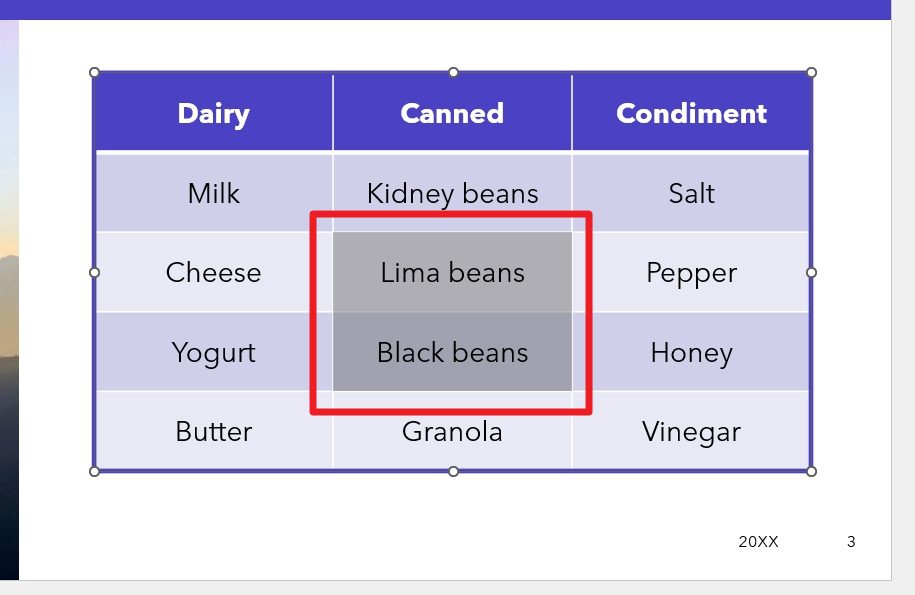
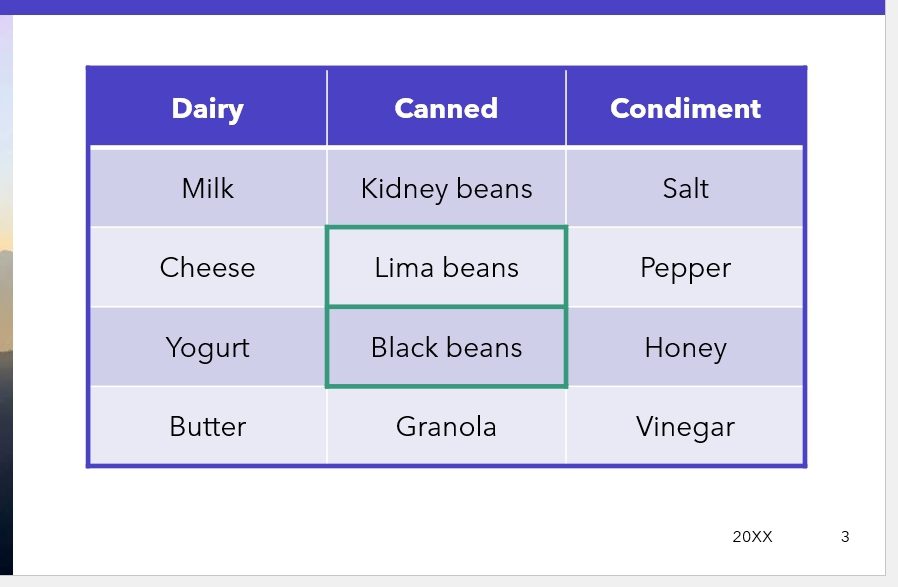
1. First, select the cell you want to add a border. In this example, I’m going to select two cells.
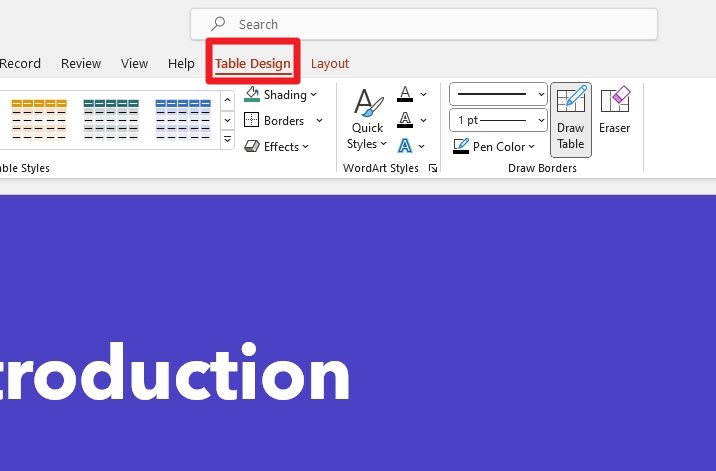
2. Next, go to the Table Design menu.
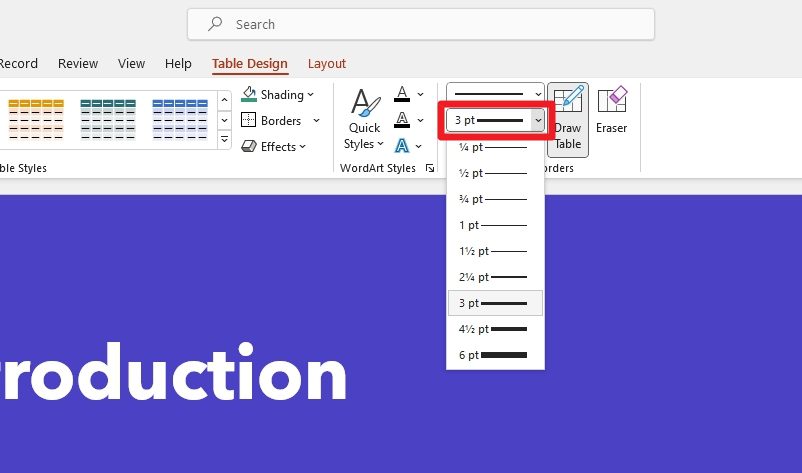
3. On the Pen Weight menu, select the thickness of the border.
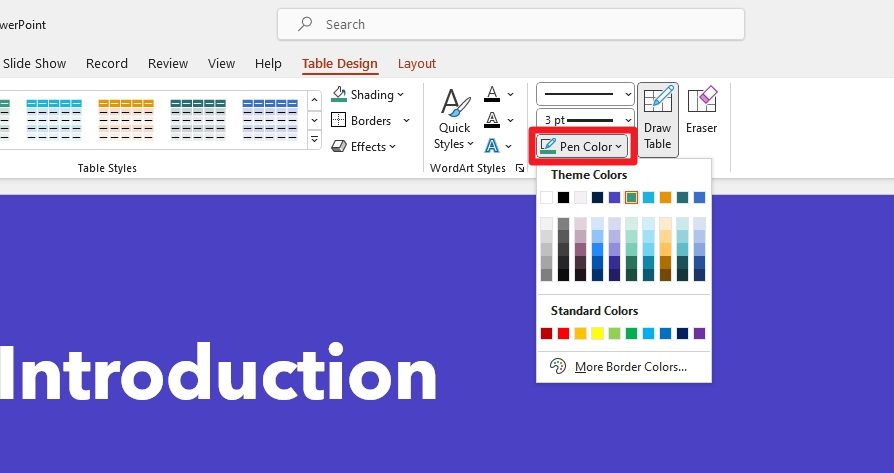
4. Then on the Pen Color menu, select the color for the border.
5. After that, go to Borders and select either All Borders or Outside Borders.
6. You have added a border to the cell(s) and changed the border color.
This article only covers one type of table customization in PowerPoint. There are a ton more visual elements that you can edit, which I can’t cover here but will in the next articles.
Frequently Asked Questions
Here, I have answered some related questions about this topic. You may find them helpful.
How do I change the color of the table border in slides?
To change the color of the table border in a PowerPoint slide, select all the cells of the table, click Table Design, click Pen Color to select a new color, then click Borders, and finally, select Outside Borders.
How do I change the border outline in PowerPoint?
To change the border outline in PowerPoint, click the shape or photo you want to edit, then go to the Shape Format menu. From the Shape Outline menu, you can change the color, border weight, and other effects.
Can you apply borders to a table and change its color?
Yes, you can apply borders to a table in PowerPoint while also changing its color. First, select all the cells of the table, go to the Table Design menu, click Pen Color, select a color for the table, go to Borders, and then click Outside Borders.
How do you color code a table in PowerPoint?
To color code a table in PowerPoint, select the table by clicking on it, go to the Table Design menu, under the Table Styles section, and hover your cursor over each style to preview it. One you have found what you want, click on a style to apply it to your table.


