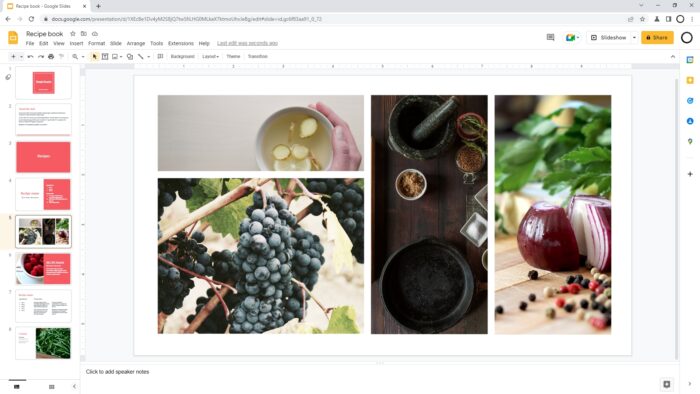
Grouping elements in Google Slides is an incredibly useful feature that allows you to easily organize and manage the design of your slides. By grouping objects like images, shapes, charts, and text boxes, you can move, resize, arrange, and format them as a single unit.
This makes editing the elements on your slides much simpler and faster. Whether you want to quickly reposition a complex graphic or apply the same effect to several objects, grouping is the way to go.
In this blog post, we’ll cover everything you need to know about grouping elements in Google Slides, including step-by-step instructions for mobile and PC.
Benefits of Grouping Elements in Google Slides
Here are some of the key advantages of using the grouping feature:
- Move multiple objects simultaneously instead of individually
- Resize a group of objects while maintaining position/proportions
- Change opacity, apply filters, or add other effects to several elements at once
- Rearrange the layering of overlapping objects
- Organize complex designs for easier editing
- Align or distribute grouped objects evenly on a slide
- Copy/paste groups of elements between slides or presentations
As you can see, mastering the group function can save you a ton of time and effort while designing your slides!
How to Group Elements on Mobile
The process of grouping objects in the Google Slides mobile app is quick and intuitive:
Step 1: Select the Elements
Tap and hold the first object you want in the group, then tap additional objects to add them to your selection. The selection box will expand as you choose more elements.
Step 2: Group the Elements
Once your desired objects are selected, tap the “Group objects” icon at the top of the screen (it looks like overlapping squares). The elements are now grouped on that slide.
Step 3: Ungroup (Optional)
If you need to edit individual objects again later, you can ungroup them easily:
Tap the grouped elements, then press the “Ungroup objects” icon at the top of the screen (it looks like separated squares). The objects can now be edited individually again.
And that’s all there is to it! The process works the same whether you’re on an Android phone, iPhone, iPad or other mobile devices.
How to Group Elements on a PC
Grouping objects in the desktop version of Google Slides only takes a few clicks:
Step 1: Select the Elements
Click on the first object you want to group, then hold the “Shift” key while selecting additional objects. You can also click-drag a box around all your desired elements.
Step 2: Group the Elements
With your objects selected, right-click on the group and choose “Group” from the context menu. Alternatively, use the keyboard shortcut Ctrl + Alt + G (Windows) or Cmd + Alt + G (Mac).
Step 3: Ungroup (Optional)
To separate a group back into individual elements, right-click and select “Ungroup” or use the shortcut Ctrl + Alt + Shift + G (Windows) or Cmd + Alt + Shift + G (Mac).
And you’re done! The group function works the same whether you’re using a Windows PC, Mac, Chromebook or any device with access to Google Slides.
Tips for Effective Grouping in Google Slides
Here are some tips to help you get the most out of grouping objects:
- Name your groups using the selection pane so you can easily identify different elements
- Use folders in the selection pane to organize complex slides
- Group placeholders + content together so text moves with shapes
- Make sure grouped objects don’t span multiple slides
- Adjust layer ordering before grouping to avoid issues later
- Ungroup to edit individual objects whenever needed
- Align or distribute groups rather than individual objects
Common Questions about Grouping Elements in Google Slides
Here are answers to some frequently asked questions about the grouping feature:
Can I group objects from multiple slides?
No, currently all grouped elements must exist entirely on the same slide. Grouped objects cannot span over multiple slides.
What types of elements can I group together in Google Slides?
You can group images, shapes, charts, text boxes, tables, SmartArt graphics, Word Art, and other objects. Groups can even contain other groups!
Is there a limit to how many items I can group?
There is no explicit limit, but grouping hundreds of objects may impact performance. For overly complex designs, try organizing content into folders in the selection pane.
What happens if I delete a slide containing a grouped object?
Deleting a slide also permanently deletes all elements on that slide, including any groups. Groups do not get moved to another slide automatically.
Can I copy/paste or duplicate grouped objects?
Absolutely! Copying or duplicating groups retains all the elements exactly as they exist in the original group. This is super useful for reusing complex graphics.
Conclusion
Learning how to quickly group and ungroup elements can transform your Google Slides editing workflow. With just a few taps on mobile or clicks on desktop, you can organize, rearrange, and format multiple design objects efficiently.
Leveraging groups helps simplify the process of perfecting your slides, allowing you to focus on presentation content rather than fiddling with graphic elements.
So give the grouping features a try today on your next Google Slides presentation! Let us know in the comments if this post helped explain the basics.


