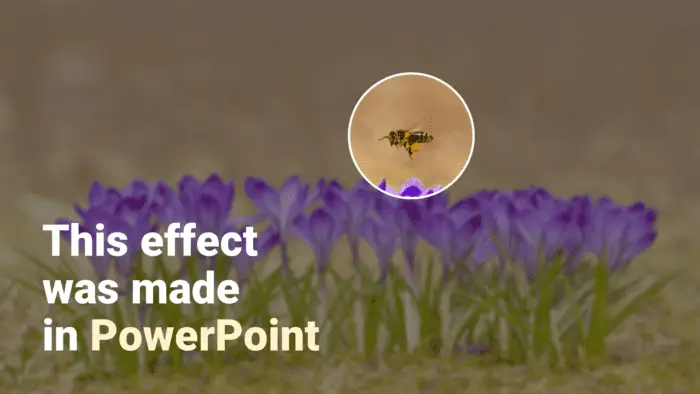
Microsoft PowerPoint is an amazing app to create a beautiful presentation. This software holds so many features that go beyond the normal. For example, it has a handful of image-editing tools so you won’t have to use other programs to perform certain types of editing.
Previously, I have made a tutorial on how to make one picture stand out among many. This time, I’m going to teach you how to highlight a part of a picture from the rest so the audience will focus solely on that part.
The basic is quite similar when editing an image in Photoshop; you must isolate the part you want to highlight and darken or blur the rest. We can use this principle but no Photoshoping is required, just use PowerPoint. So, let’s check it out!
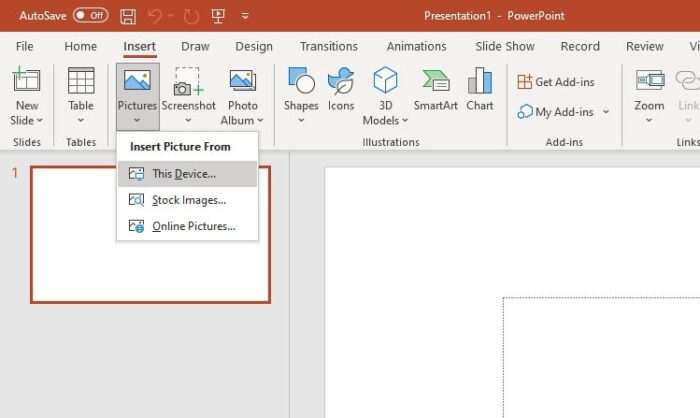
1. Open PowerPoint, then go to Insert > Pictures > This Device… and select the picture.
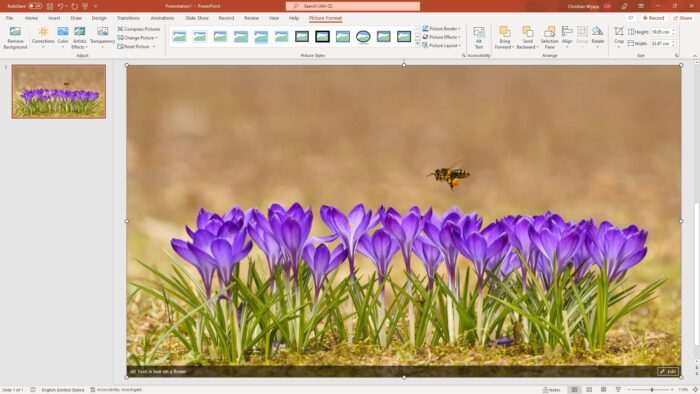
2. Determine the part you want to focus on. In this example, I’m going to highlight the bee.
3. Next, click Insert > Shapes > Oval.
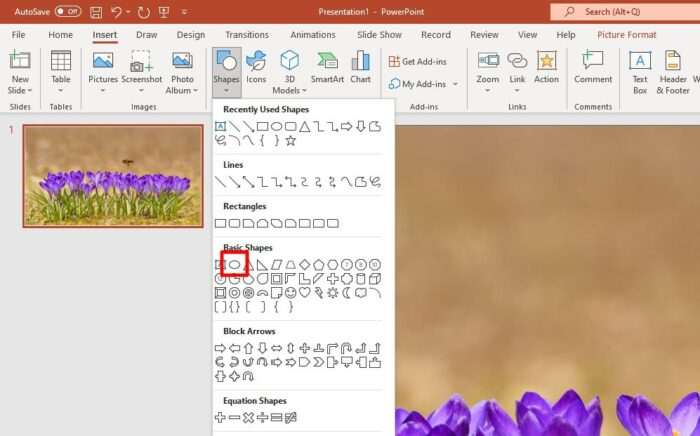
4. Draw a circle on top of the area you want to highlight. To create a perfect circle, hold Shift when dragging the cursor.
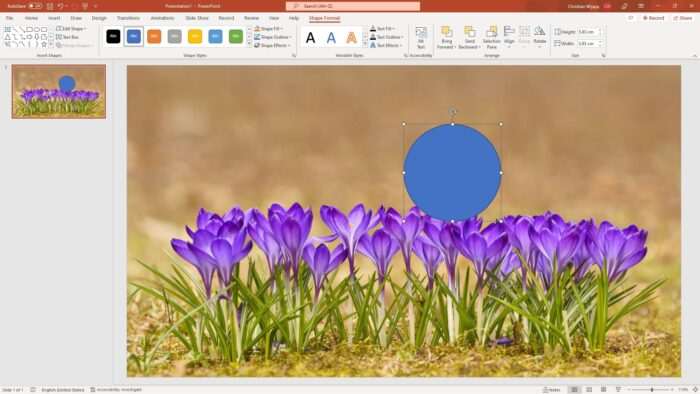
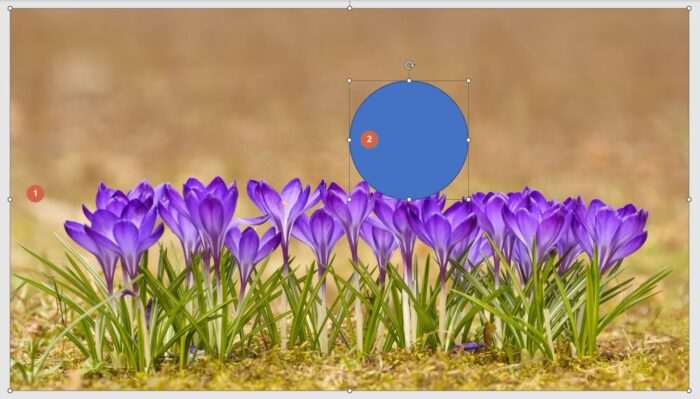
5. Now, select the background first and then the circle (hold Ctrl and then click to select). The order is important, this won’t work if you do it the other way around.
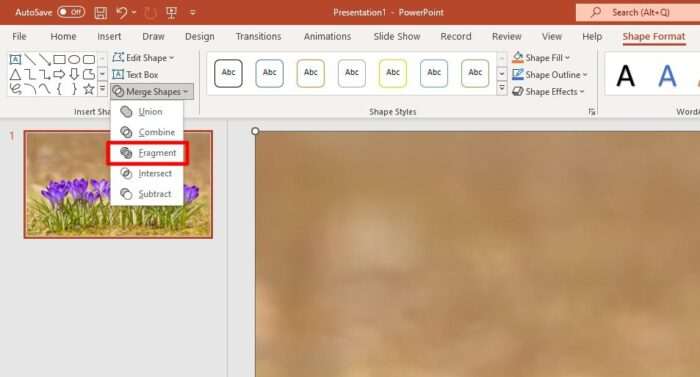
6. After that, navigate to Shape Format > Merge Shapes > Fragment.
7. You will be left with this. The picture is now separated into two.
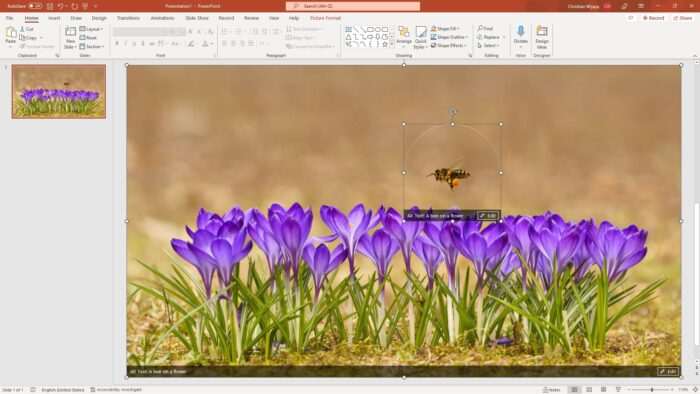
8. Next, select the background. Make sure the circle is not selected.

9. Go to Picture Format and select the effects you want to apply from Corrections, Color, Artistic Effects, and Transparency. You may apply multiple effects.
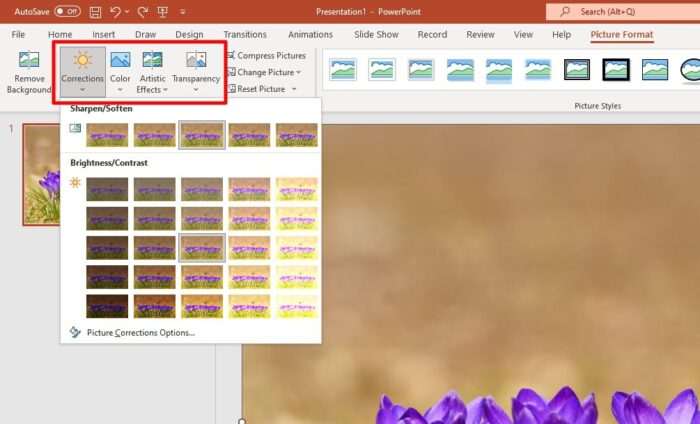
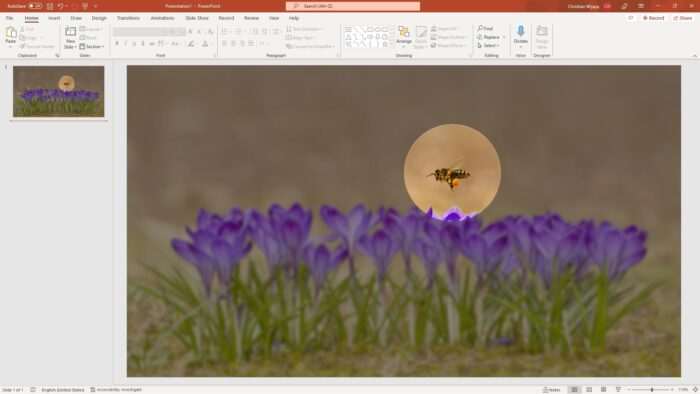
10. You will get something like this. The circle picture remains intact. At this point, the process is pretty much done, but we can go a little further.
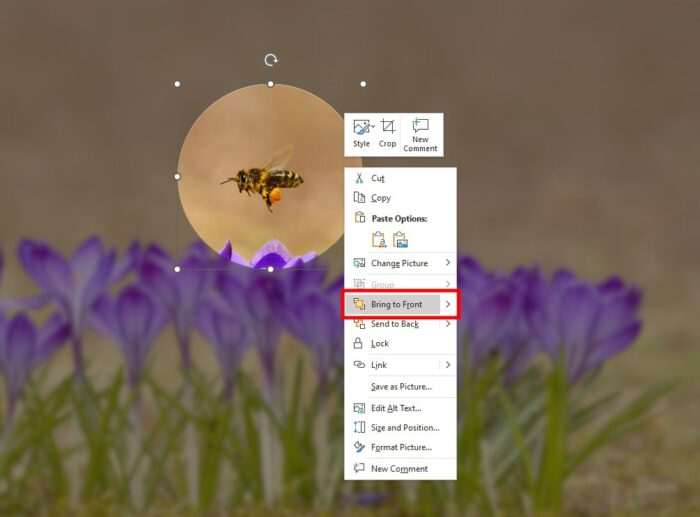
11. Select the circle picture and right-click on it. Then, click Bring to Front.
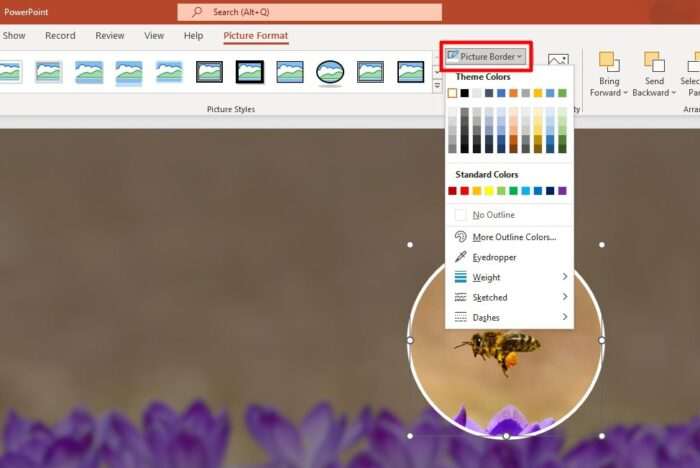
12. Head to Picture Format > Picture Border. Pick your preferred border color and weight level.
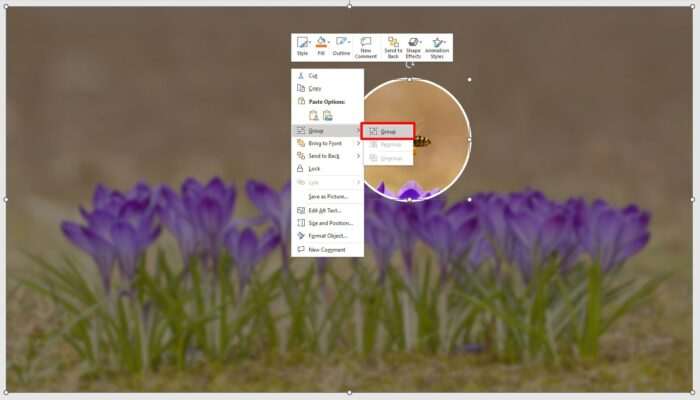
13. Almost done. Select the background and circle again. Right-click on any of them and click Group. This will make them easier to move but the step is completely optional.
14. Congratulations! You have created a highlight effect on PowerPoint.
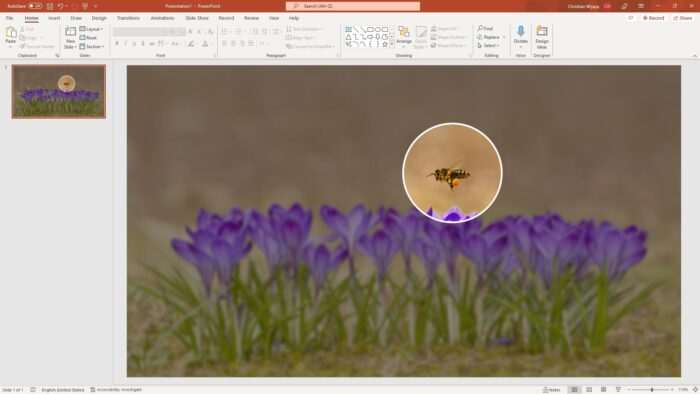
It should go without saying that this guide only covers the most basic elements to achieve a spotlight-like result. You could, for example, create multiple highlights in one picture or use a different shape.
Alas, those variations would make the guide unnecessarily long. So, I’m leaving it to you to do the creative work and get the result you want.
