Viewing your Google Slides presentation in a grid format can be extremely useful when organizing and editing your slides. The grid view allows you to see thumbnail previews of all your slides on one screen, making it easy to rearrange, add, or delete slides as needed.
Enabling Grid View
Enabling grid view in Google Slides is simple:
- Open your presentation in Google Slides
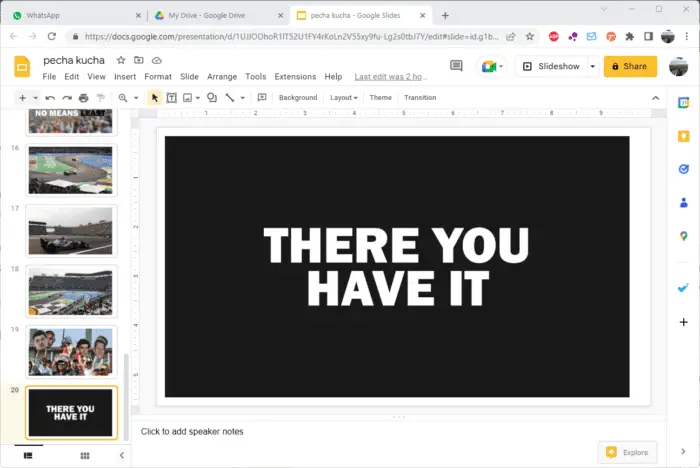
- In the bottom left corner, click on the Grid View icon (it looks like a grid of squares)
- If you don’t see the icons, click Show Filmstrip in the View menu
- Your slides will now display in a grid format
Tip: You can toggle between grid view and filmstrip view by clicking the icons in the bottom left.
Benefits of Using Grid View
Here are some of the benefits of using grid view when organizing your Google Slides presentation:
Rearrange Slides Easily
In grid view, you can quickly drag and drop slides to rearrange them into the order you want. This allows you to experiment with different sequencing quickly.
See the Big Picture
Seeing all your slides simultaneously gives you a high-level perspective of the overall presentation flow and narrative. You can ensure the slides work well together.
Identify Visual Consistency
Scanning the thumbnail slides makes it easy to spot any odd slides that don’t match the visual style of the other slides. You can then edit them to align better.
Add and Delete Slides
With all slides visible, you can decide where new slides should be inserted. You can also easily select any extraneous slides to delete.
Editing Slides in Grid View
In addition to organizing your slides, you can also edit them right in grid view:
- Change slide background – Click on a slide and use the toolbar to pick a new theme or background color
- Change slide layout – Click the dropdown arrow at the top of a slide to change its layout
- Add slide transitions – Select “Transition” in the toolbar to set transitions between slides
- Leave slide comments – Click the comment icon in the toolbar to leave notes on a particular slide
This allows you to do basic editing as you organize your slides, without having to toggle between views.
Other Tips for Using Grid View
Here are some other handy tips for getting the most out of grid view:
- Use the search bar to quickly locate a particular slide
- Adjust the zoom slider to make thumbnails bigger or smaller
- Open the presentation outline to navigate slides or rearrange content
- Use keyboard shortcuts like arrow keys to navigate the grid
Transitioning Back to Standard View
When you’re done organizing in grid view, toggling back to the standard filmstrip view is simple. Just click on the filmstrip icon in the bottom left corner of the screen.
This will return you to the editing view where you can finalize slide content, add animations, review presenter notes, and prepare to present.
Presenting from Grid View
You may be wondering…can you actually present from grid view? Unfortunately, the grid view option is meant for editing and organizing only. Your audience will only see the active slide filling the full screen.
However, presenter view gives you a special view with extra tools like slide previews, notes, and a timer. So if seeing multiple slides is helpful, use presenter view when showing your slides to an audience.
Try Grid View for Your Next Google Slides Presentation
Hopefully you now understand the basics of accessing and using grid view for your Google Slide presentations. Implementing these tips can streamline the process of perfecting your slide deck before presenting or sharing with colleagues.
The ability to visually scan slides, rearrange content, and do basic editing right in grid view makes it an indispensable tool for both planning presentations and putting on the finishing touches. Stop hiding your slides in a linear filmstrip and put them front and center in an easily editable grid!


