Polaroid cameras might have been phased out in favor of a more practical digital camera that we carry every day. However, it’s not easy to forget the aesthetic of a printed polaroid photo.
Instead of covering the whole paper with an image, it leaves a noticeable gap that creates an iconic frame, also known as a polaroid frame. Now, you can recreate this style with PowerPoint.
Yup, you heard it right. We don’t need Adobe Illustrator or Corel Draw, a basic office program like PowerPoint can do the job just fine. Here’s how to make a polaroid photo frame in PowerPoint.
1. Open a PowerPoint document.

2. Navigate to Insert > Shapes > Rectangle.
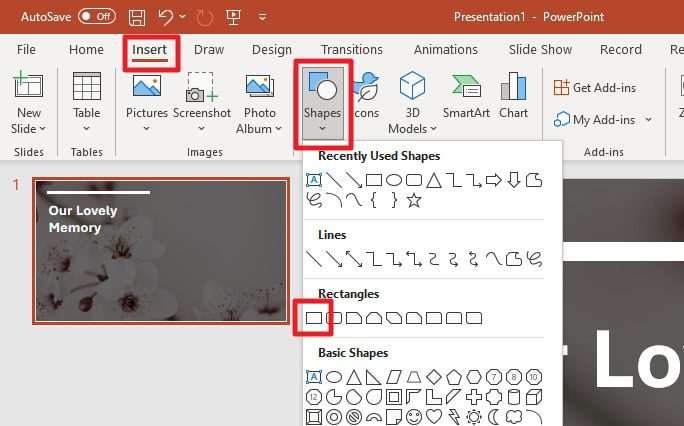
3. Draw a rectangle shape.
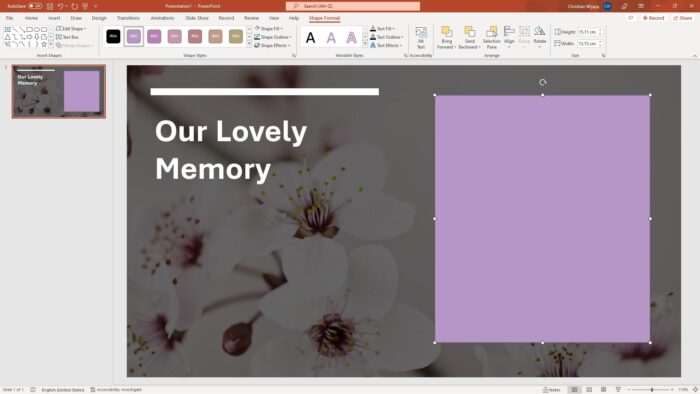
4. Then go to Shape Format > Shape Fill and select white or light grey, whichever you like.

5. For the Shape Outline color, black or dark grey is preferable. Also, feel free to adjust its Weight.

6. Now, go to Insert > Shapes > Rectangle again.
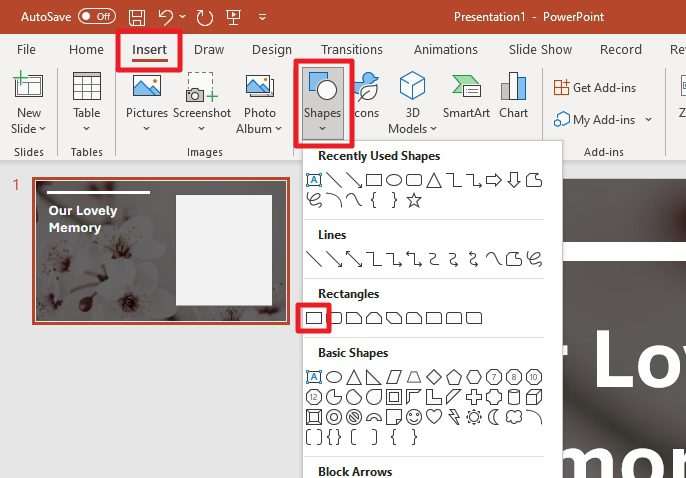
7. Draw a perfect square by holding the Shift key inside of the previous rectangle.
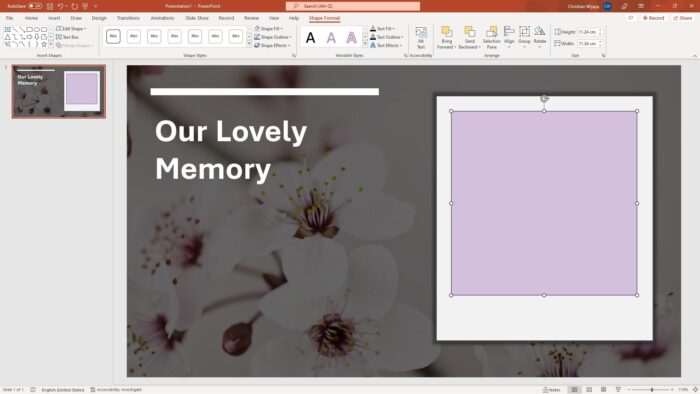
8. Assign black or dark grey for its Shape Outline color.

9. We are going to insert a photo inside the square. To do that, click Shape Format > Shape Fill > Picture.

10. Select the source of the photo. Ideally, the photo should’ve been cropped to a square to avoid unnecessary stretching.

11. You have created a polaroid frame. You might want to group the shapes together for easier resizing and moving.

12. Experiment with color, size, shadow, position, and quantity to achieve the best result.

A polaroid frame is arguably one simple application of the Shape tool in PowerPoint. The tool can do much more than that. For example, you can even create a shining light bulb in five minutes. Go, and check it out to learn more.


