As a document filled with pictures, vectors, and even videos, the size of a PowerPoint file can swell beyond 100MB which is quite significant compared to DOCX or PDF document. With such size, it will be quite challenging to transfer the file to your colleagues.
Not to mention the amount of media that has to be loaded when launching the document would take some time to finish. To make matter worse, an unoptimized PPTX file can be a bit laggy when being presented, damaging the viewer’s experience as a result.
To combat this issue, it is always a good idea to reduce the PowerPoint size with these tips.
#1 Cut down the number of slides

The number of slides stored in a PPTX file will correspond to its overall size. Of course, not all slides are equal, some may be bigger than others, but it’s recommended to keep your presentation simple and minimal.
Remove slides that are no longer used. If you are unsure, you may combine the content from multiple slides into one. This will require another hour of editing and rearranging the slides, but the result could be worth it.
To remove unused slides, right-click on it and select Delete Slide.
#2 Resize images before inserting them into PowerPoint
Raw pictures can look nice and sharp, but there is no need to use 8K pictures on a presentation that will be projected into an 800 x 600 screen.
Sure, there can be cases where extra details on a picture can be helpful, but let’s be real, only a studio-grade projector can make that reality. Even that requires a pitch dark room and highly reflected screen, something that is unlikely to exist in an office environment.
Plenty of popular software like Photoshop, GIMP, and Paint 3D offers quick resizing. If there are tons of images to handle, search “bulk image resizer” on Google and you will find a lot of free online tools to do just that.
#3 Convert image format to WebP to reduce its size

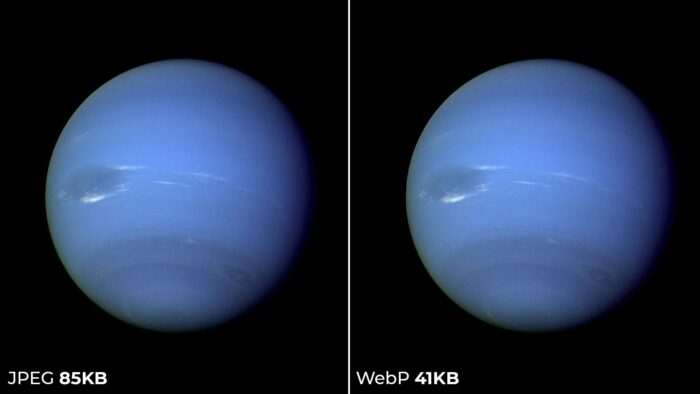
WebP is a modern image format mostly used on the web due to its small nature which could speed up the web page. In general, WebP is about 30% smaller than JPEG and PNG without sacrificing quality.
A few WebP converter services I recommend include Convertio, EzGIF, and CloudConvert. But feel free to use other conversion services.
#4 Try compressing images directly in PowerPoint

If you already have tons of pictures in your presentation document and have no time to manually resize and convert them, consider compressing them right in PowerPoint.
PowerPoint has an image compressing feature that can substantially reduce the overall file size. From my testing, I managed to compress a 6MB file into just 1MB. That’s an 83% drop!
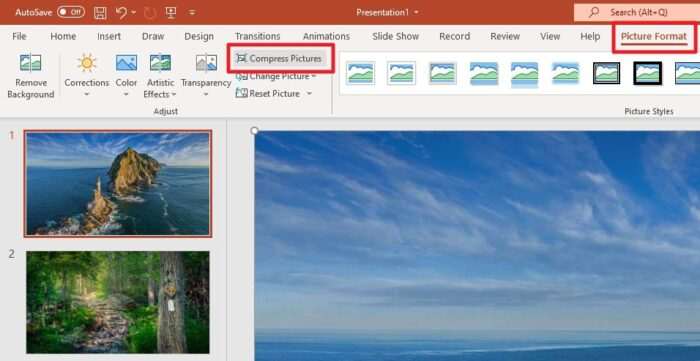
To compress all images in PowerPoint, click on a picture, then navigate to Picture Format > Compress Pictures > Uncheck Apply only to this picture > E-mail (96ppi) > OK.
#5 For video content, try streaming instead of inserting

PowerPoint has made it convenient for us to insert a video into a slide and transfer the presentation file to another device with the video remains intact. However, this practice leads the file to explode as soon as the video is inserted.
The solution to this problem is by storing the video file somewhere else, particularly on the internet. PowerPoint lets you embed a video from a streaming site, like YouTube, and play it during a presentation. It means an internet connection is necessary, but at least we don’t have to store a gigantic video file within the document.
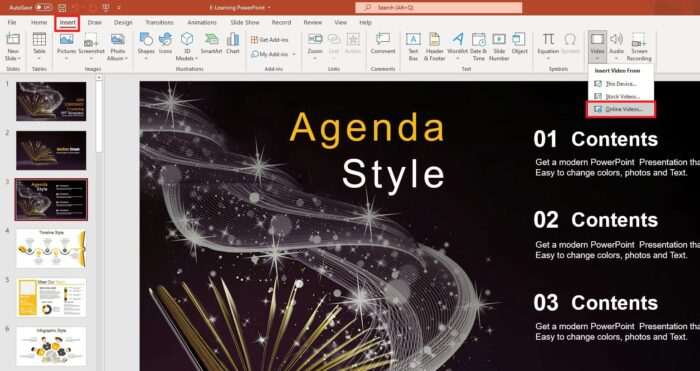
Should you be interested in this approach, go to Insert > Video > Online Videos and enter the video URL. I have made a more detailed guide for the topic here.
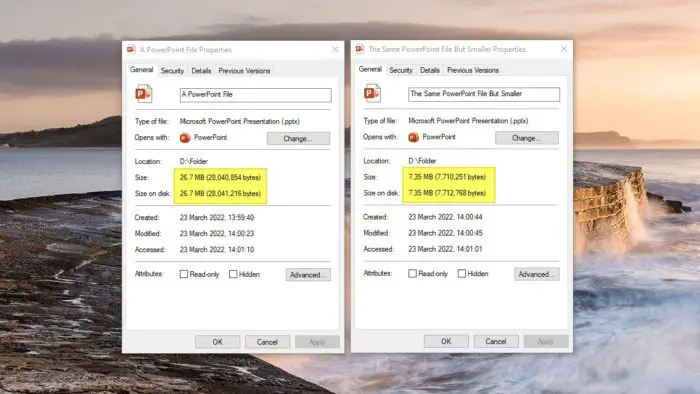
While there is no exact number, the good rule of thumb when creating a PowerPoint presentation is aiming at a size no larger than 20MB. This way, the document would be easier to transfer and you will avoid lag and crashes during a presentation.


